Dashboard
The Dashboard is the first screen an Admin sees after logging into BitoLink. It provides a quick summary of team activity, communication status, and task progress—all in one place.
Purpose of the Dashboard
The Dashboard helps Admins to:
- Get an instant overview of workspace activity
- Track channels, tasks, and team members
- Quickly access channels and assigned activities
- Navigate to the Admin Panel and workspace settings
Dashboard Layout Explained
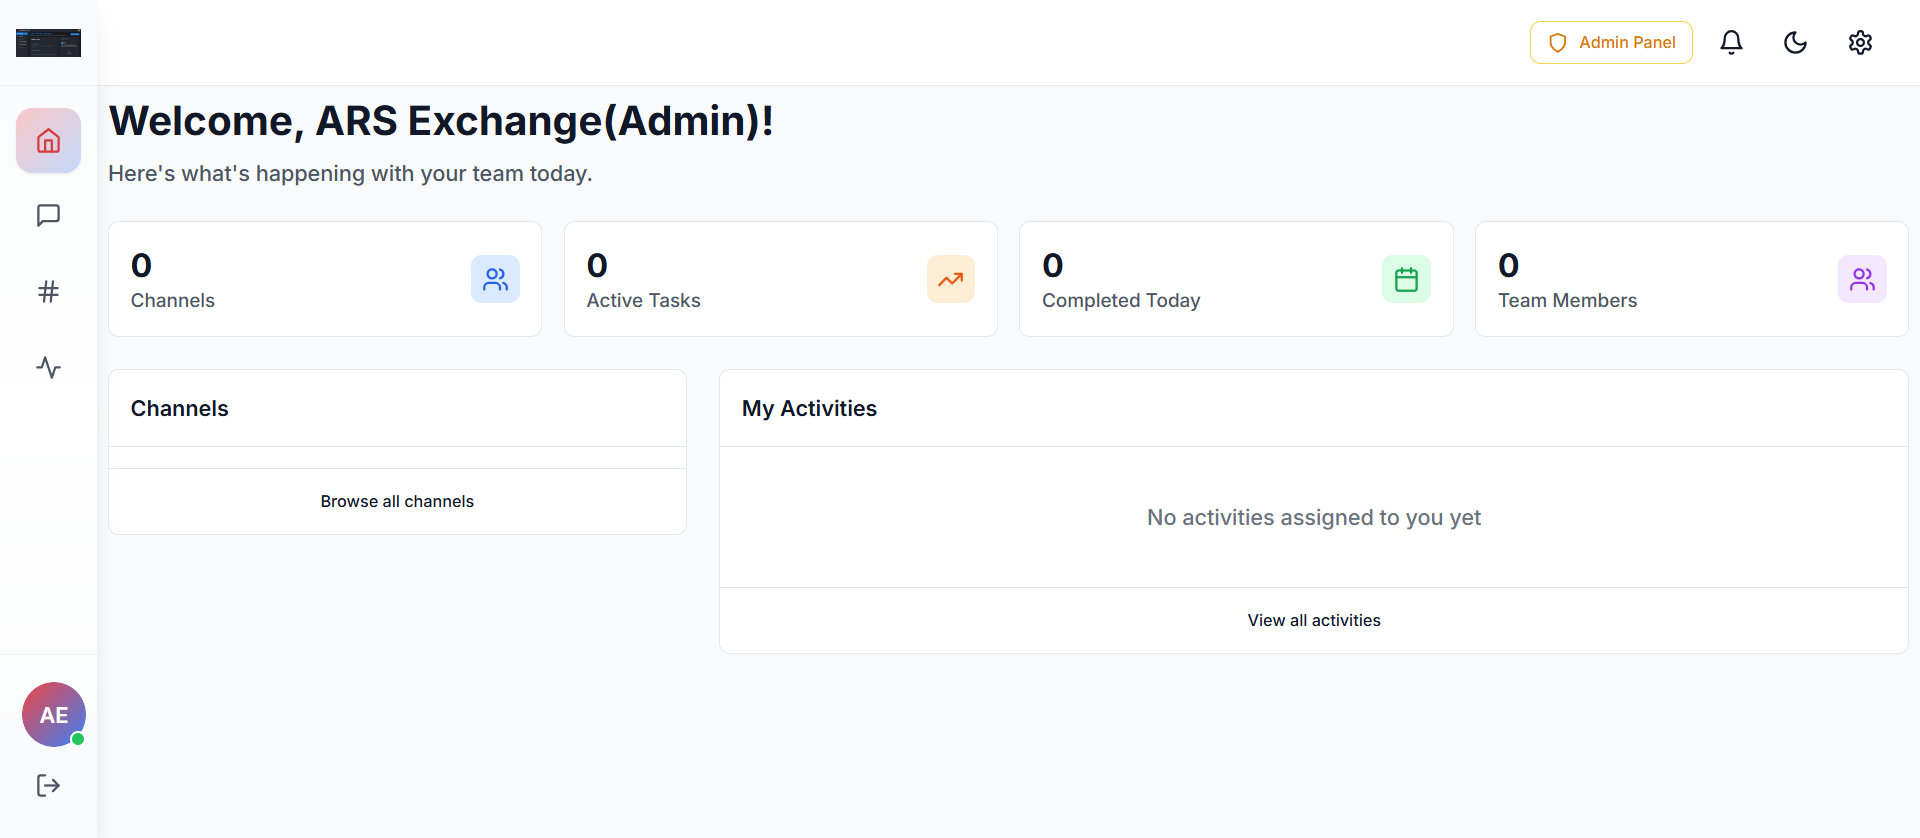
1. Welcome Header
"Welcome, [Workspace Name] (Admin)!" - Confirms the active workspace and admin role. Displays a short status message about team activity for the day.
2. Top Summary Cards
These cards provide real-time workspace metrics:
Channels
Total Count
Active Tasks
Ongoing Work
Completed Today
Daily Progress
Team Members
Total Users
3. Channels Section
Quick Access to Channels
Located on the left side of the dashboard. Displays quick access to channels. "Browse all channels" allows admins to view all existing channels, join or manage channels, and monitor team discussions.
4. My Activities Section
Task Management
Located on the right side of the dashboard. Shows tasks or activities assigned to the logged-in admin. "View all activities" lets admins see full activity/task lists, track progress and deadlines, and monitor task ownership.
Top Navigation Icons (Right Side)
Sidebar Navigation (Left)
The sidebar allows quick access to:
- Home / Dashboard
- Direct Messages
- Channels
- Activities
- Profile & logout options
Best Practices for Admins
Direct Messages
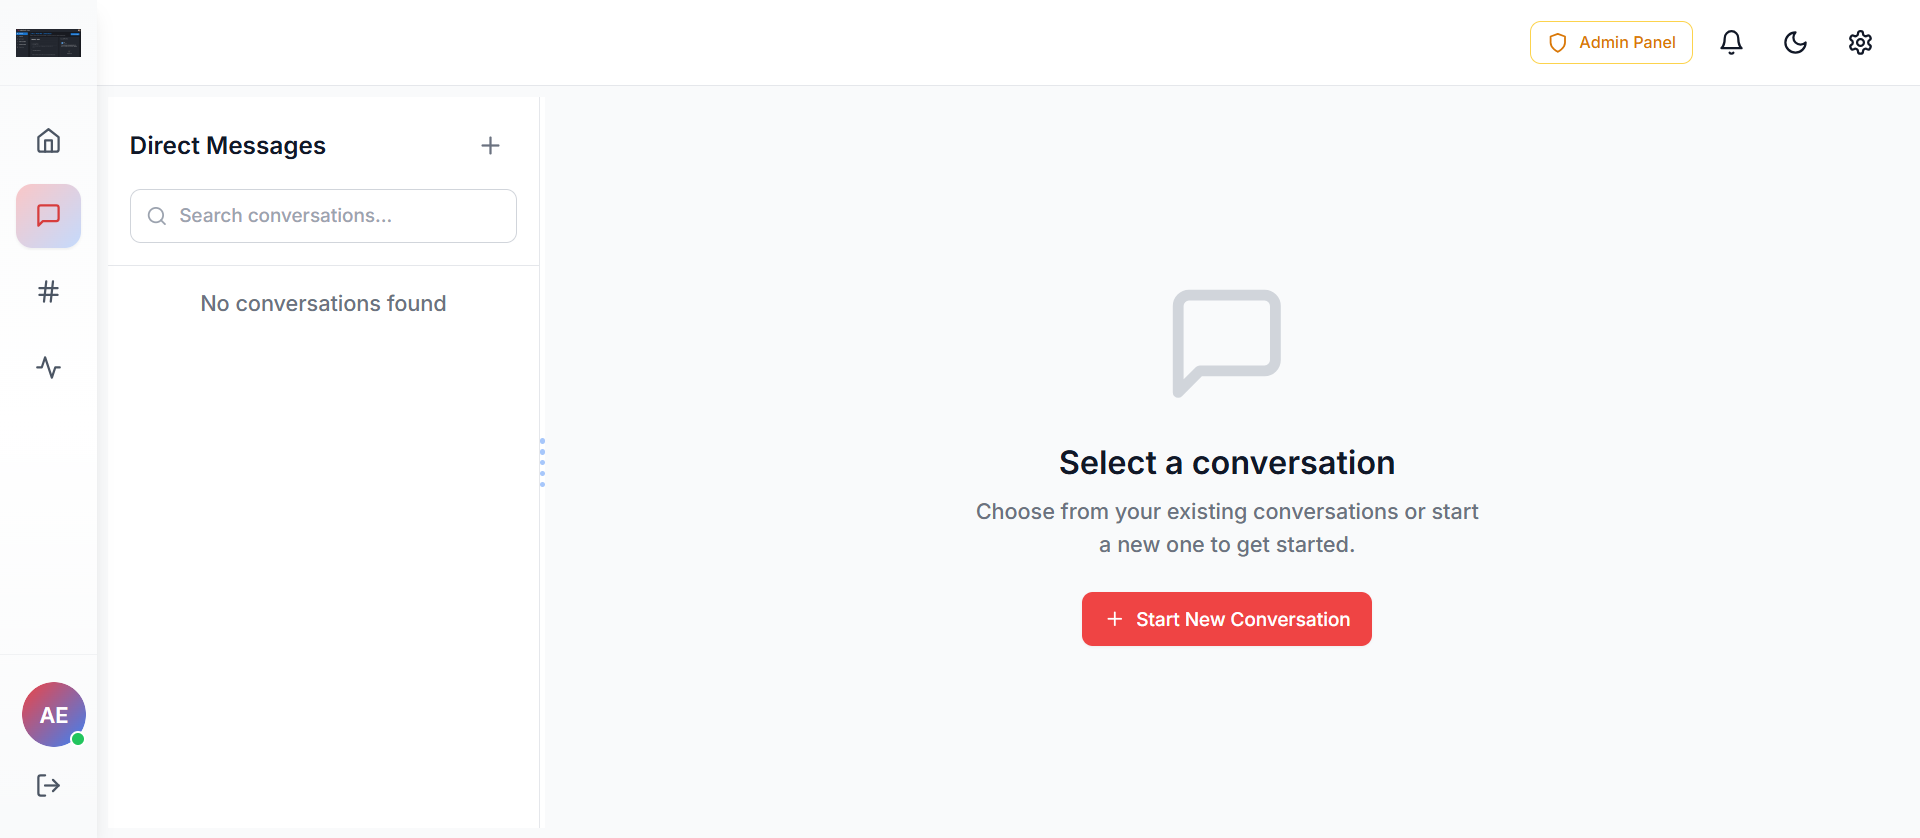
The Direct Messages section allows admins to have one-to-one or private conversations with team members outside of public channels. This is ideal for confidential discussions, quick clarifications, or direct task coordination.
Purpose of Direct Messages
Admins use Direct Messages to:
- Communicate privately with team members
- Share sensitive information securely
- Resolve issues without involving channels
- Coordinate tasks or decisions quickly
Direct Messages Layout Explained
1. Direct Messages Panel (Left Sidebar)
Search Conversations
Use the search bar to find existing conversations by user name. Helpful when managing multiple team members.
Start New Conversation
Click the "+" icon next to Direct Messages. Select a team member to begin a new private chat.
2. Conversation Area (Main Screen)
Select a Conversation
Displays a prompt to choose or start a conversation. Ensures no messages are sent accidentally without selecting a user.
Start New Conversation Button
Click "Start New Conversation", choose one or more team members, and begin private communication instantly.
What You Can Do in Direct Messages
Send Messages
Send text messages to team members privately.
Share Files
Share files and documents securely.
Mention Users
Use @mentions to get attention in messages.
Follow Up on Tasks
Coordinate and track task progress directly.
Admin Best Practices
Channels
Channels are shared spaces where team members communicate, collaborate, and work together around specific topics, projects, or departments. Admins use channels to keep conversations organized and visible to the right people.
Purpose of Channels
Admins use Channels to:
- Centralize team discussions
- Organize communication by topic or function
- Share files, updates, and decisions transparently
- Control access through public and private channels
Channels Layout Explained
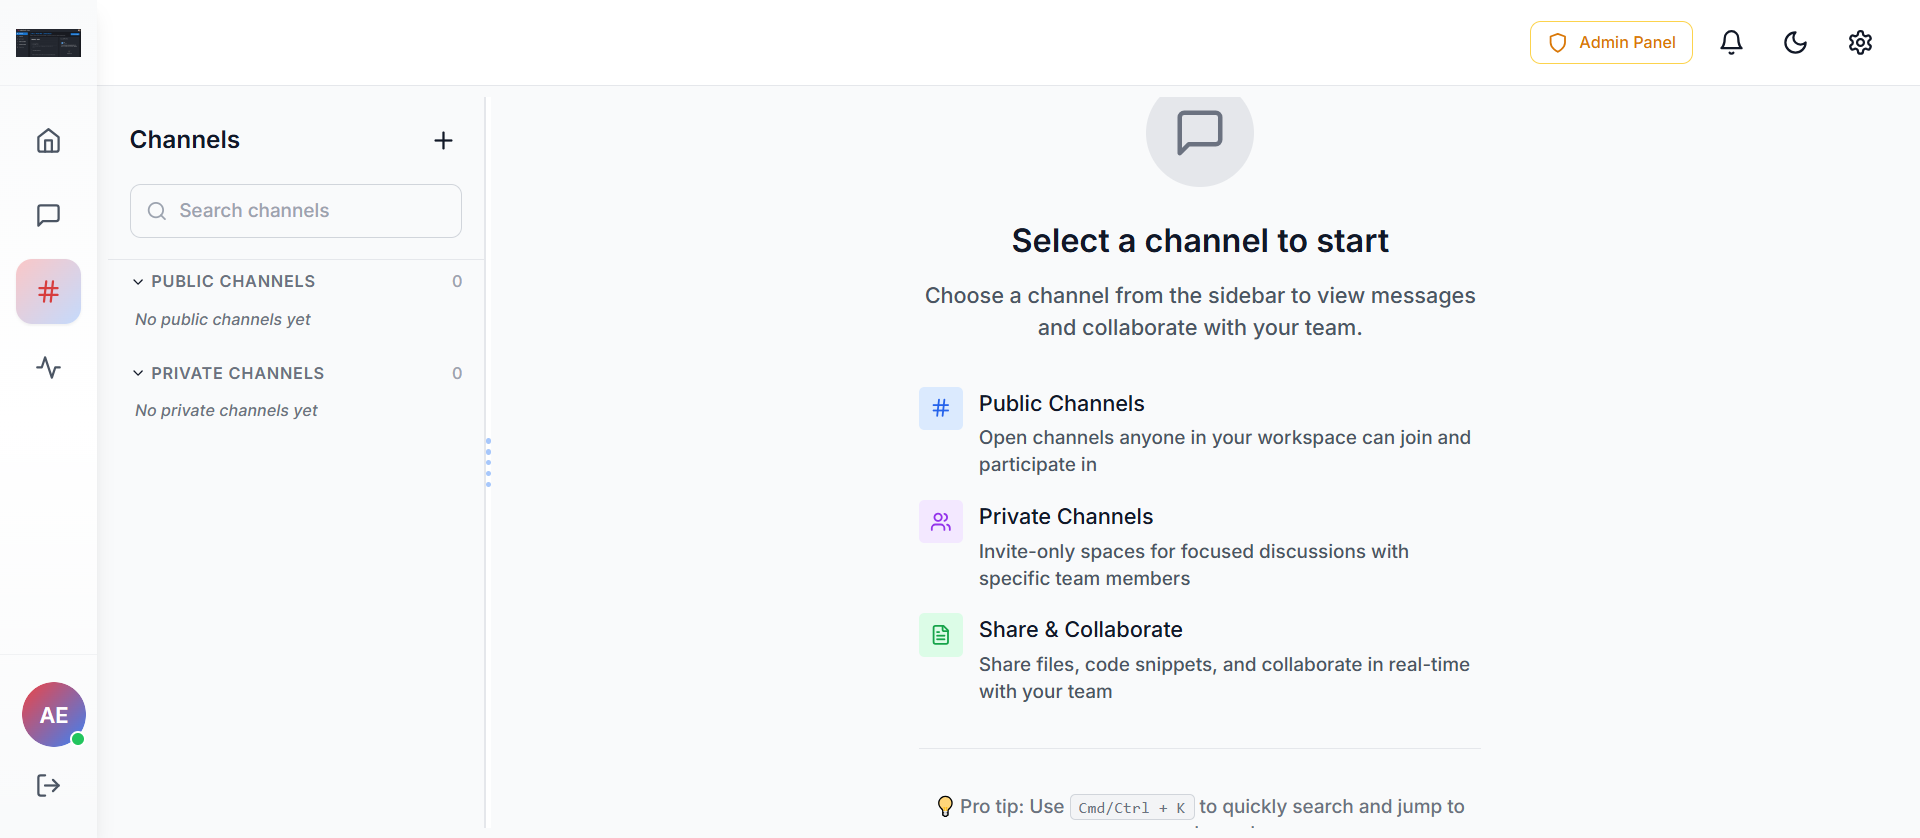
1. Channels Panel (Left Sidebar)
Search Channels
Use the Search channels field to quickly find a channel by name. Helpful when managing multiple teams or projects.
Create Channel (Plus Icon)
Click the "+" icon next to Channels to create a new channel. Admins can choose channel name, public or private visibility, and members (for private channels).
2. Channel Types
Public Channels
Open to All
Public Channels
Open channels visible to everyone in the workspace. Any team member can join and participate. Best for company-wide announcements, general discussions, and cross-team collaboration.
Examples: #general, #announcements, #product-updates
Private Channels
Invite Only
Private Channels
Invite-only channels restricted to selected members. Used for focused or sensitive discussions. Ideal for leadership conversations, security or compliance topics, and confidential project work.
Only invited members can see and access private channels.
3. Channel Content Area (Main Screen)
Select a Channel
Displays a prompt when no channel is selected. Encourages users to choose a channel to view messages and collaborate.
Share & Collaborate
Within channels, team members can send messages, share files and documents, post code snippets, and collaborate in real time.
How to Create a Channel (Admin)
Click Channels from the sidebar
Navigate to the Channels section in the left sidebar.
Click the "+" icon
Click the plus icon to open the channel creation form.
Enter a channel name
Provide a clear, descriptive name for the channel.
Choose Public or Private
Select visibility based on the channel's purpose.
Add members (for private) & Click Create
Add team members if private, then click Create to finish.
Admin Controls & Best Practices
- Use public channels for transparency and collaboration
- Use private channels sparingly for sensitive discussions
- Keep channel names clear and purpose-driven
- Archive or remove unused channels to reduce clutter
Activities
The Activities section is where BitoLink converts conversations into trackable tasks. Admins can view, monitor, filter, and manage all activities created from channel messages across the workspace.
Purpose of Activities
Admins use Activities to:
- Track work created from conversations
- Monitor task status and progress
- Manage accountability across teams
- Ensure nothing discussed in channels is missed
Activities Dashboard Overview
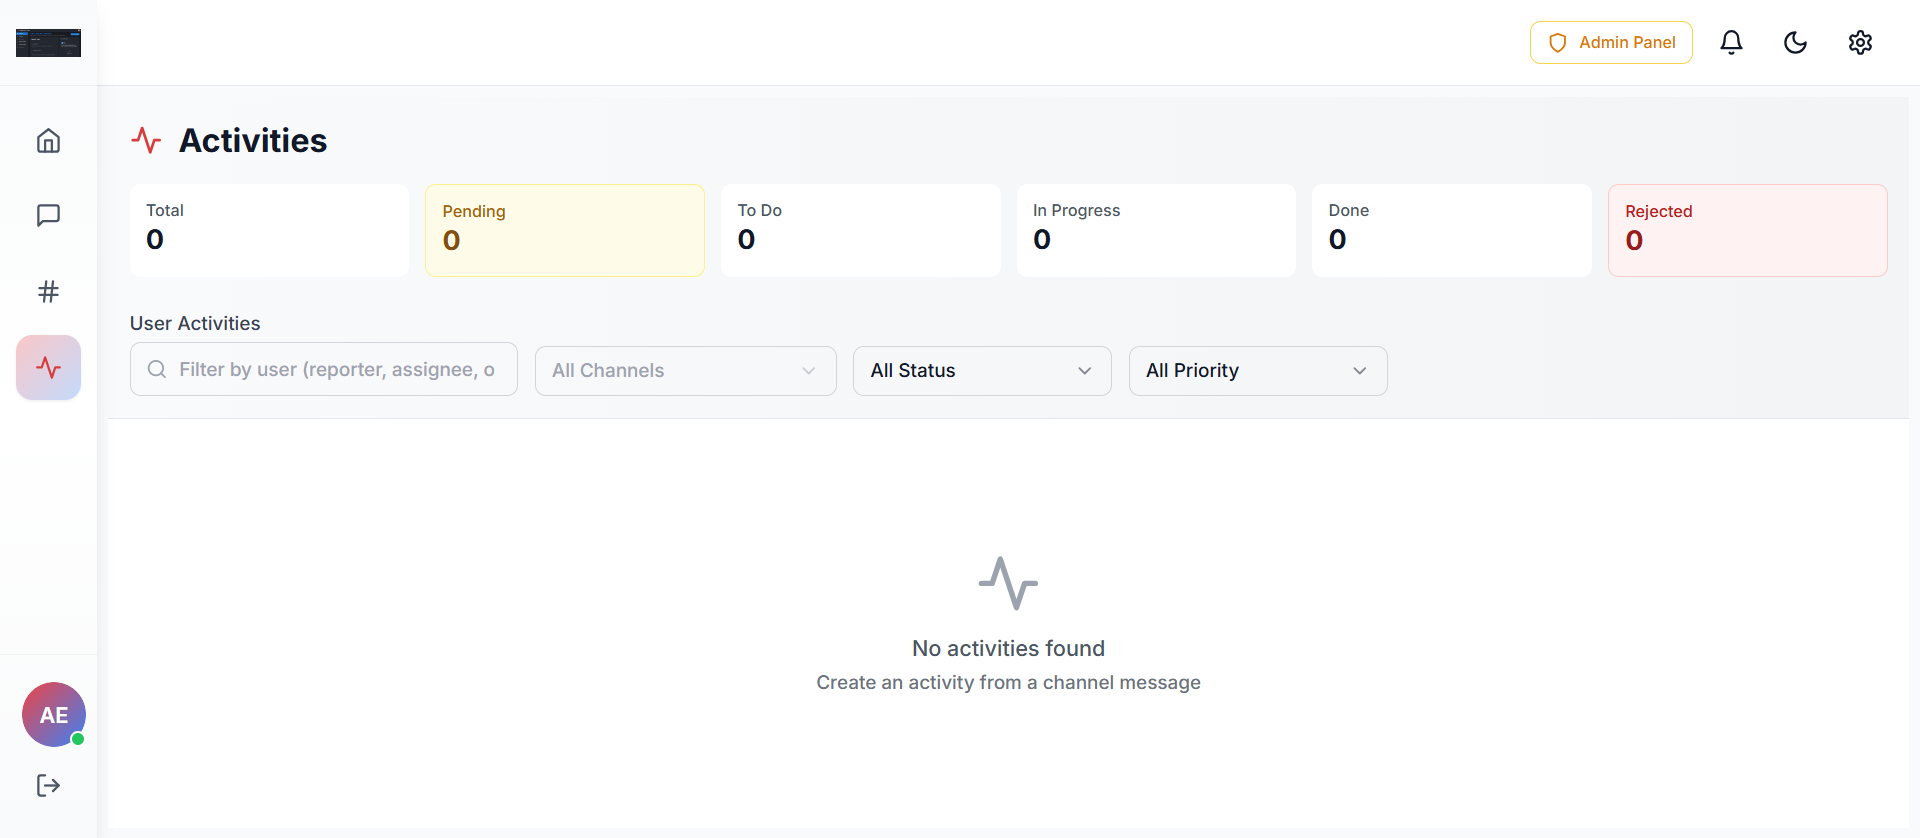
1. Activity Summary Cards
These cards provide a real-time snapshot of all activities:
Total
All Activities
Pending
Awaiting Action
To Do
Ready to Start
In Progress
Being Worked On
Done
Completed
Rejected
Declined
2. User Activities Filters
Admins can refine the activity list using filters:
| Filter | Description |
|---|---|
| Filter by User | Search by reporter, assignee, or participant. Helps track individual or team workload. |
| Channel Filter | View activities from specific channels. Useful for project or department-level tracking. |
| Status Filter | Filter activities by status (Pending, To Do, In Progress, Done, Rejected). |
| Priority Filter | Sort tasks by priority level. Helps admins focus on high-impact activities. |
3. Activities List Area
Activity List
Displays all created activities based on selected filters. Shows task details such as title, status, priority, and assignee.
How to Create an Activity (Admin)
Open any Channel
Navigate to the channel containing the message you want to convert.
Hover over a message
Find the relevant message and hover to reveal options.
Select "Create Activity"
Click the Create Activity option from the menu.
Assign the task to a user
Select the team member responsible for the activity.
Set priority, status & Save
Configure priority level and initial status, then save. The activity will now appear in the Activities section for tracking.
Admin Controls & Best Practices
- Regularly review Pending and In Progress activities
- Use filters to identify delays or blockers
- Encourage teams to convert important messages into activities
- Close completed activities to maintain clarity
Admin Panel
The Admin Panel is the central control center for workspace administrators. It provides deep insights into team performance, user activity, task progress, and overall workspace health.
Purpose of the Admin Panel
Admins use the Admin Panel to:
- Monitor team activity and productivity
- Track user engagement and task progress
- Review activity trends over time
- Manage workspace performance at a high level
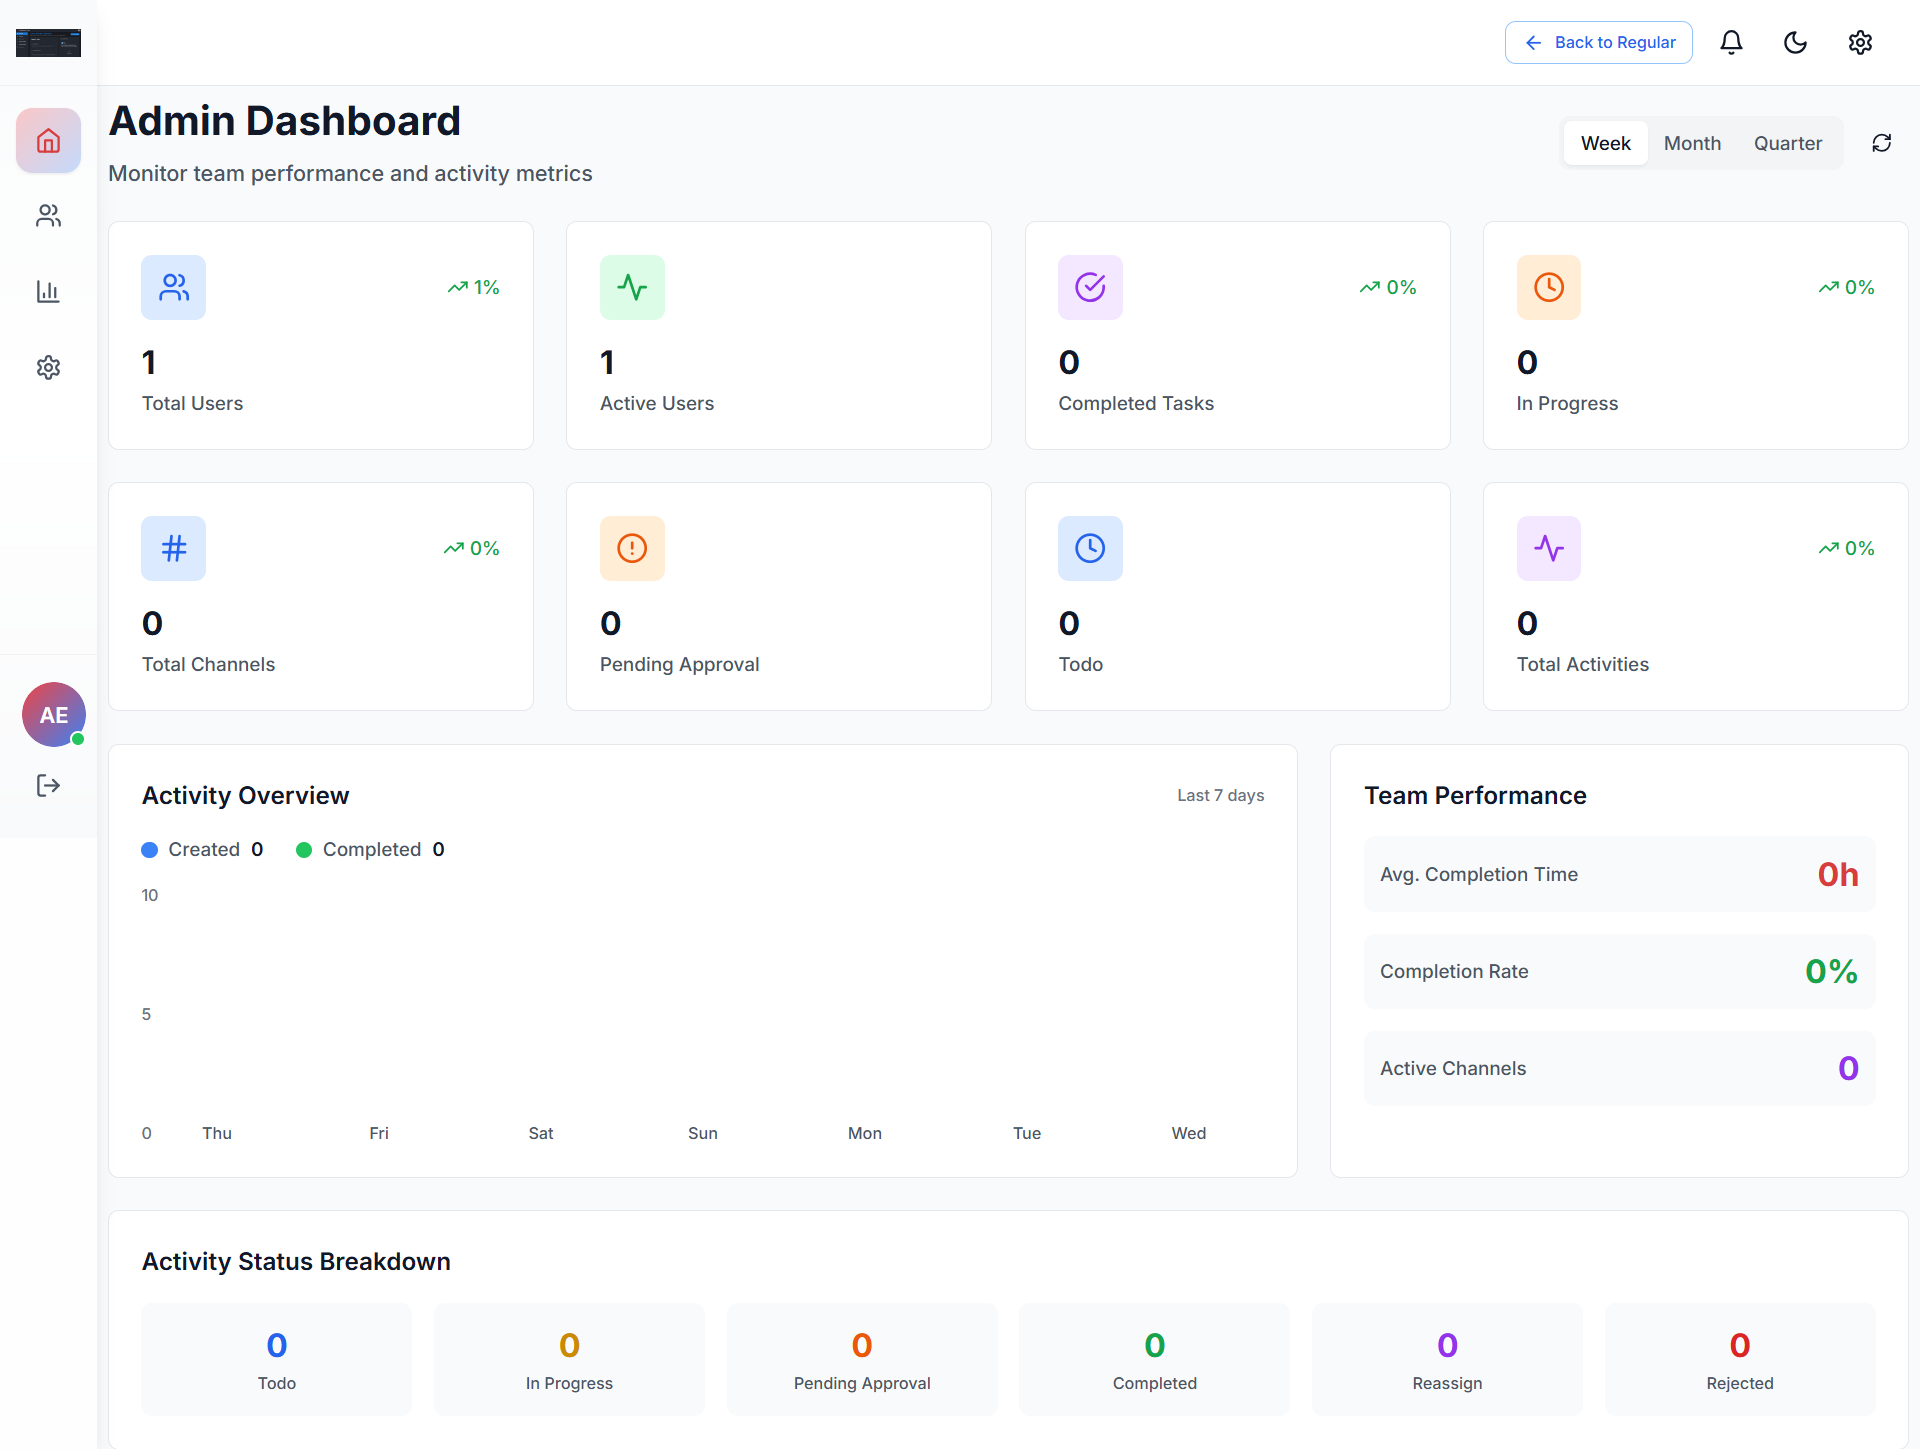
Admin Dashboard Layout Explained
1. Admin Dashboard Header
Back to Regular
Returns the admin to the normal workspace view. Useful for switching between management and collaboration modes.
Time Range Selector
Week / Month / Quarter - Adjusts all dashboard metrics and graphs based on the selected timeframe.
Key Metrics Cards
These cards provide a quick snapshot of workspace health:
Total Users
All Members
Active Users
Currently Active
Completed Tasks
Total Done
In Progress
Active Work
Total Channels
All Channels
Pending Approval
Awaiting
To Do
Not Started
Total Activities
All Created
Activity Overview (Chart)
Visual Graph
Displays trends showing Activities Created and Activities Completed over the last 7 days. Helps admins identify productivity patterns and bottlenecks.
Team Performance Panel
This section highlights key efficiency metrics:
Average Completion Time
Average time taken to complete activities.
Completion Rate
Percentage of tasks completed successfully.
Active Channels
Number of channels currently active during the selected period.
Activity Status Breakdown
A clear breakdown of tasks by status helps admins quickly identify where work is getting stuck:
| Status | Description |
|---|---|
| To Do | Tasks ready to be started |
| In Progress | Tasks currently being worked on |
| Pending Approval | Tasks awaiting admin review |
| Completed | Successfully finished tasks |
| Reassign | Tasks reassigned to different users |
| Rejected | Tasks declined or marked invalid |
Admin Best Practices
Settings
The Settings section (located in the top right corner) enables admins to customize their personal preferences, manage workspace-level configurations, and control how BitoLink behaves across devices. This section is divided into Preferences, Administration, and Support categories.
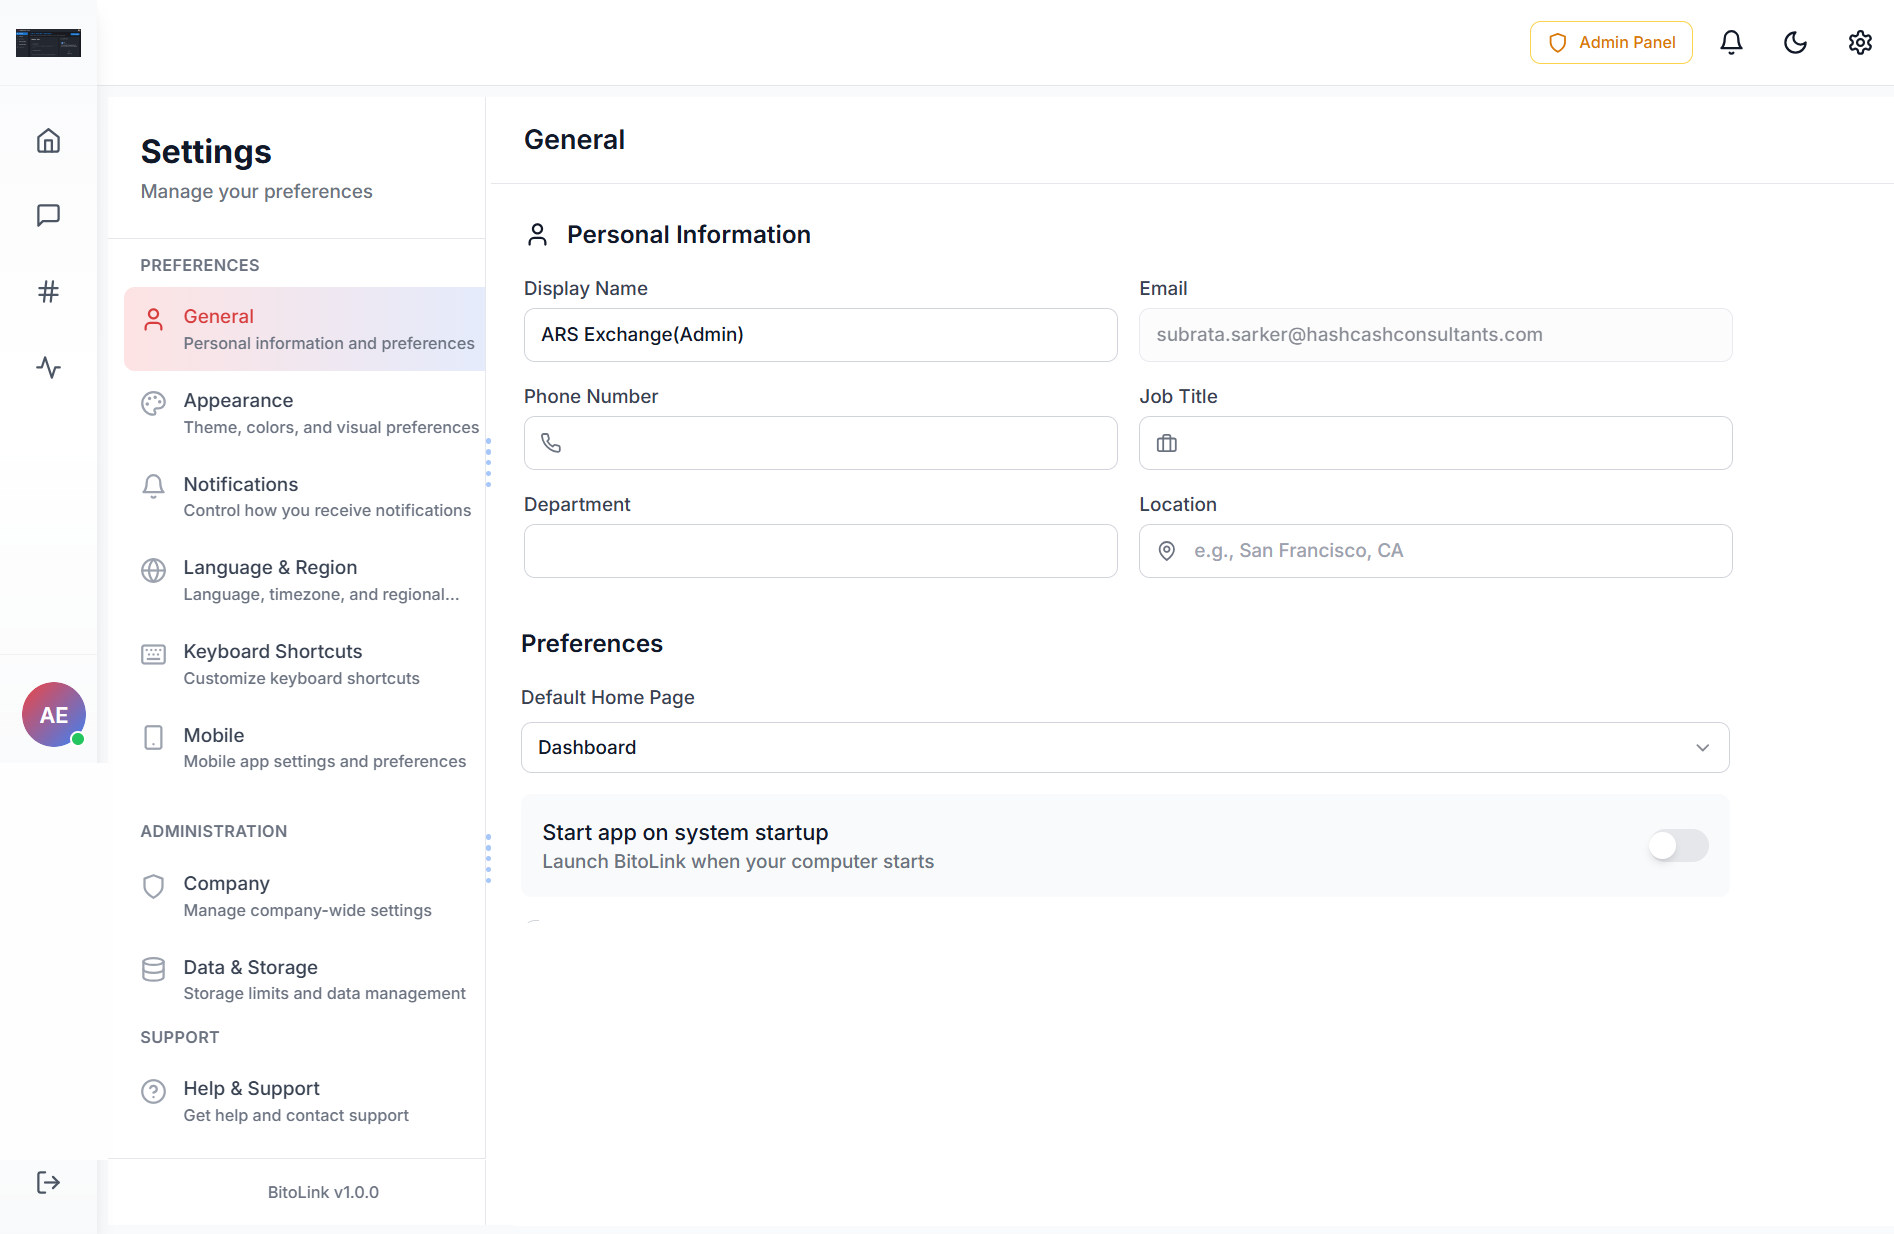
Settings Navigation Overview
The left panel lists all available settings, grouped logically for ease of access:
- Preferences – Personal and usage settings
- Administration – Company-wide controls (Admin only)
- Support – Help and assistance
Preferences
General
Personal Information: Update Display Name, Email, Phone Number, Job Title, Department, Location.
Preferences: Set Default Home Page and app startup preferences (start on system startup).
Appearance
Switch between Light and Dark themes. Adjust visual settings for comfort and accessibility. Customize the look and feel of the workspace.
Notifications
Manage message alerts, mentions and replies, activity and task notifications. Configure email vs in-app notification preferences. Helps reduce noise while staying informed.
Language & Region
Configure workspace language, timezone (affects timestamps and activity tracking), and regional formats for date and time.
Keyboard Shortcuts
View available shortcuts, customize keys for faster navigation, and improve productivity with quick actions.
Mobile
Manage mobile notification behavior, device-specific preferences, and sync experience between desktop and mobile apps.
Administration (Admin Only)
Company
Manage company-wide settings including company name and branding, workspace-wide defaults, and organizational preferences that affect all users.
Data & Storage
Monitor data usage, manage file storage limits, and control data retention and cleanup policies.
Support
Help & Support
Access help documentation, contact customer support, and report issues or request assistance.