Step 1: Paybito website
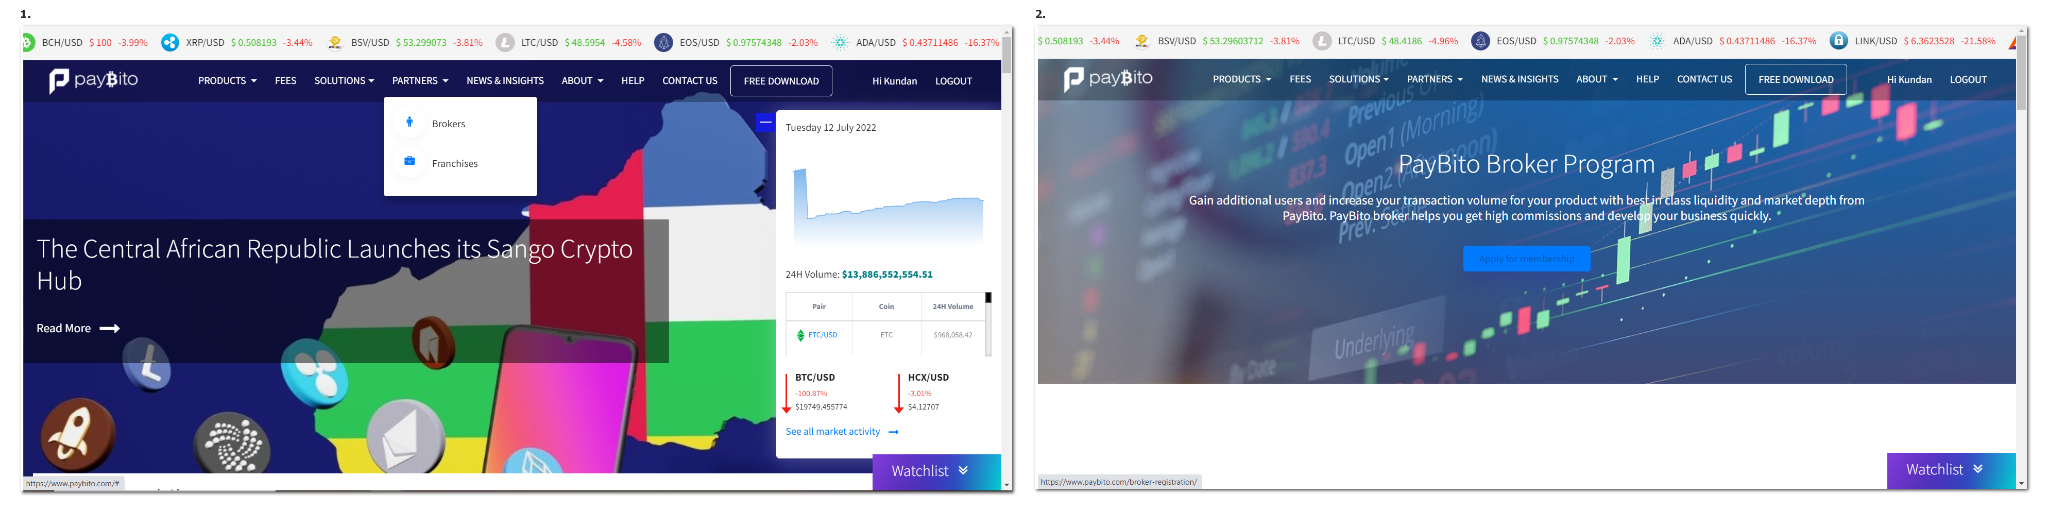
Go to the Paybito website www.paybito.com and click on the "Business Owner Sign-Up" link located at the top right corner of the homepage.
Step 2: Fill out the Sign-Up Form
When we Click on “Start your free trial now” after clicking its opens the sign-up page
- Enter a first name & last name then click the arrow button.
- Select Company or individual then type the company name or exchange name then Click the arrow button.
- Select your country code then type Phone no then click the arrow button.
- Type your email id then click the arrow button. After sign-up, the pop-up message shows “Your broker admin access credential has been sent to your email.
Broker Admin
1: Broker Admin
Brokers will get a Broker Admin link and login credentials in their registered email id. Clicking on the link, a login page will appear.
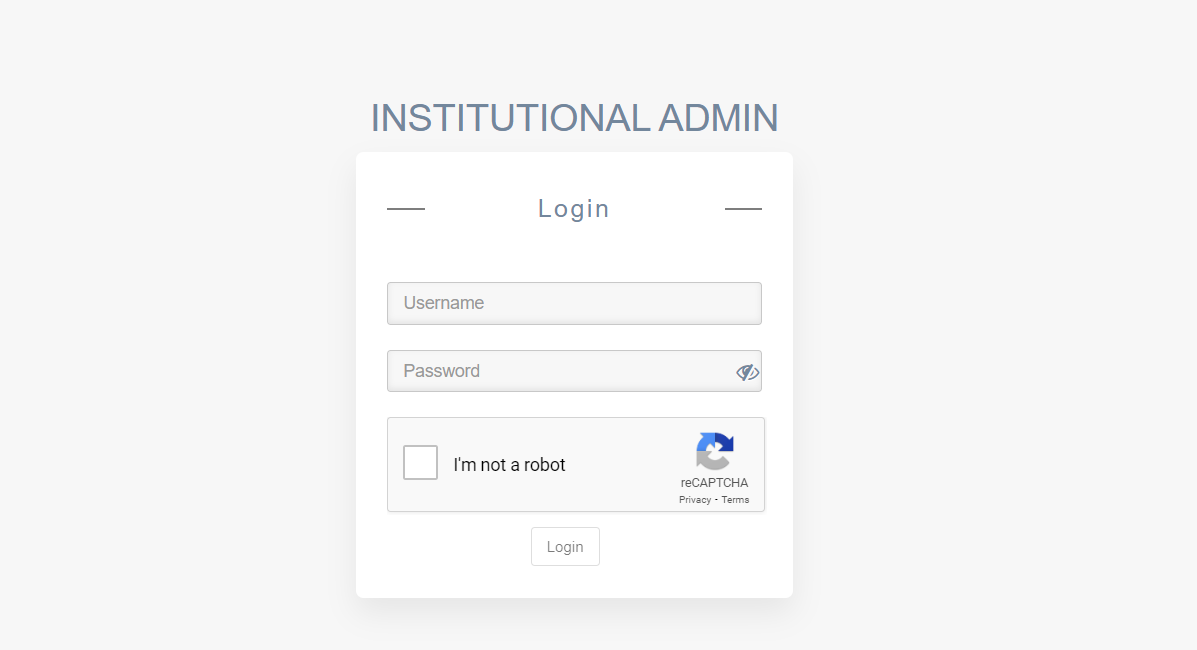
2: Login Broker Admin
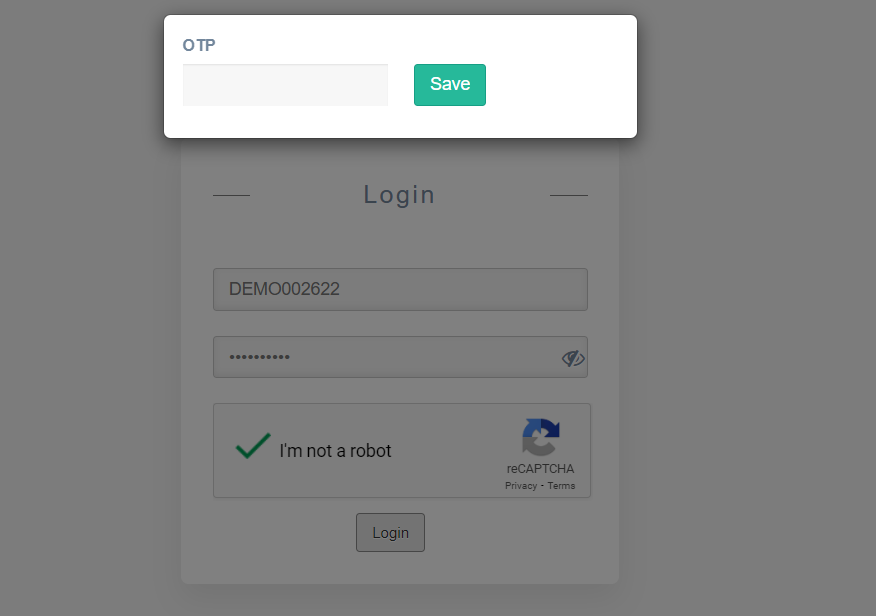
Enter the User name and password, you will get an OTP in your email, save the OPT & log in to the admin panel.
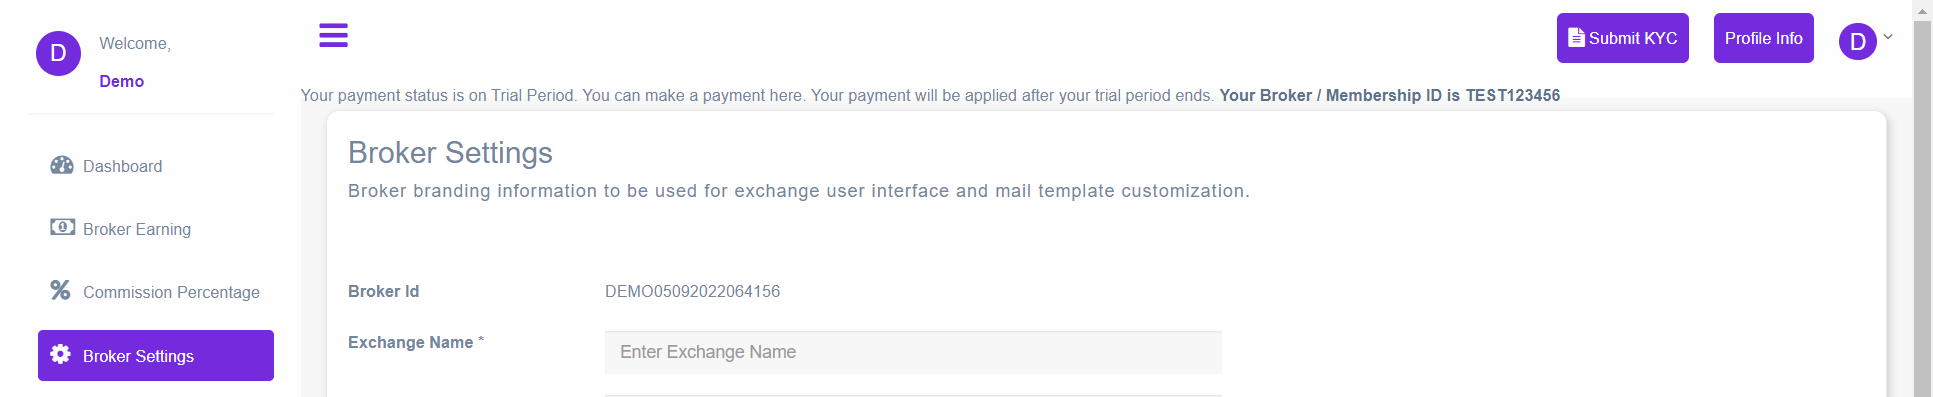
3: Broker Setting
3a. After login it opens the Broker Setting page, We can't see the information on other pages until the broker has filled in all the setting details.
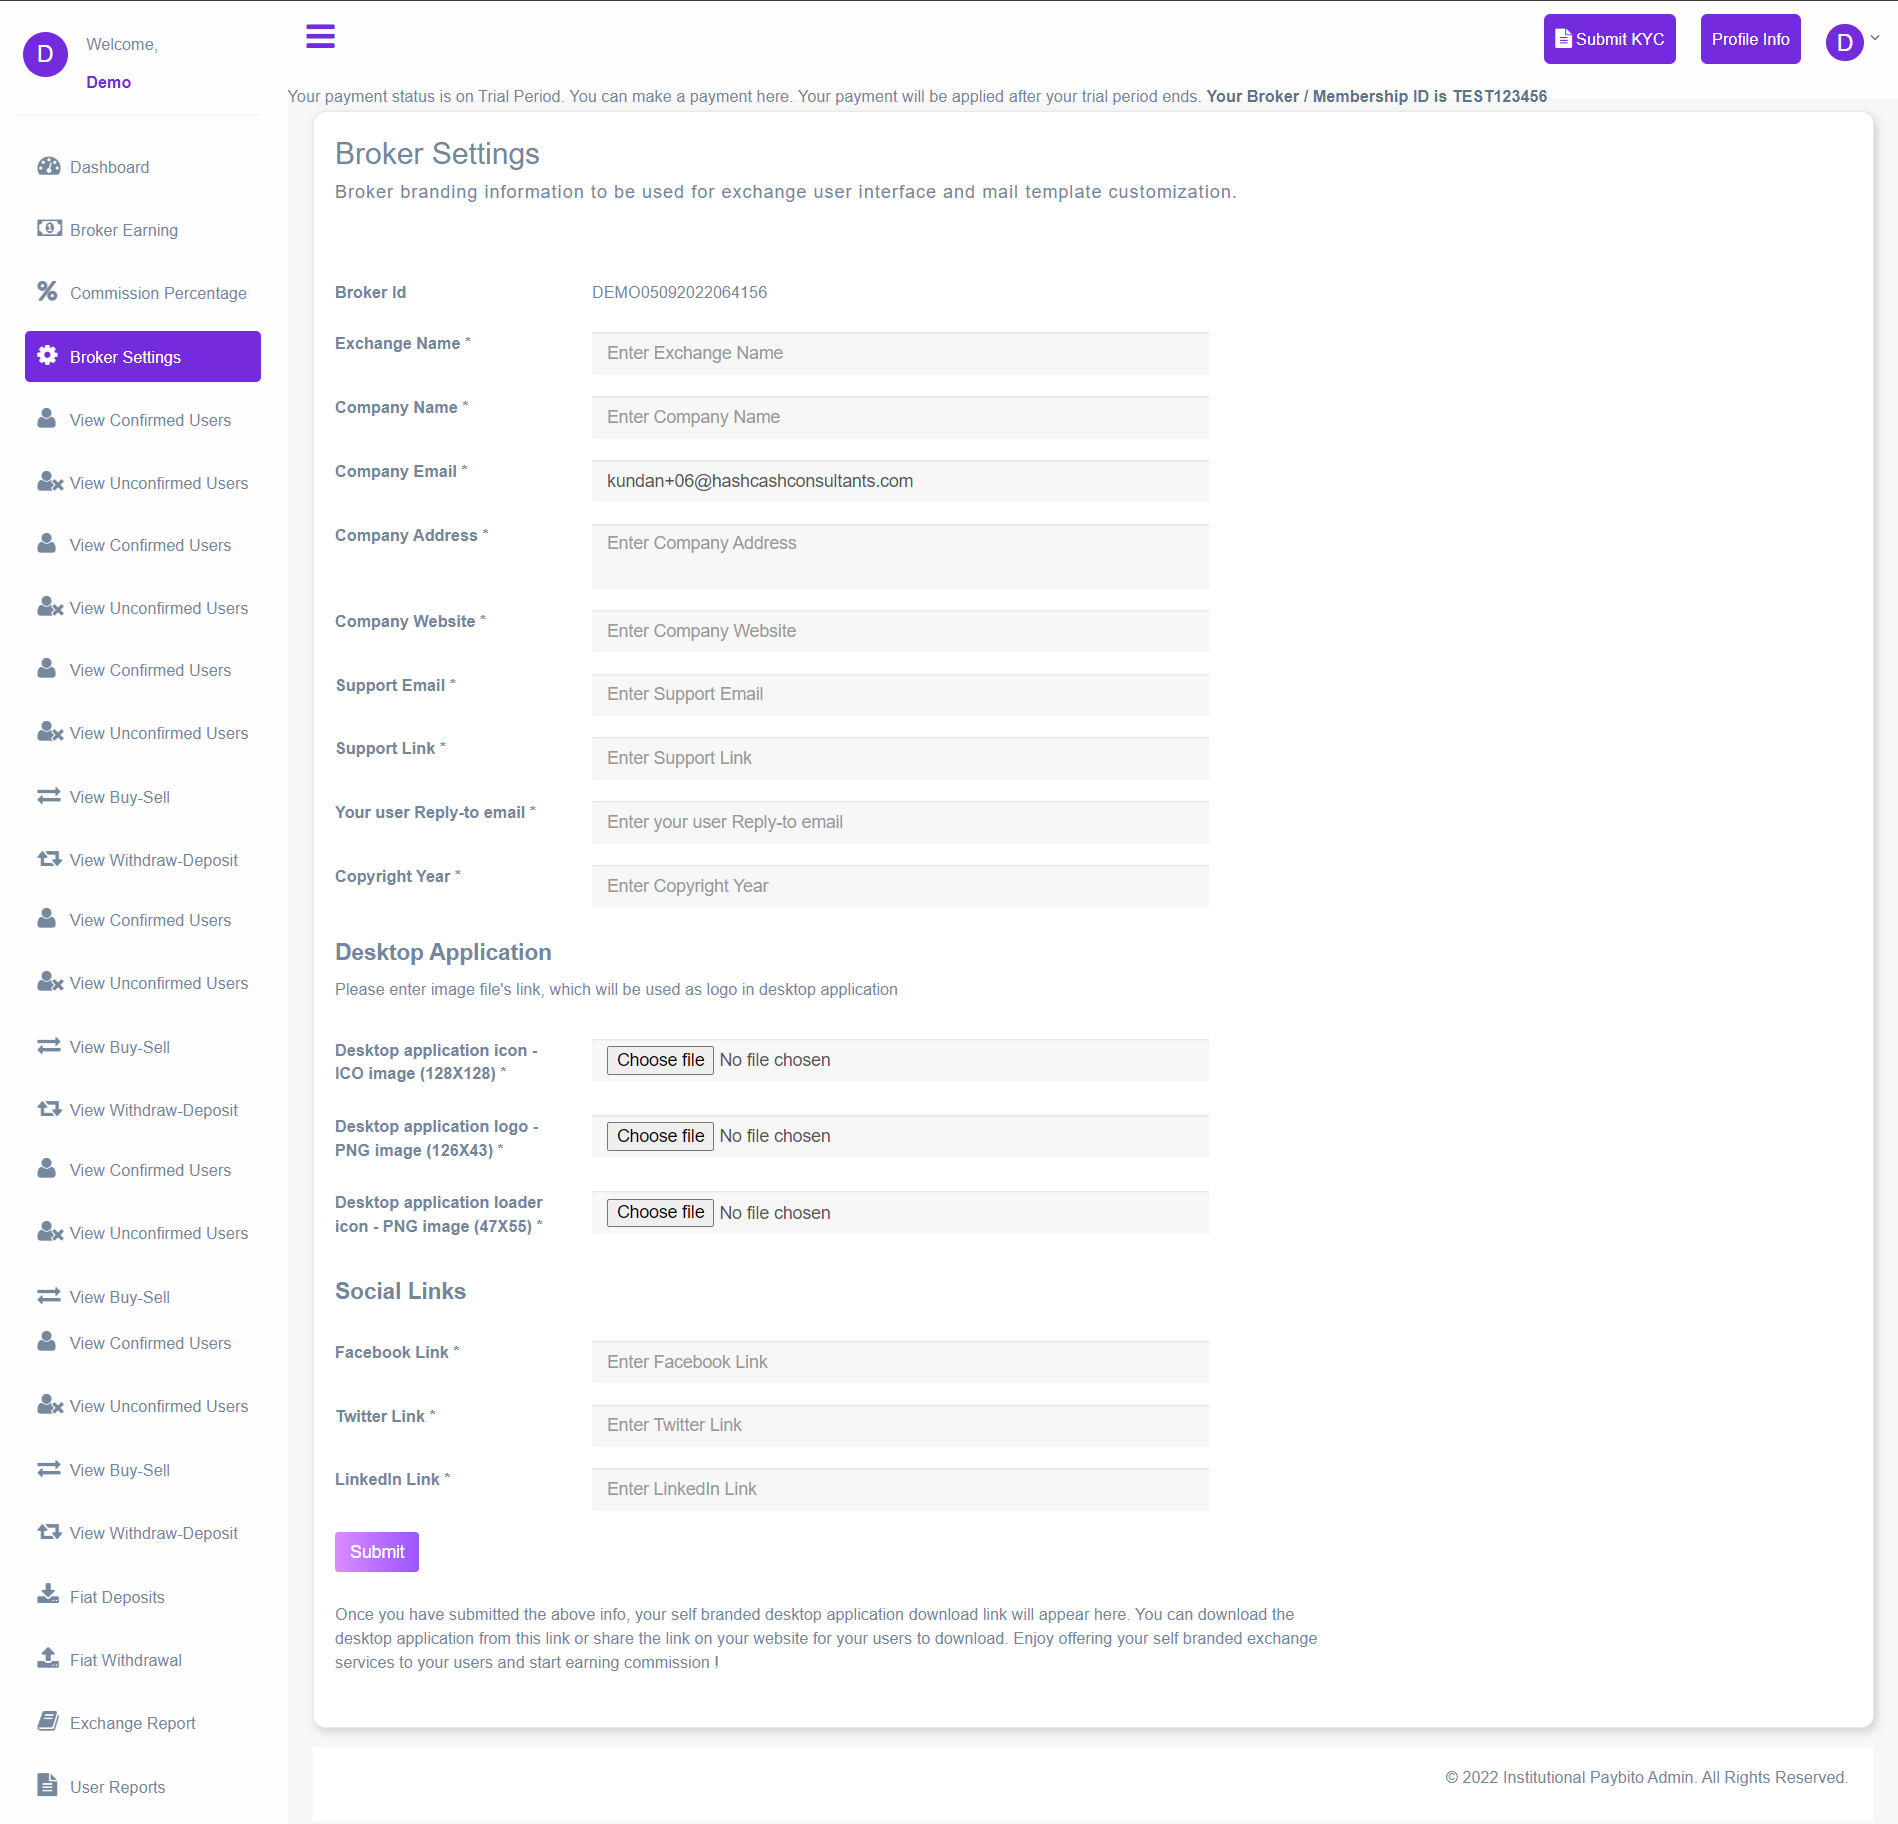
3b. After uploading the logo information, we will provide the desktop app link to the broker's Setting page.
3c. When we Click on Submit button its redirects to KYC SUBMISSION PAGE
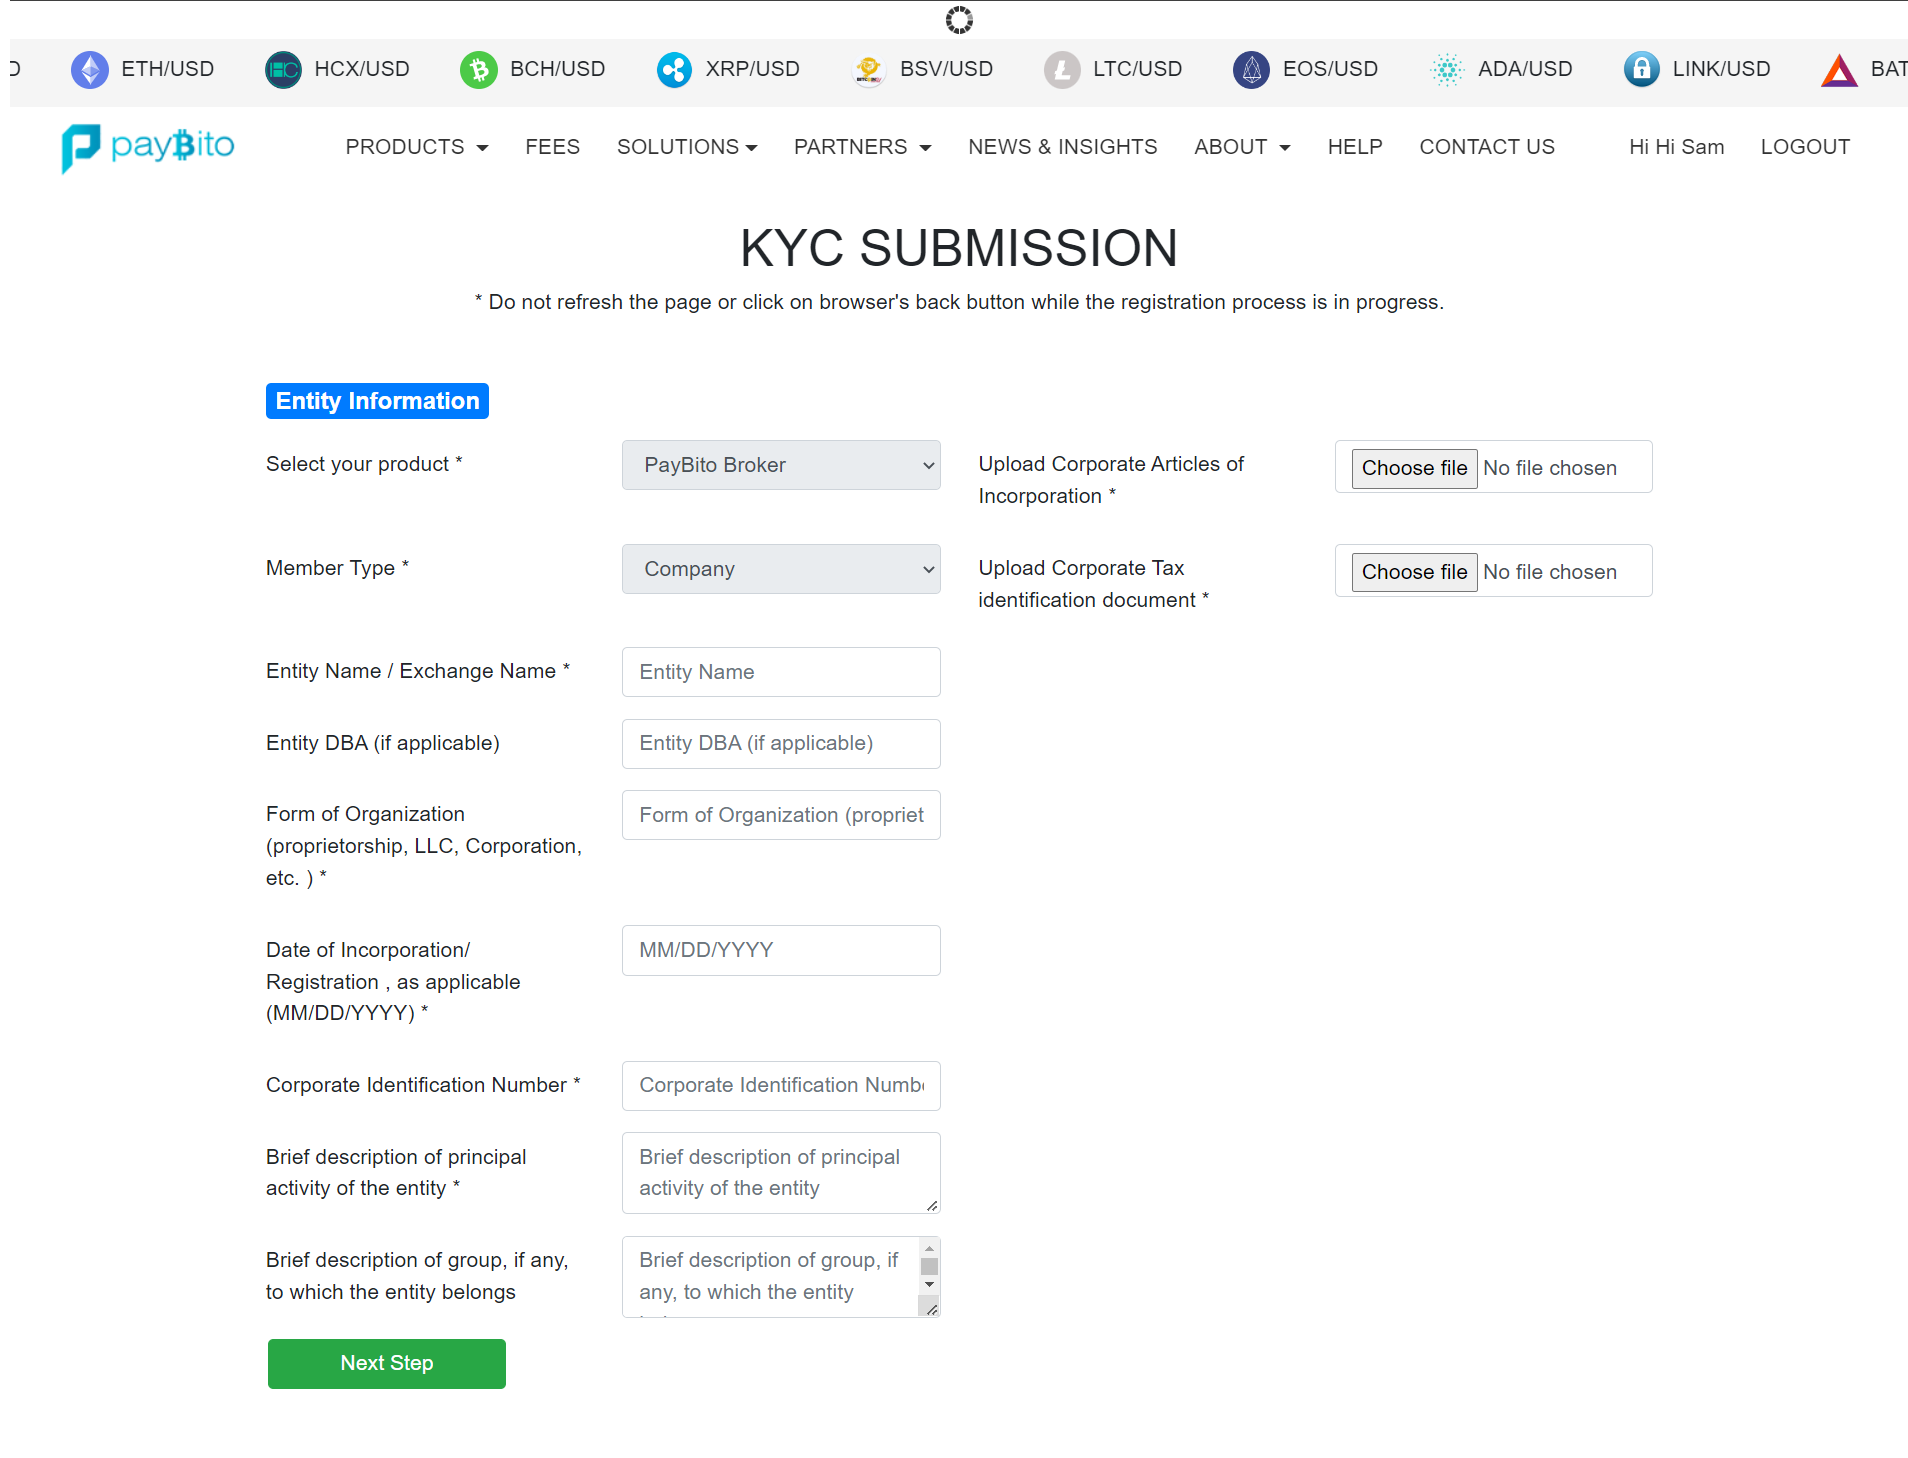
Step 1: KYC SUBMISSION
When opening the " KYC SUBMISSION PAGE" Click On ‘Select your Product’ then Select ‘Paybito Broker’ fill in all the compulsory details and click the submit button.
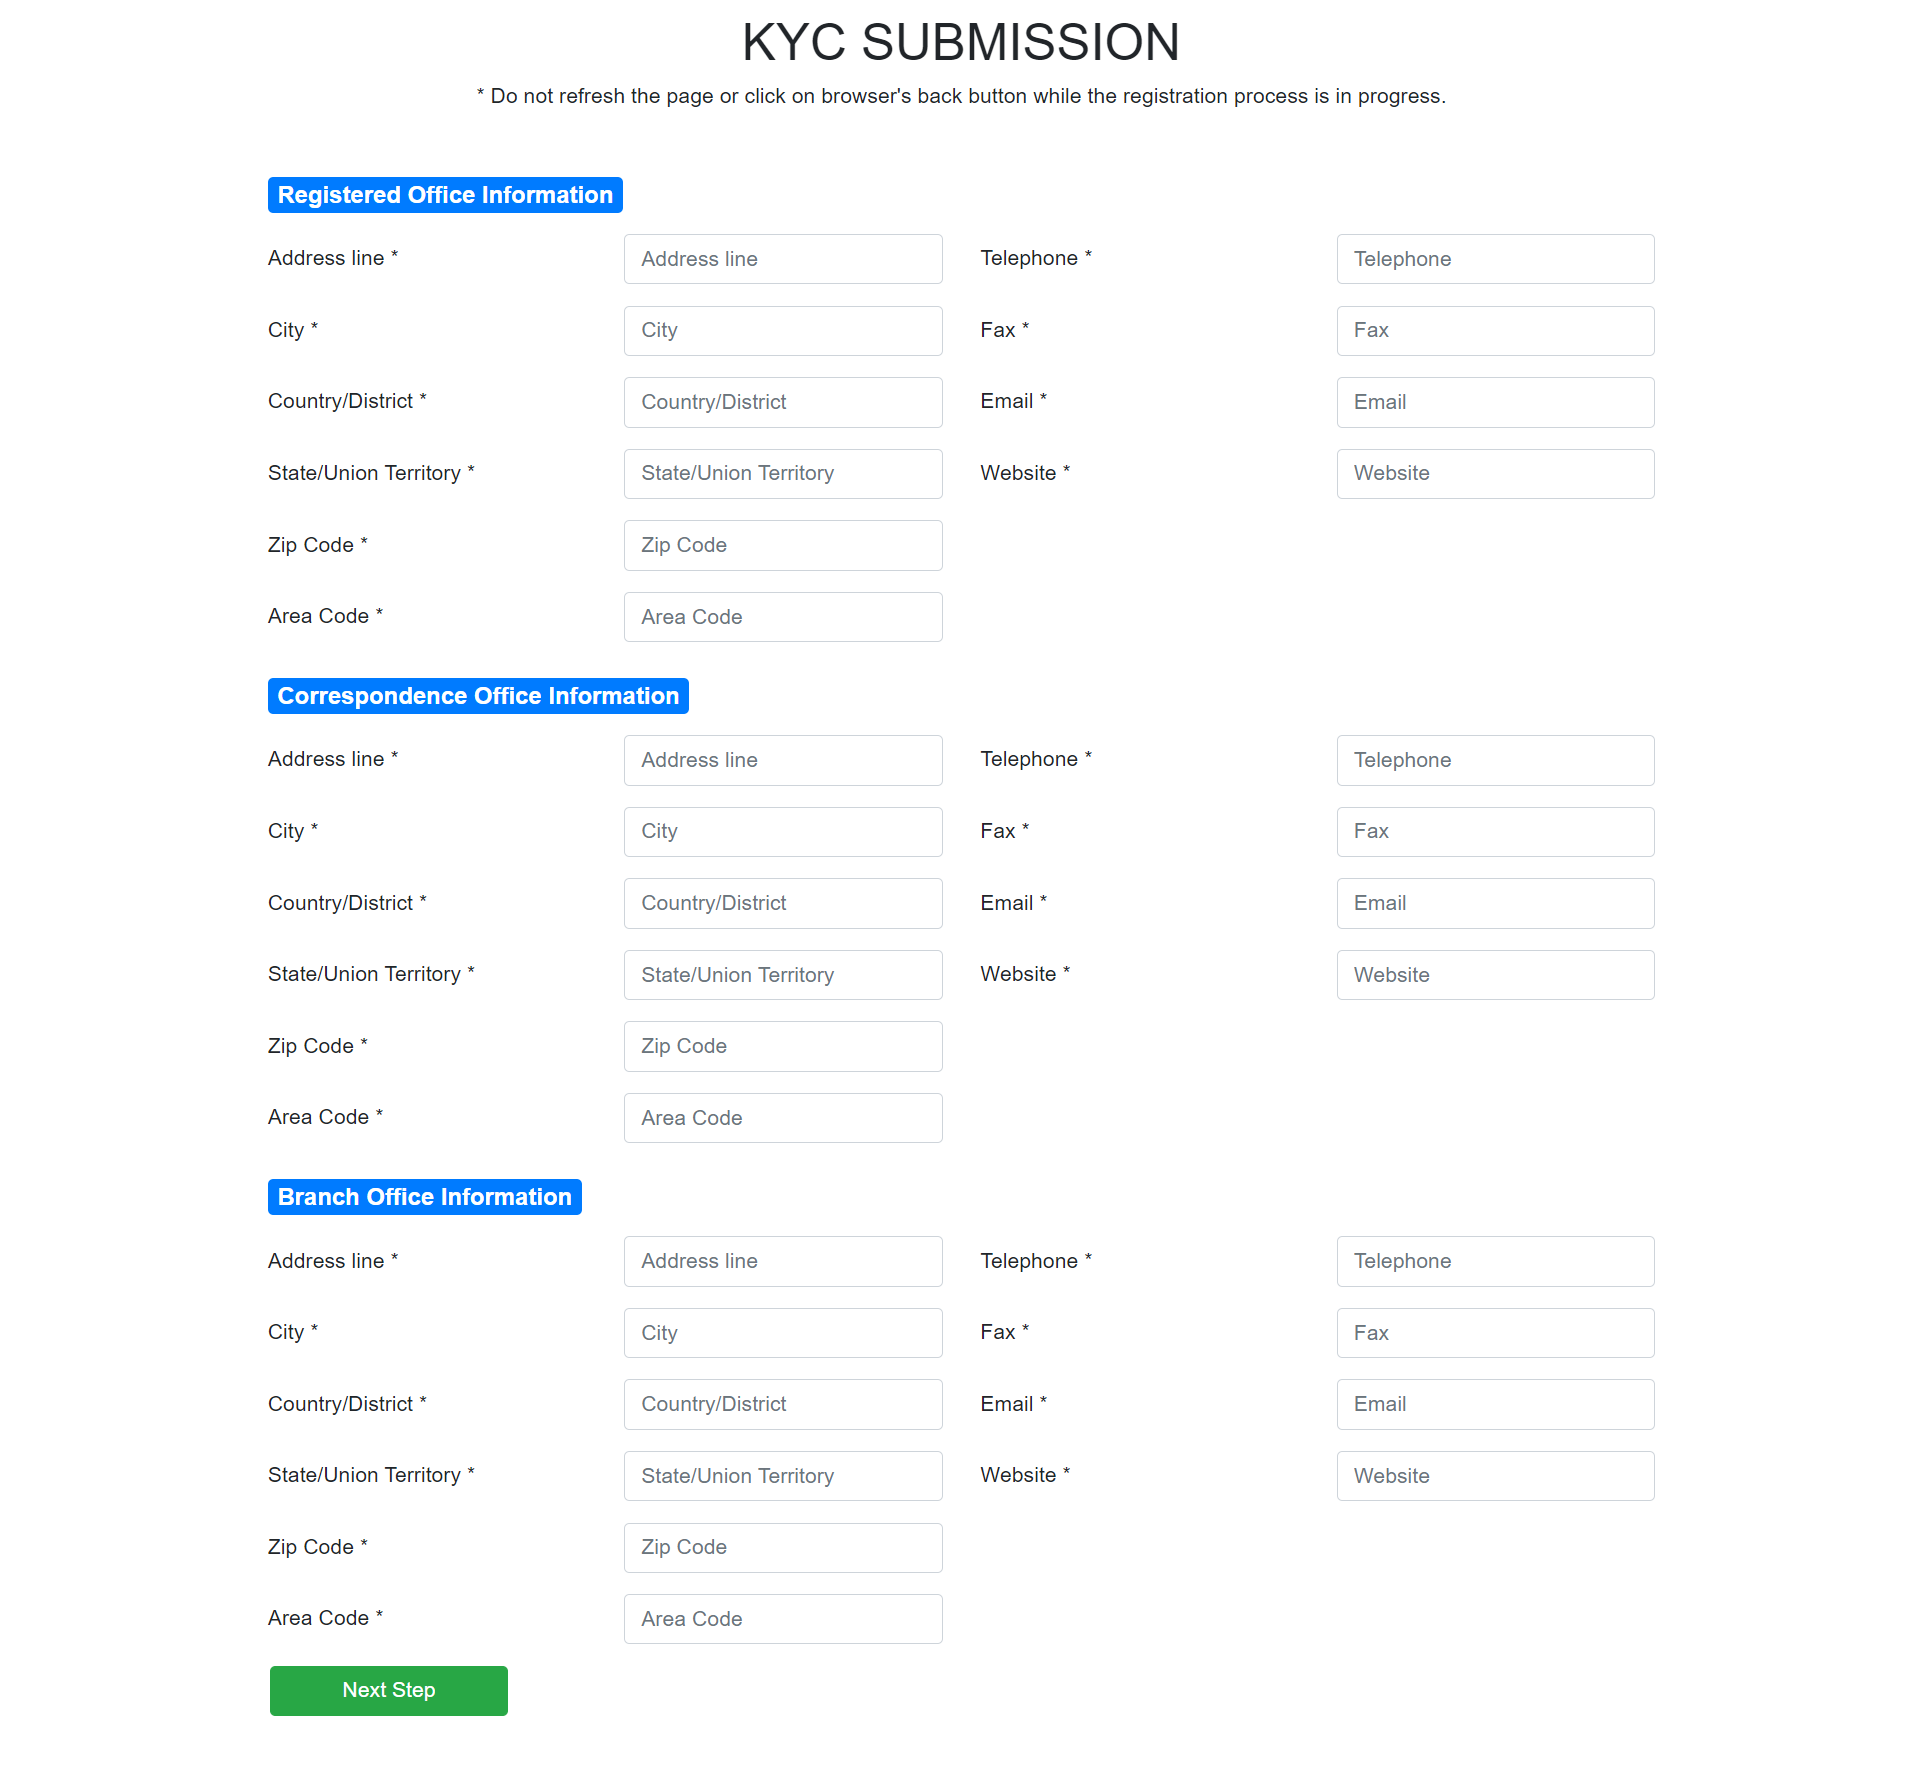
Step 2: Broker Registered Office Information
When we click on the ‘Next page’ its redirects to the ‘Registered Office Information page’. There are three sections-
- (1) Registered Office Information
- (2) Correspondence Office Information
- (3) Batch Office Information.
Fill in all the information& click on ‘Next step’.
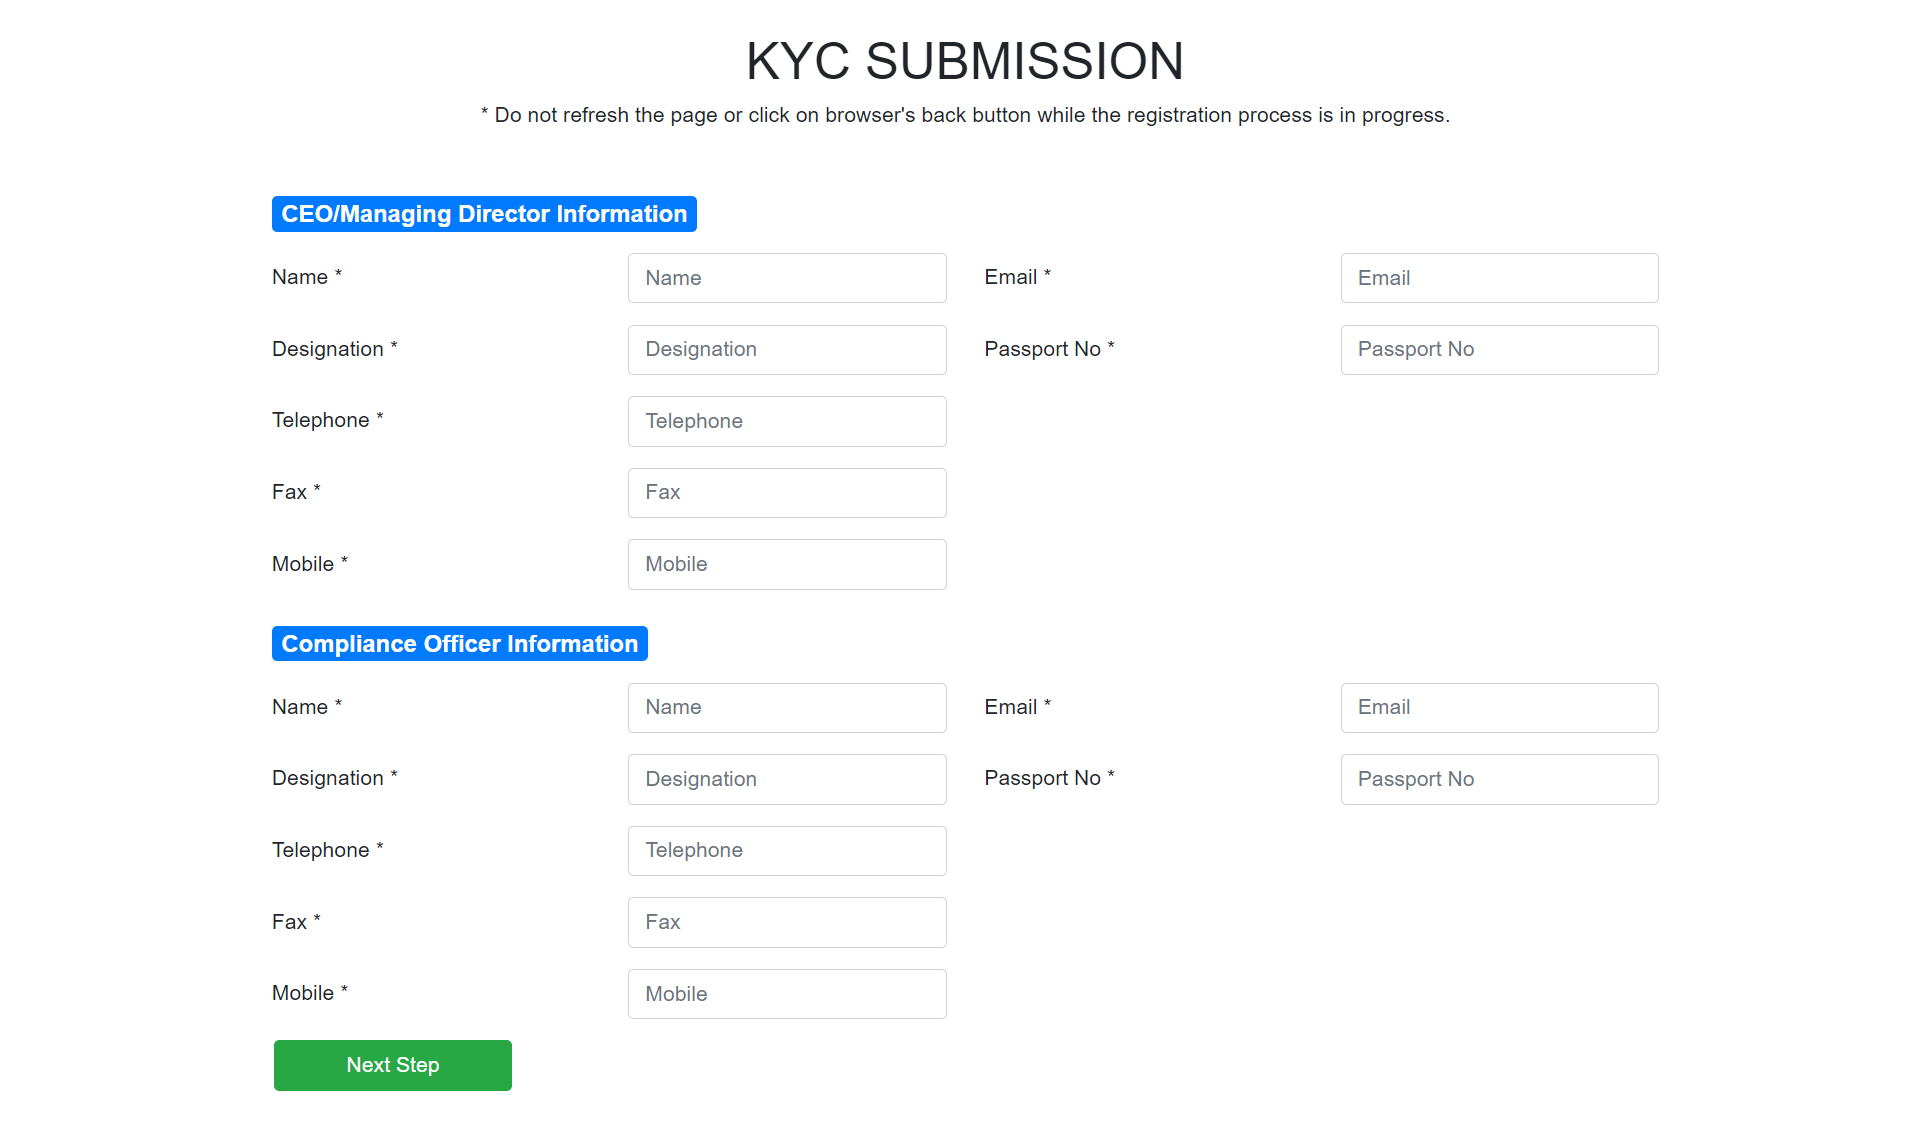
Step 3: Broker CEO/Managing Director Information
It redirects to the CEO/Managing Director Information page. There are two-section -
- (1) CEO/Managing Director Information and
- (2) Compliance Officer Information.
Fill in all the information& click on ‘Next step’.
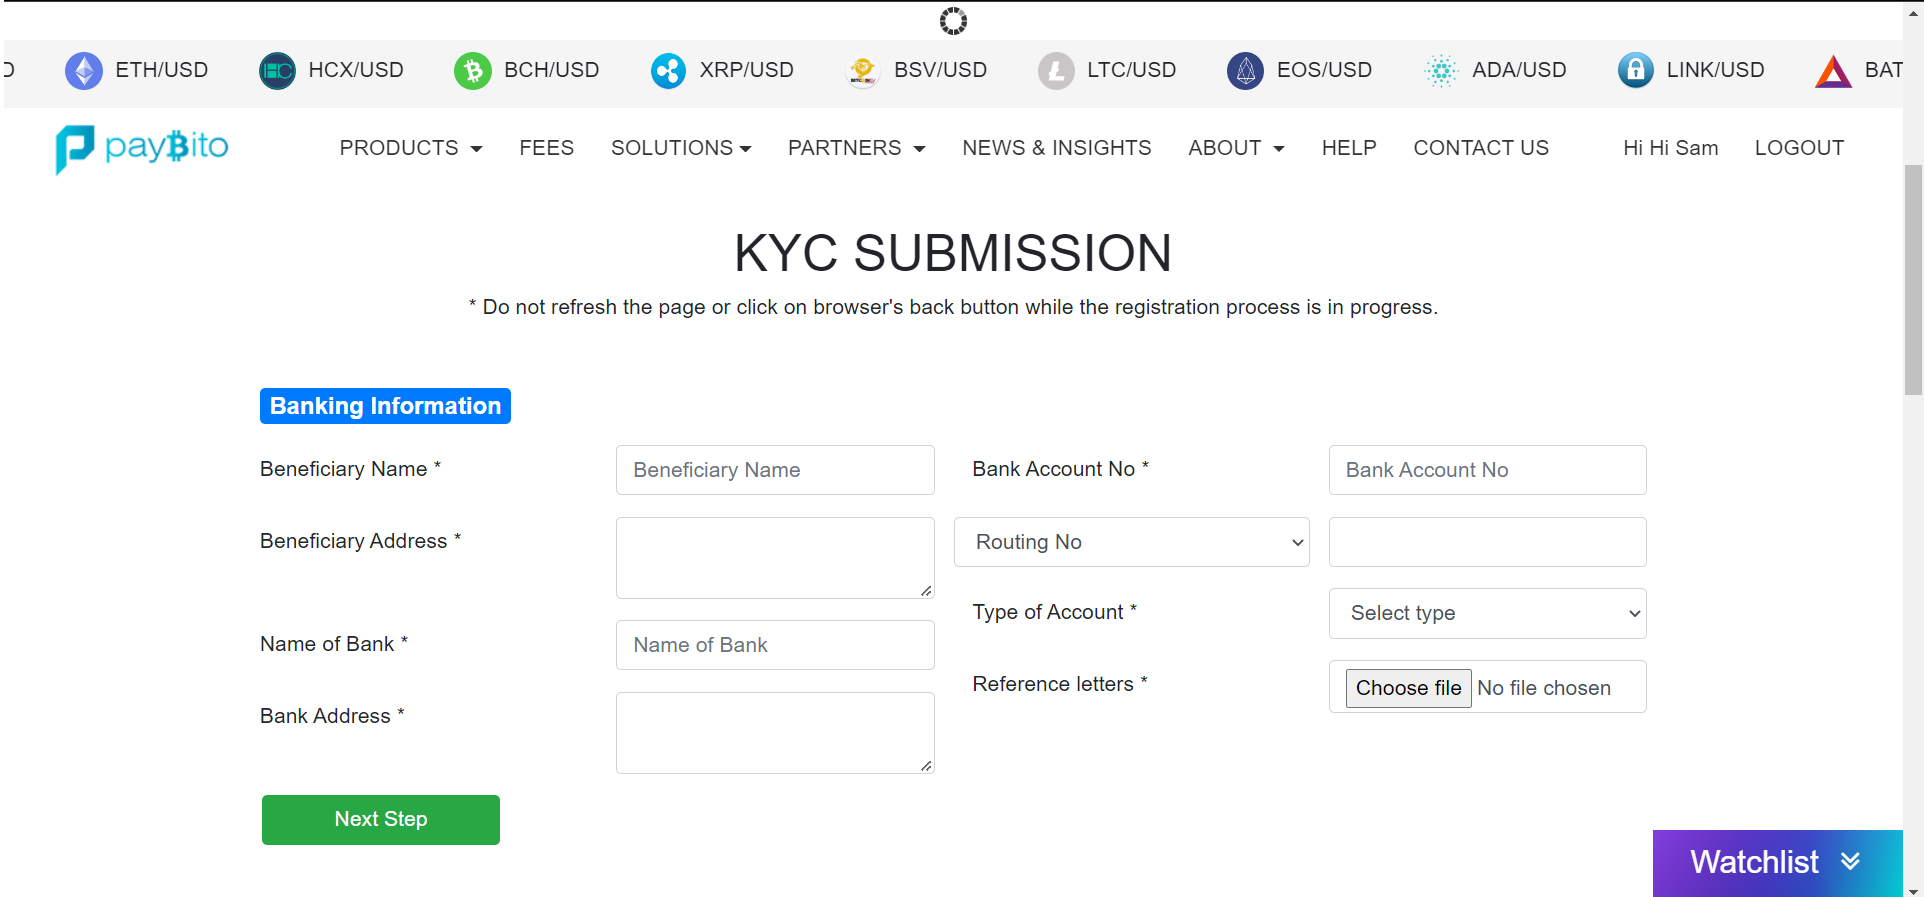
Step 4: Broker Corporate Banking Information
Fill in all the information here & click on ‘Next step’
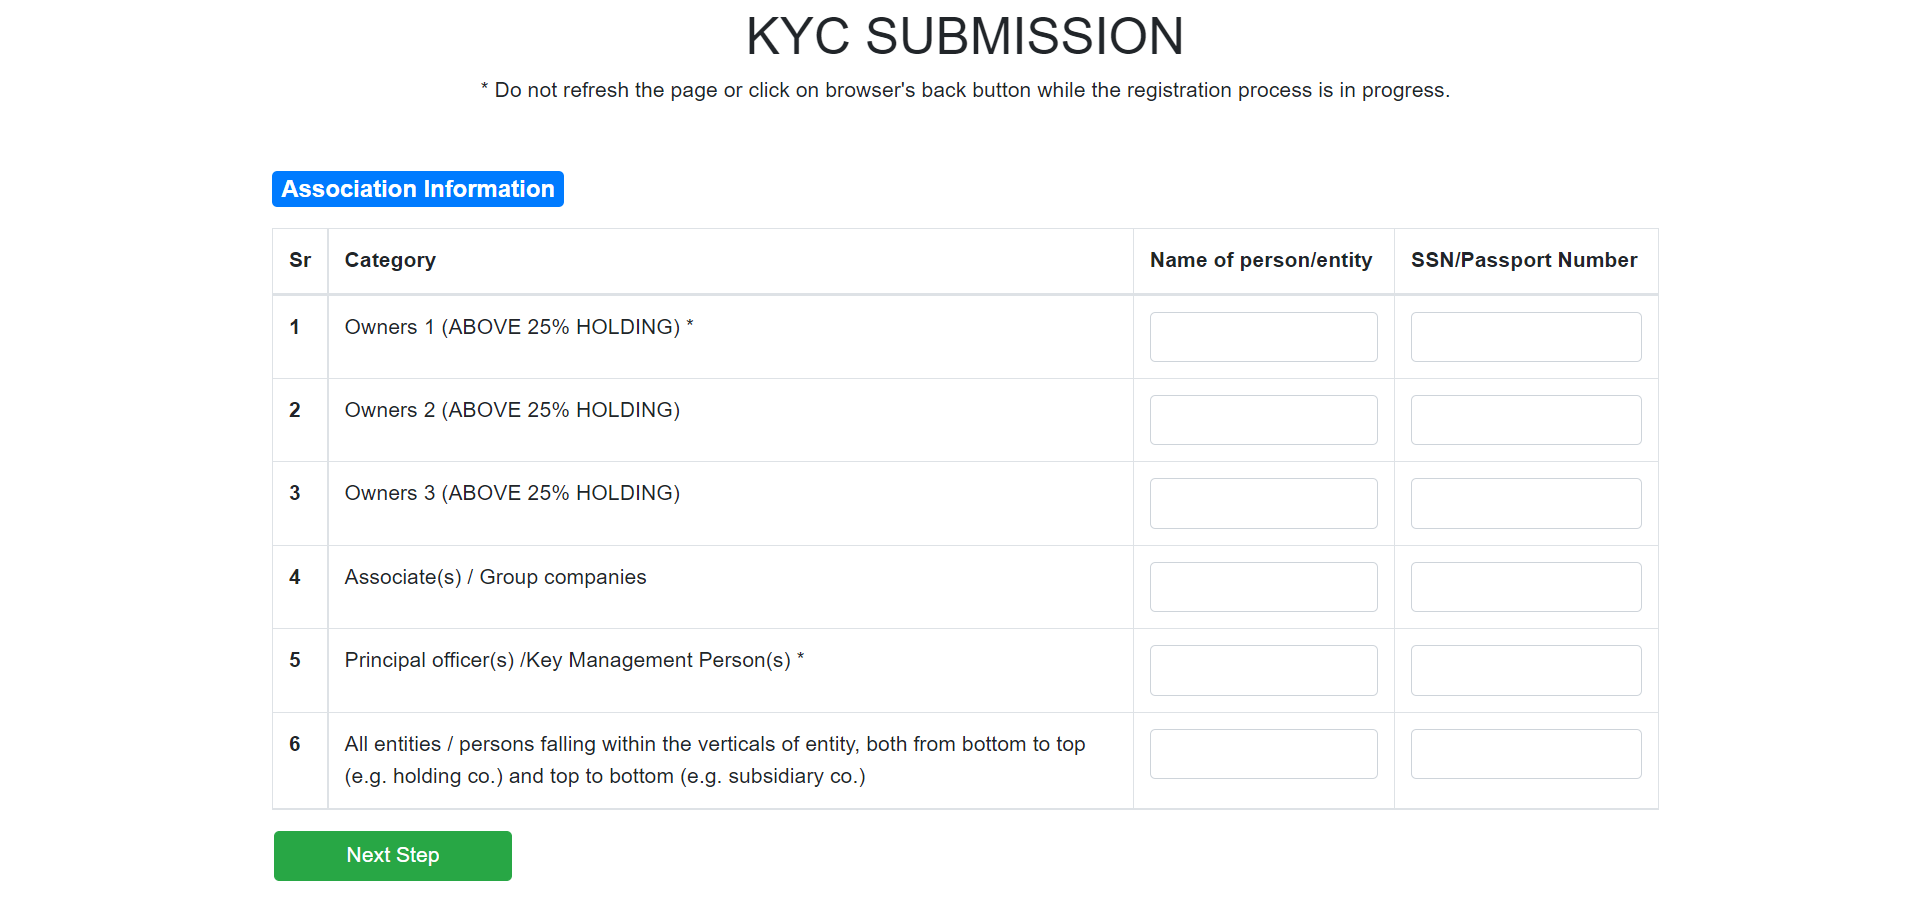
Step 5: Broker Association Information
In this section, the ‘Association Information page will appear. Fill in all the information& click on ‘Next step’.
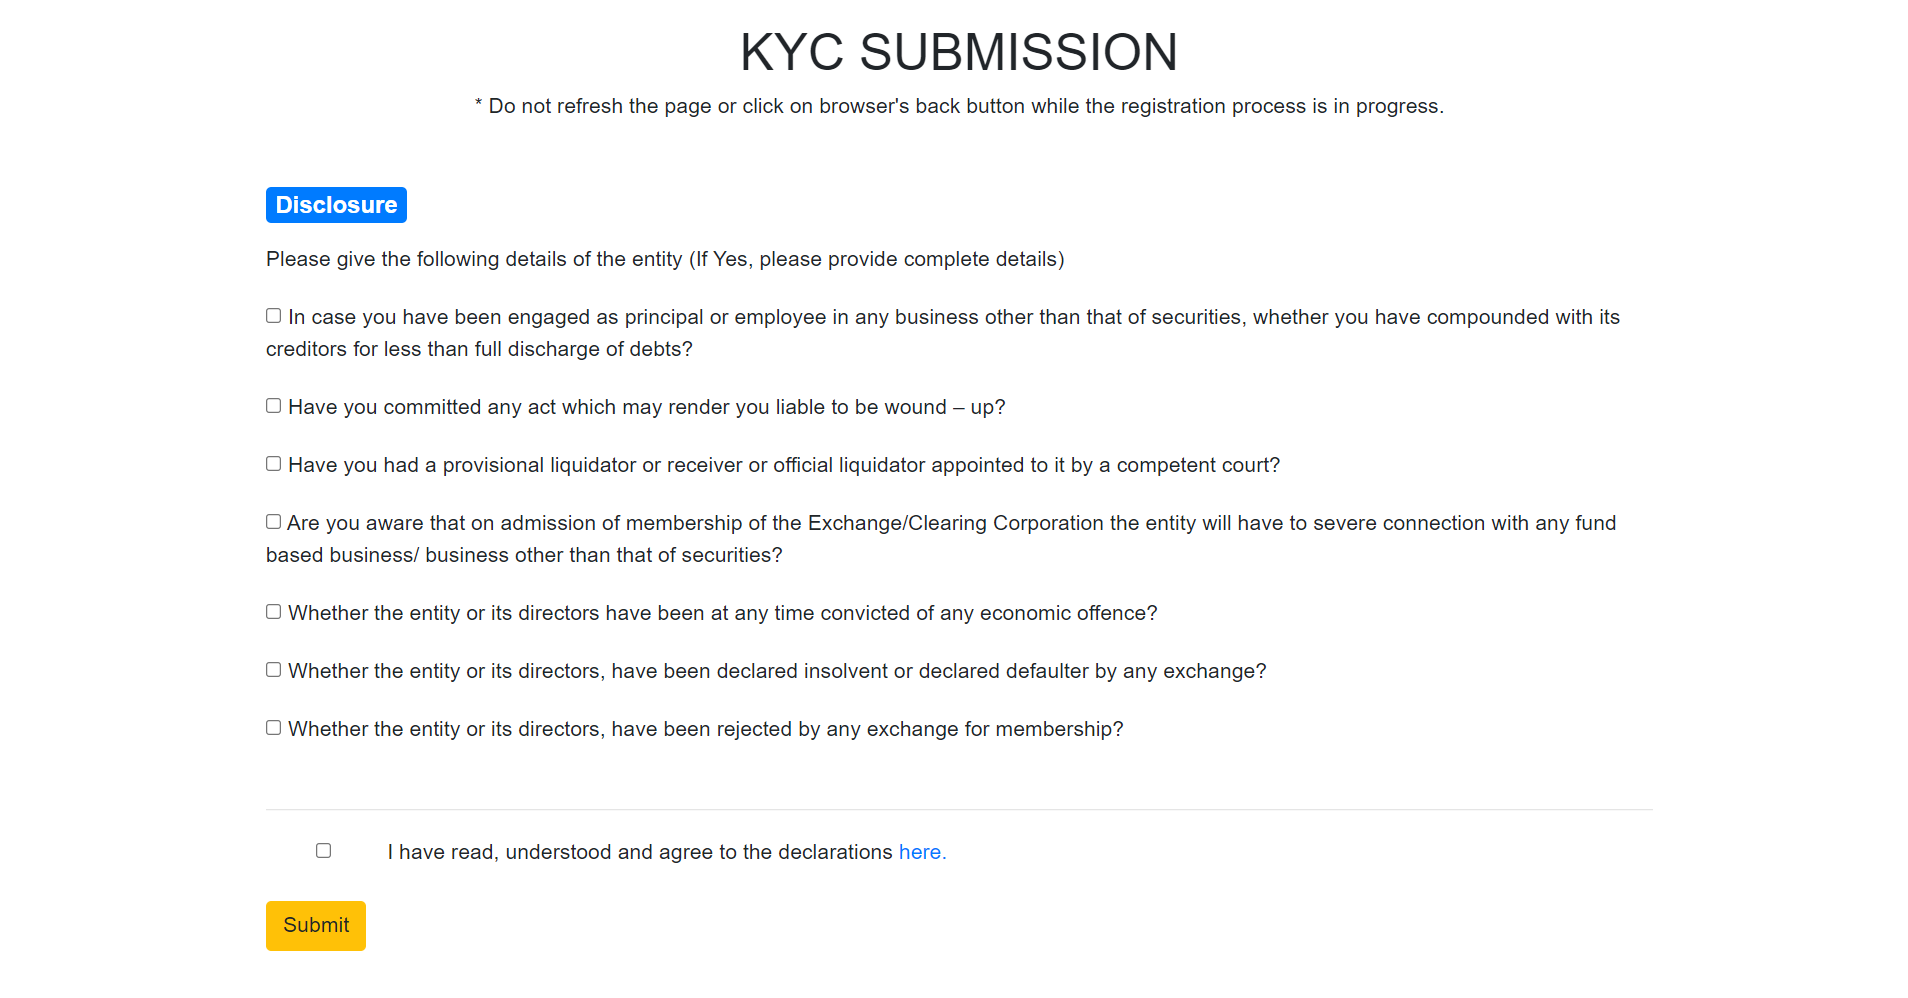
Step 6: Disclosure
On the Disclosure page, Fill in all the mandatory information& click on ‘Next step’.
Step 7: Submission Information
You have successfully submitted all the details. Please note-
- (1) The review process may take 1-3business days.
- (2) You may be asked to submit additional information if required.
- (3) Once approved, you will receive information in your registered email id.

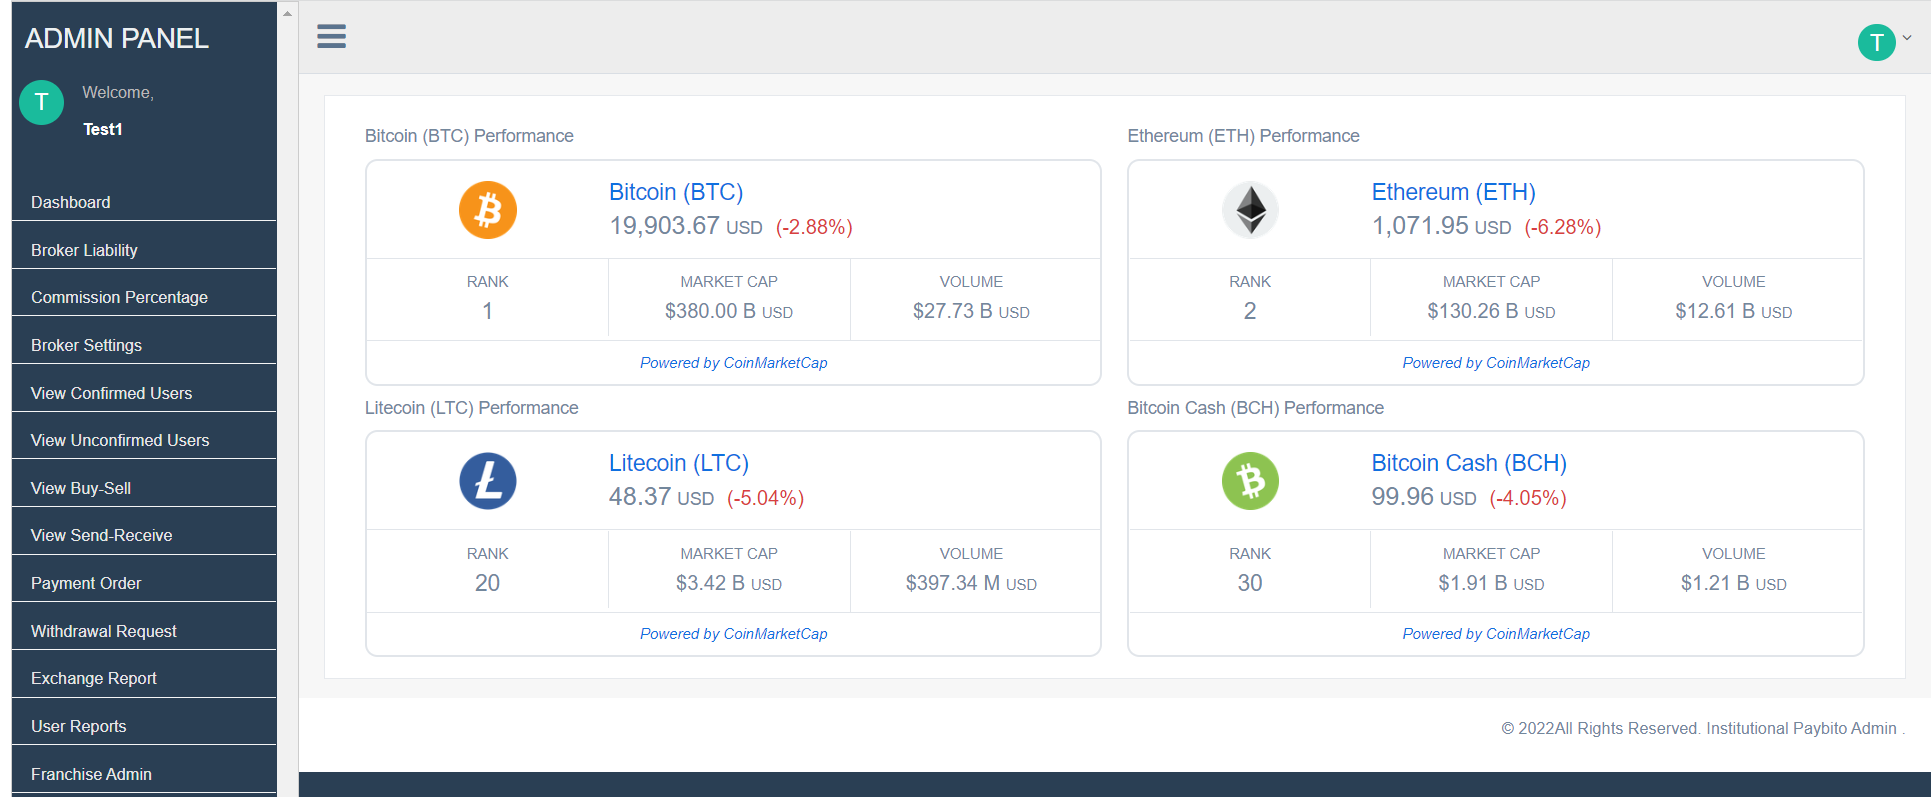
4: Dashboards
It shows the Buy and Sell trends for the exchange for all the listed assets in the Last 3 Months / 1 Month/ 1 Week.
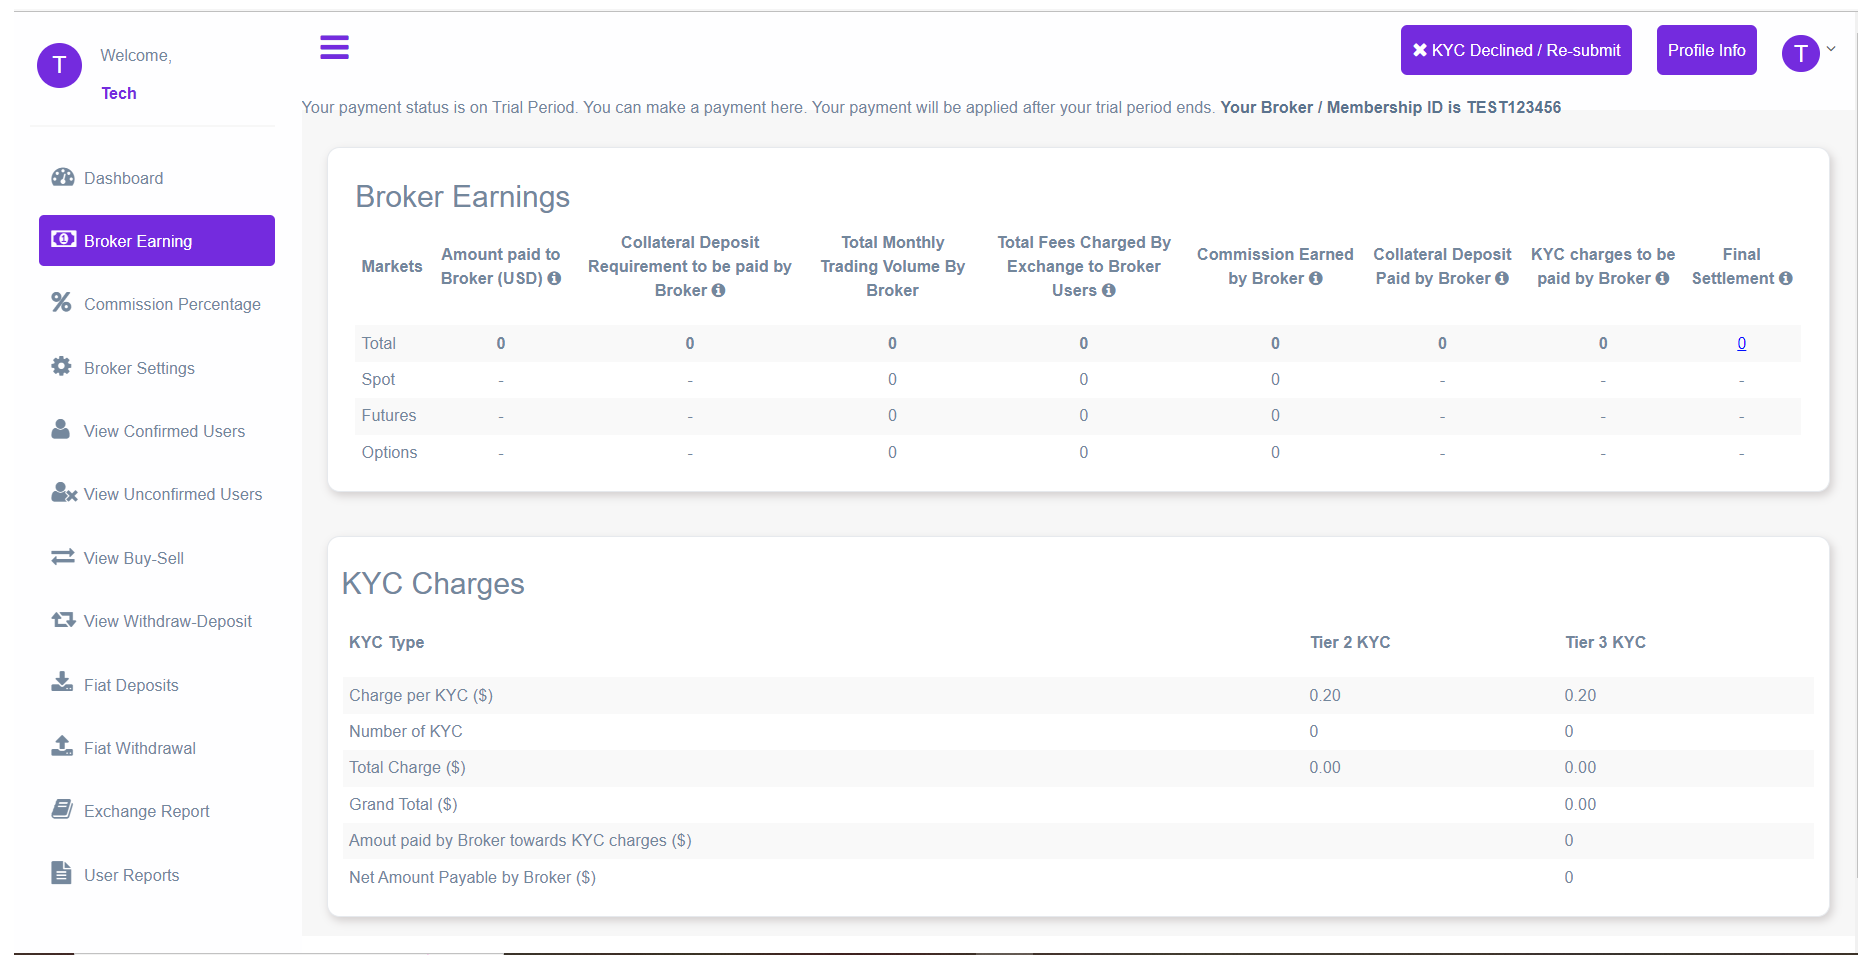
5: Broker Earning
Click on the Broker Earning menu which showing Broker information.
- Broker id:- There is showing broker id
- Amount Paid By Broker:- To give money or other compensation in exchange for goods or services.
- Collateral Deposit Requirement to be paid by Broker:- This should be calculated based on the trading volume and deposit requirement as per table or deposit and trading volume.
- Total Monthly Trading Volume By Broker:-
- Total Fees Charged By Exchange to Broker Users:-Total Fees Charged By Exchange to Broker Users is a product of the Volume tier-based fee percentage charged by Paybito and the total monthly trading volume of each user. You can view the volume-based trading fee charged by Paybito.
- Commission Payable by Exchange:- Calculated- In the Exchange Admin setting, there should be a volume-wise tier that shows how much volume and what fees % Exchange will charge the broker. Commissions payable by Exchange to the broker should be calculated based on this % and the volume.
- Collateral Deposit Paid by Broker:- Deposit by broker
- KYC charges to be paid by Broker:- The Exchange charges a small fee for performing the KYC of your users. To see the detailed breakdown of the KYC charges see the below table.
- Final Settlement:- This is the amount that the exchange owes you. If the amount is zero or negative then there is no payment due. The minimum amount for settlement to be processed is $100.
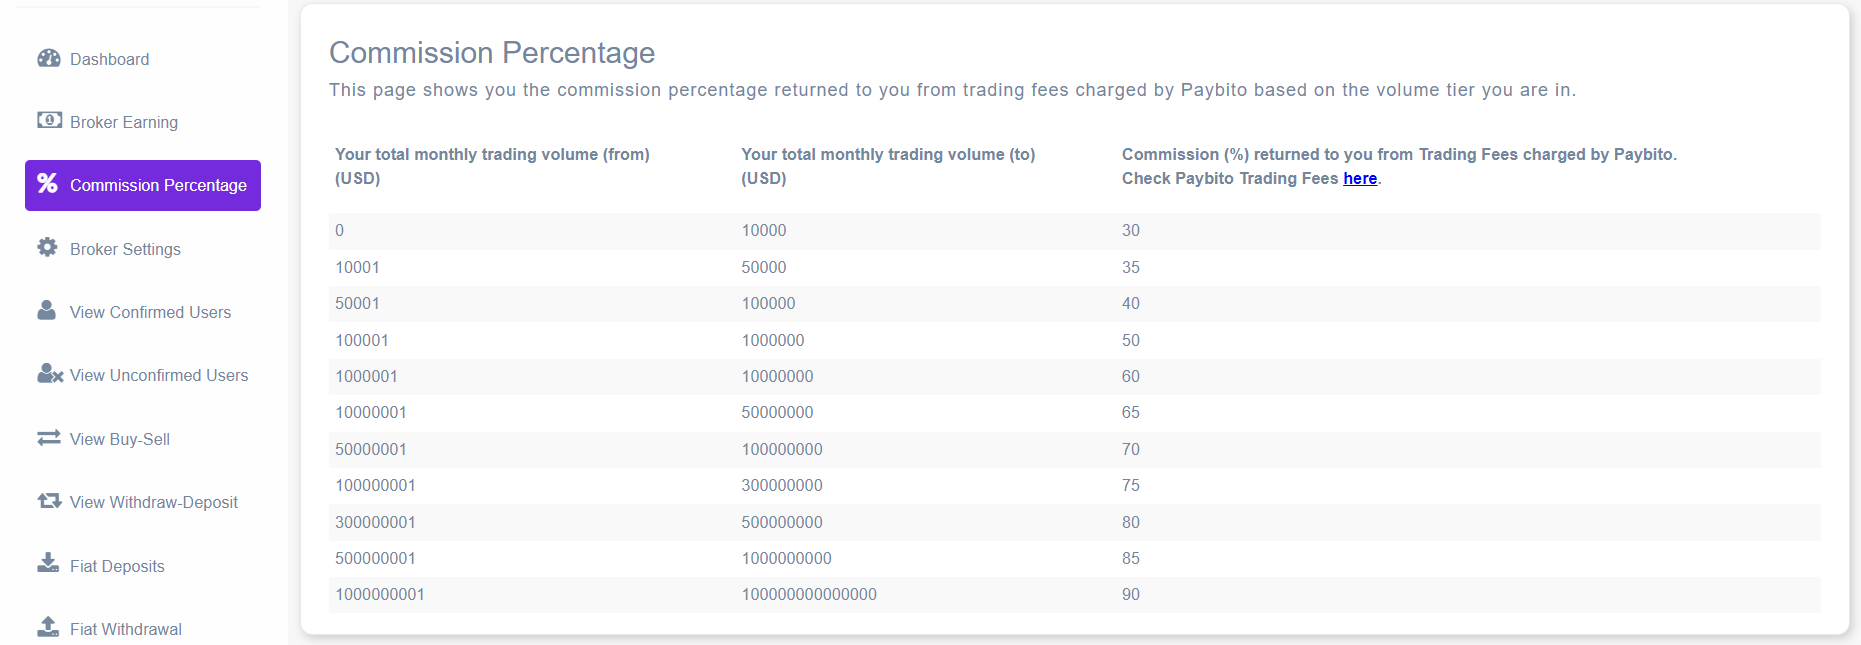
6: Commission Percentage
Click on the Commission Percentage menu it's showing all details of how much take a commission. The commission depends on Trading Volume.
7: View Confirmed Users
This page lists all the confirmed exchange users. The broker can see the users details such as:
- User id
- Name
- Date of Account Created
- User Document Status
- Bank Document Status
- Buy Status
- Sell Status
- Action
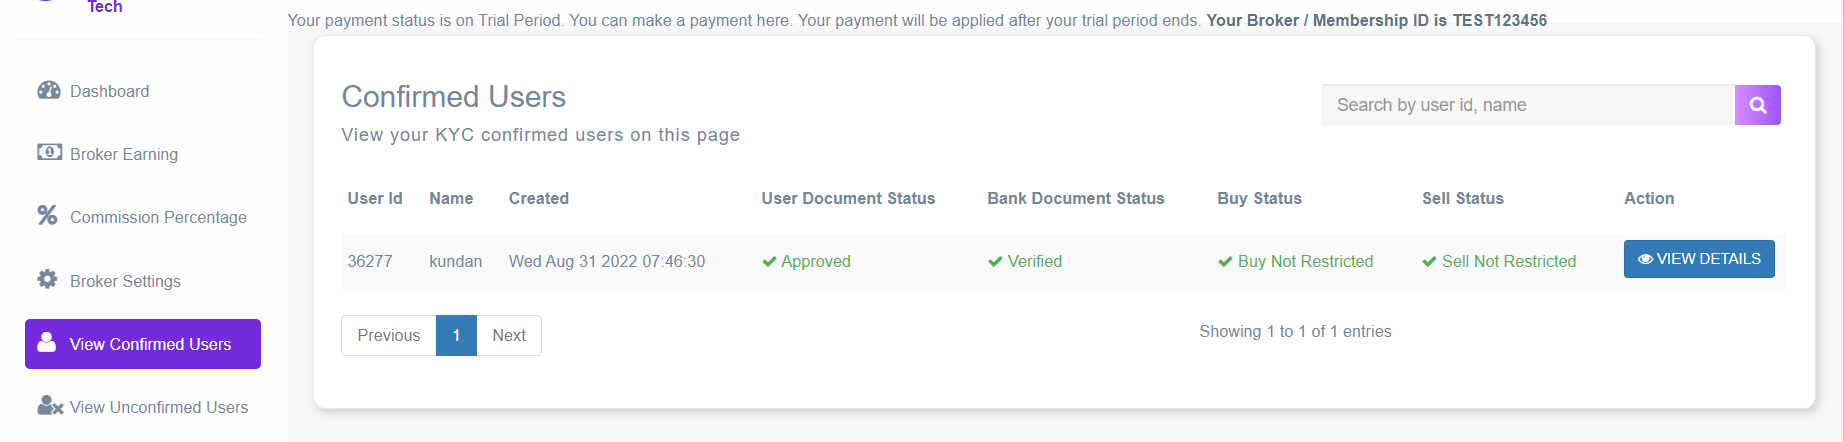
(7a) User document status:- It shows the status of ‘Identity Verification Documents’ submitted from the EXCHANGE front end by the user.
(7b) Bank document status:- It shows the status of the ‘Bank Account Verification Document’ submitted from the EXCHANGE front end by a user.

8: View Unconfirmed Users
(8a) Status for User document and Bank document can be as follows.
- Submitted:- The documents of the user or the bank are submitted or not.
- Verified:- The specified documents have to be verified.
- Declined:- Whether the documents submitted has be declined or accepted.
- No document:- If no documents are submitted then this status is put up.
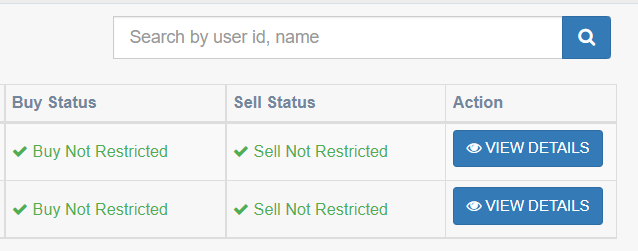
(8b) Added Features in the Interface.
- Buy status shows if Buy is restricted for the user
- Sell status shows if Sell is restricted for the user
- The search bar can be used to search customers using Name & User id
- View Details shows the details of the user
(8c) View Details
- Basic Info shows the user’s personal details including Address and Email ID
- User Verification Documents shows the Identity Verification documents submitted by the user. These can be downloaded or viewed in browser
- Bank Details shows the Bank Verifications details submitted by the user from the front end.
- Once user submits his documents and details, an Approve and a Decline button is activated. Admin can Approve or Decline the documents for the user after verifying the details.
- Buy Restrict – Restrict button can be used to restrict buy for the user
- Sell Restrict – Restrict button can be used to restrict sell for the user
- User Transactions – Shows the user’s transactions
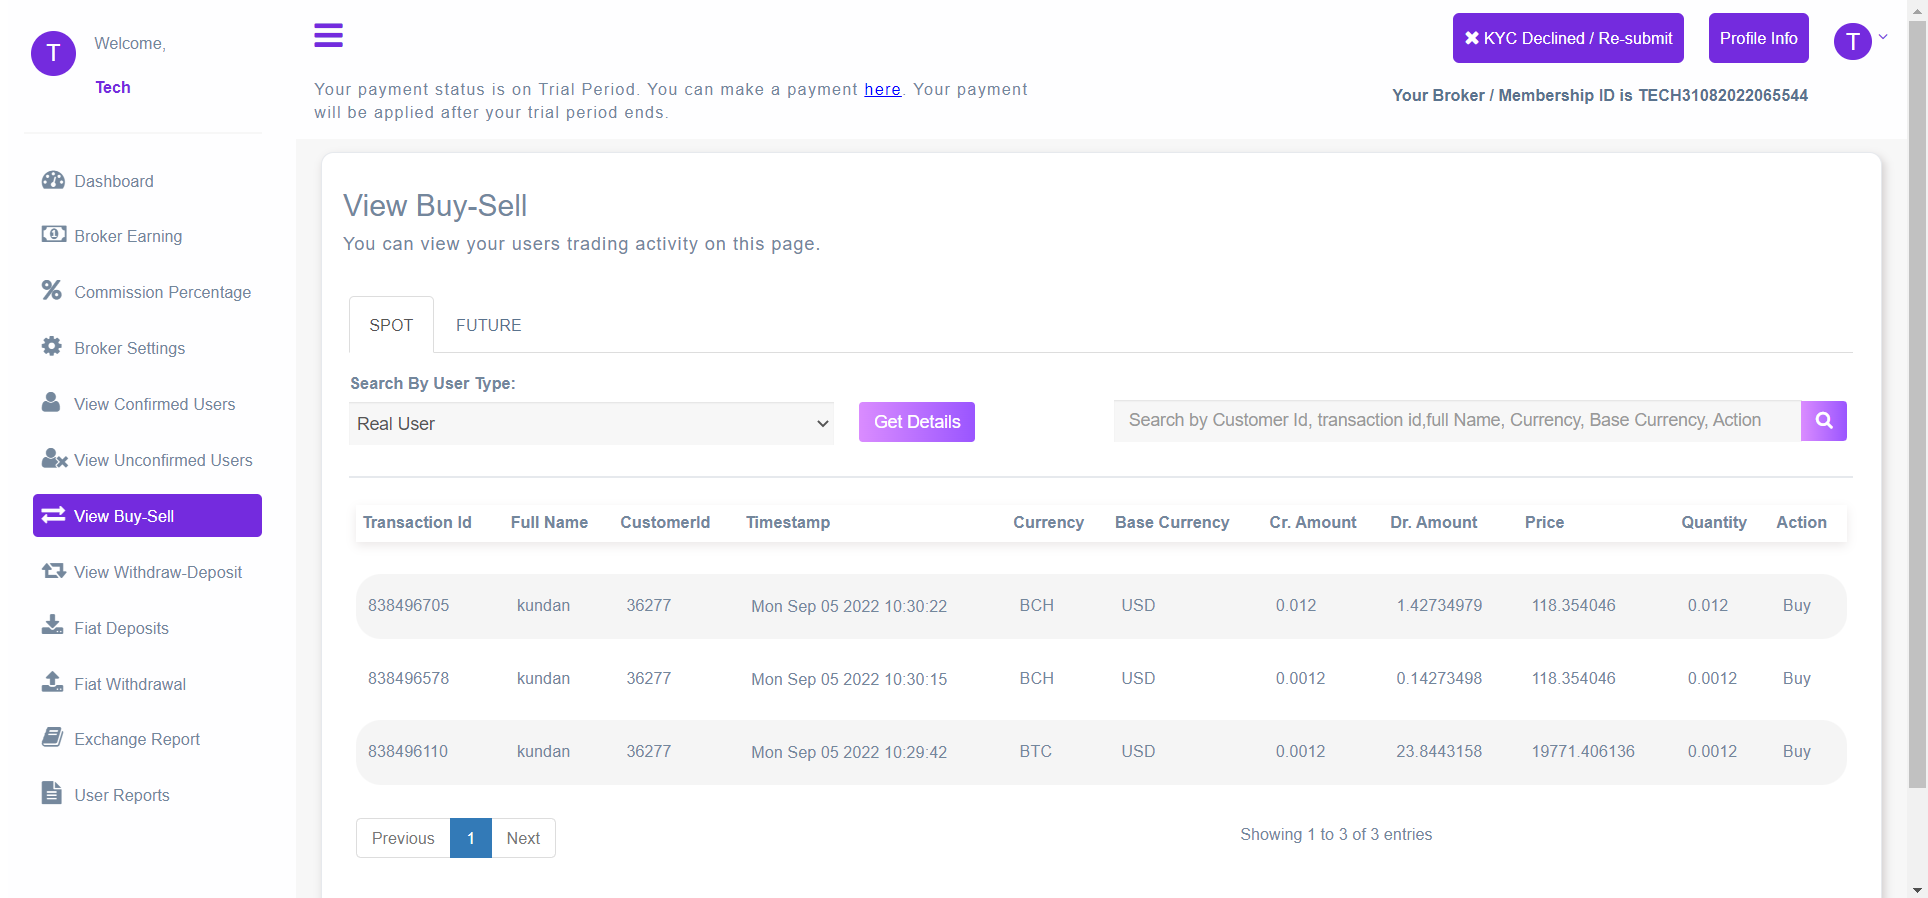
9. View Buy/Sell
Under this screen, you can see the buy/sell activities of the exchange
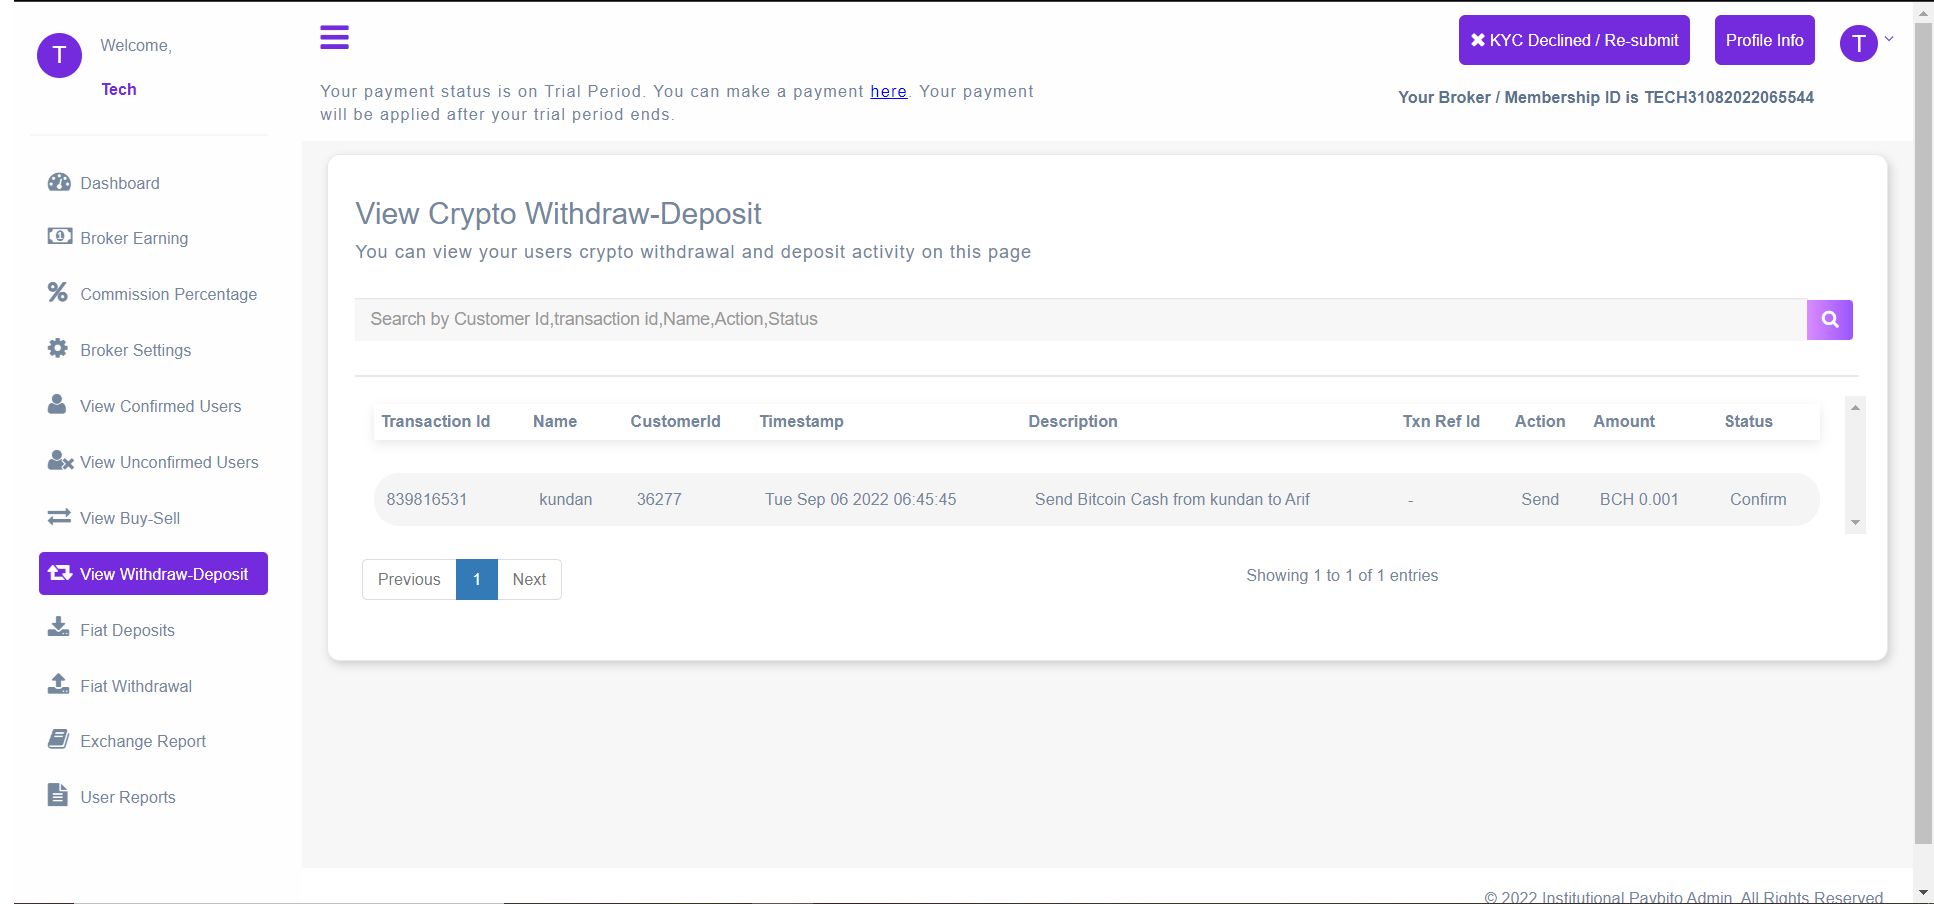
10. View Withdrawal Deposit
On this screen, you can see the send and receive details of the exchange for all transactions. The details of the transactions are given as Transaction id, Full Name, Email, Timestamp, Description, and Txn Ref ID.
Txn Ref ID: This Id is a unique Id used by Sender to send the amount to Receiver.
Action: Action can be Sent or Received.
Status: Status can be Confirm or Pending
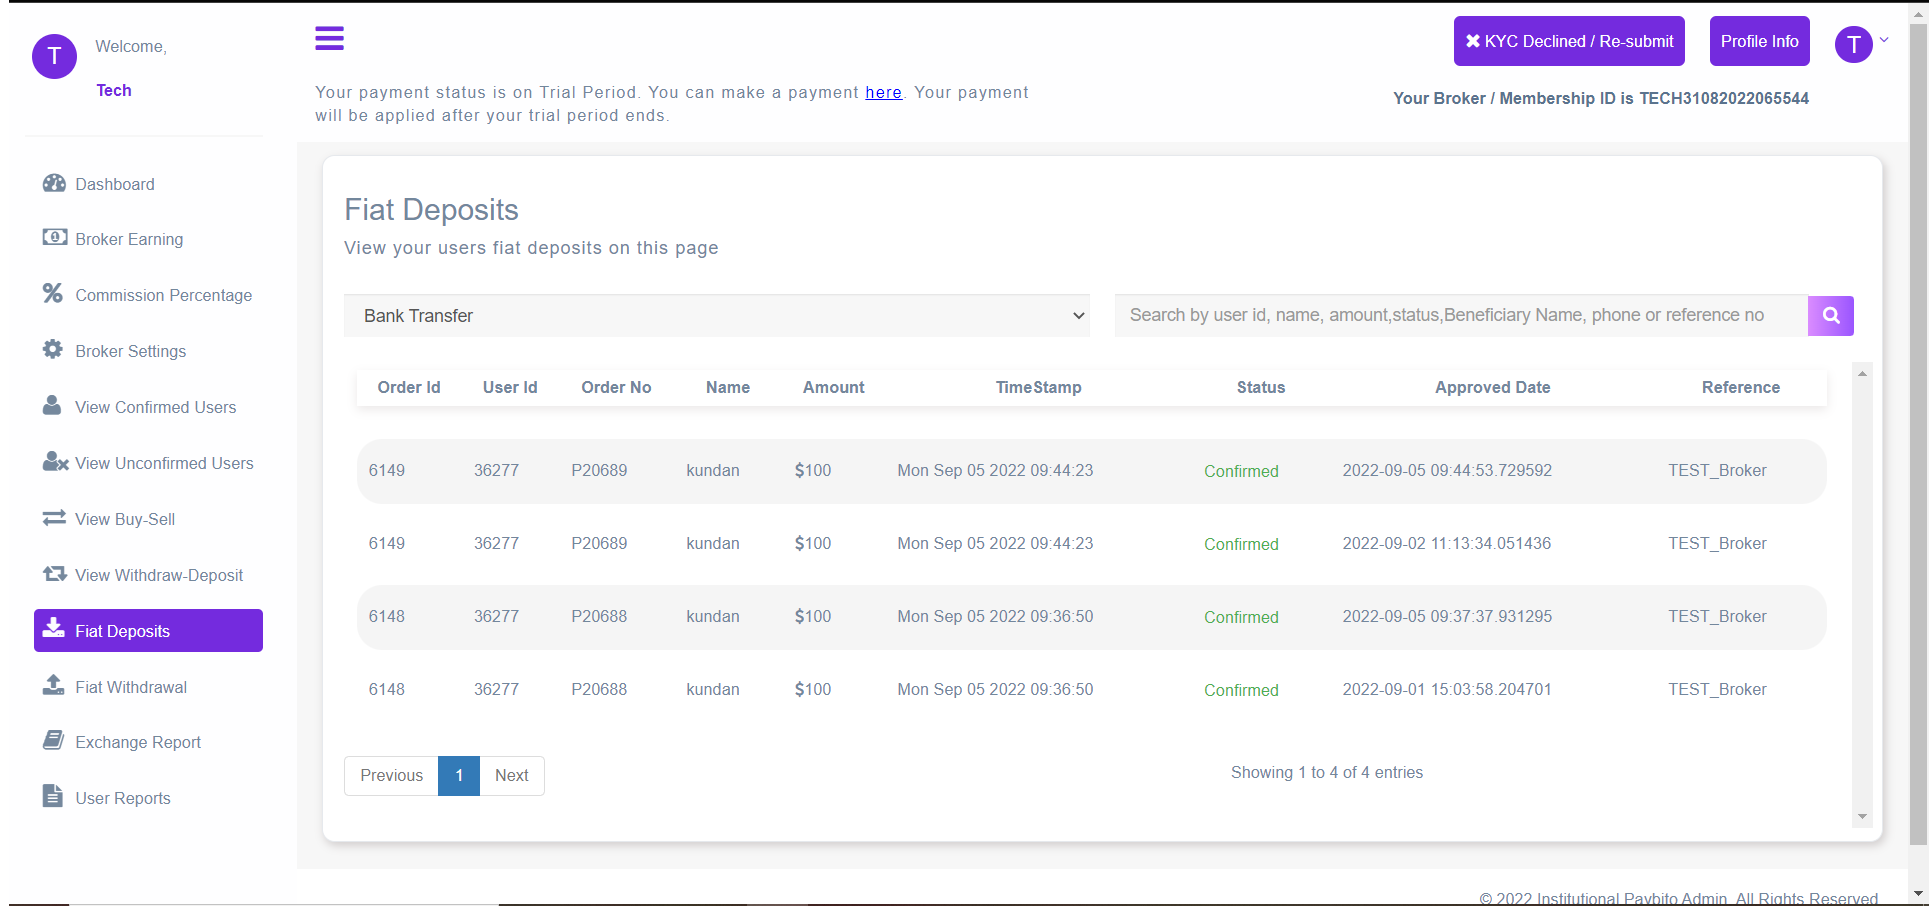
11. Fiat deposits
In Broker Admin, All fiat payment order request from user comes to this screen.
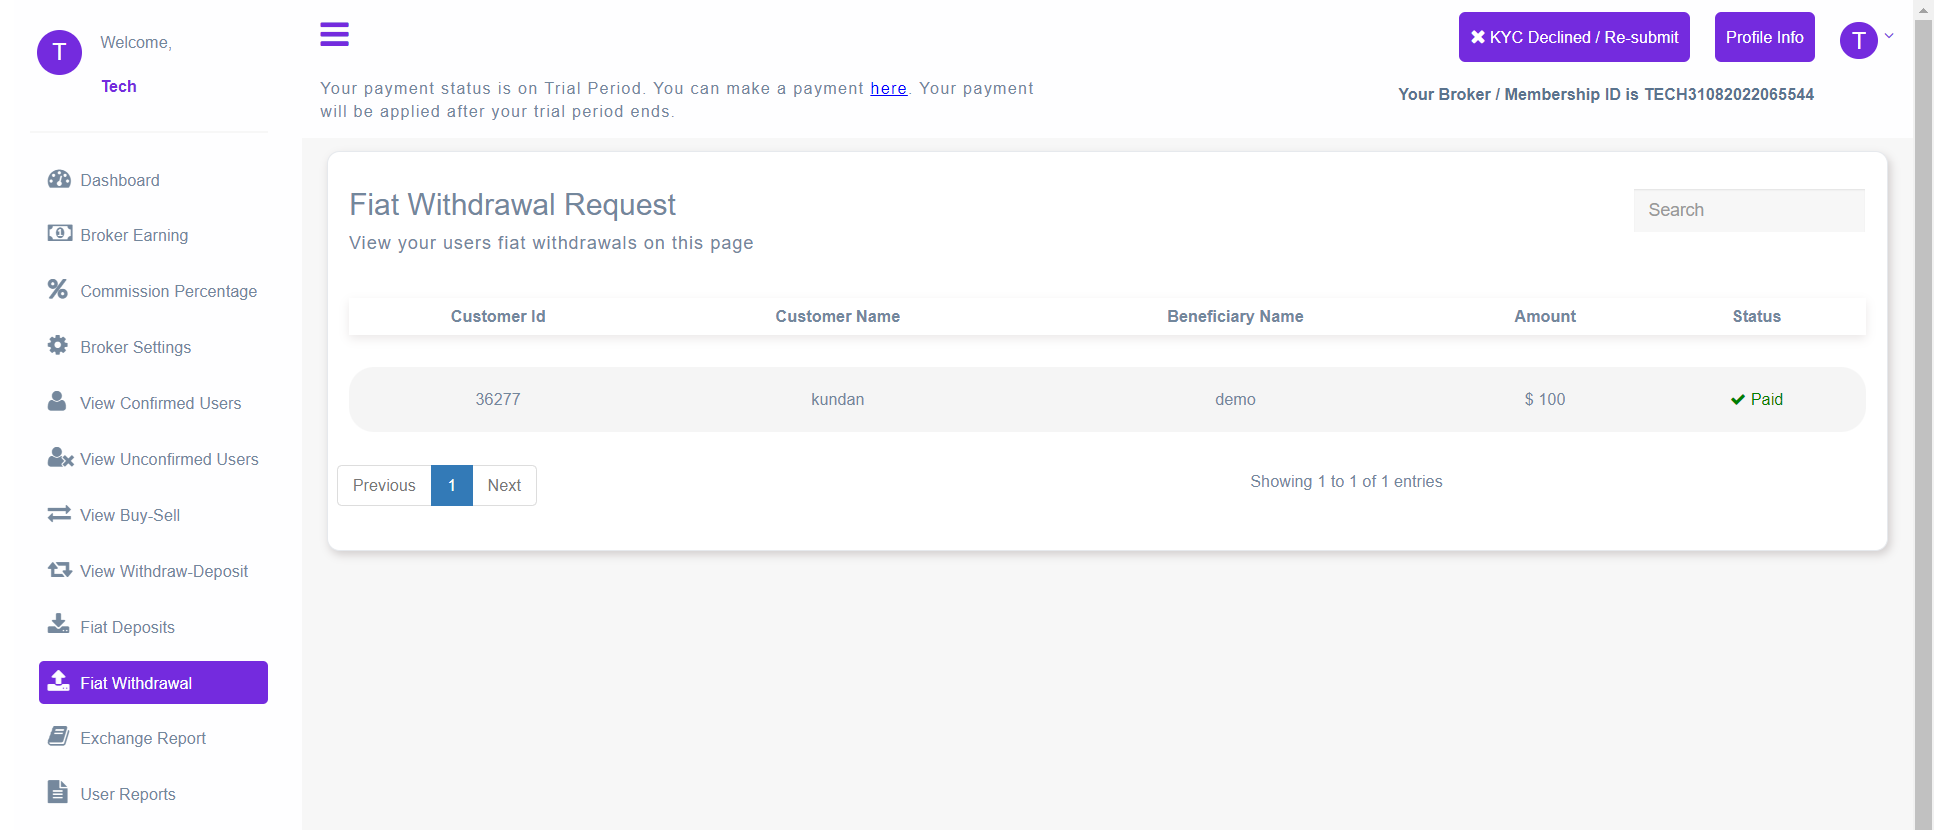
12. Fiat Withdrawal
Under ‘Fiat Withdrawal ’ you can see the entire Status like pending, paid & decline withdrawal requests from the customers.
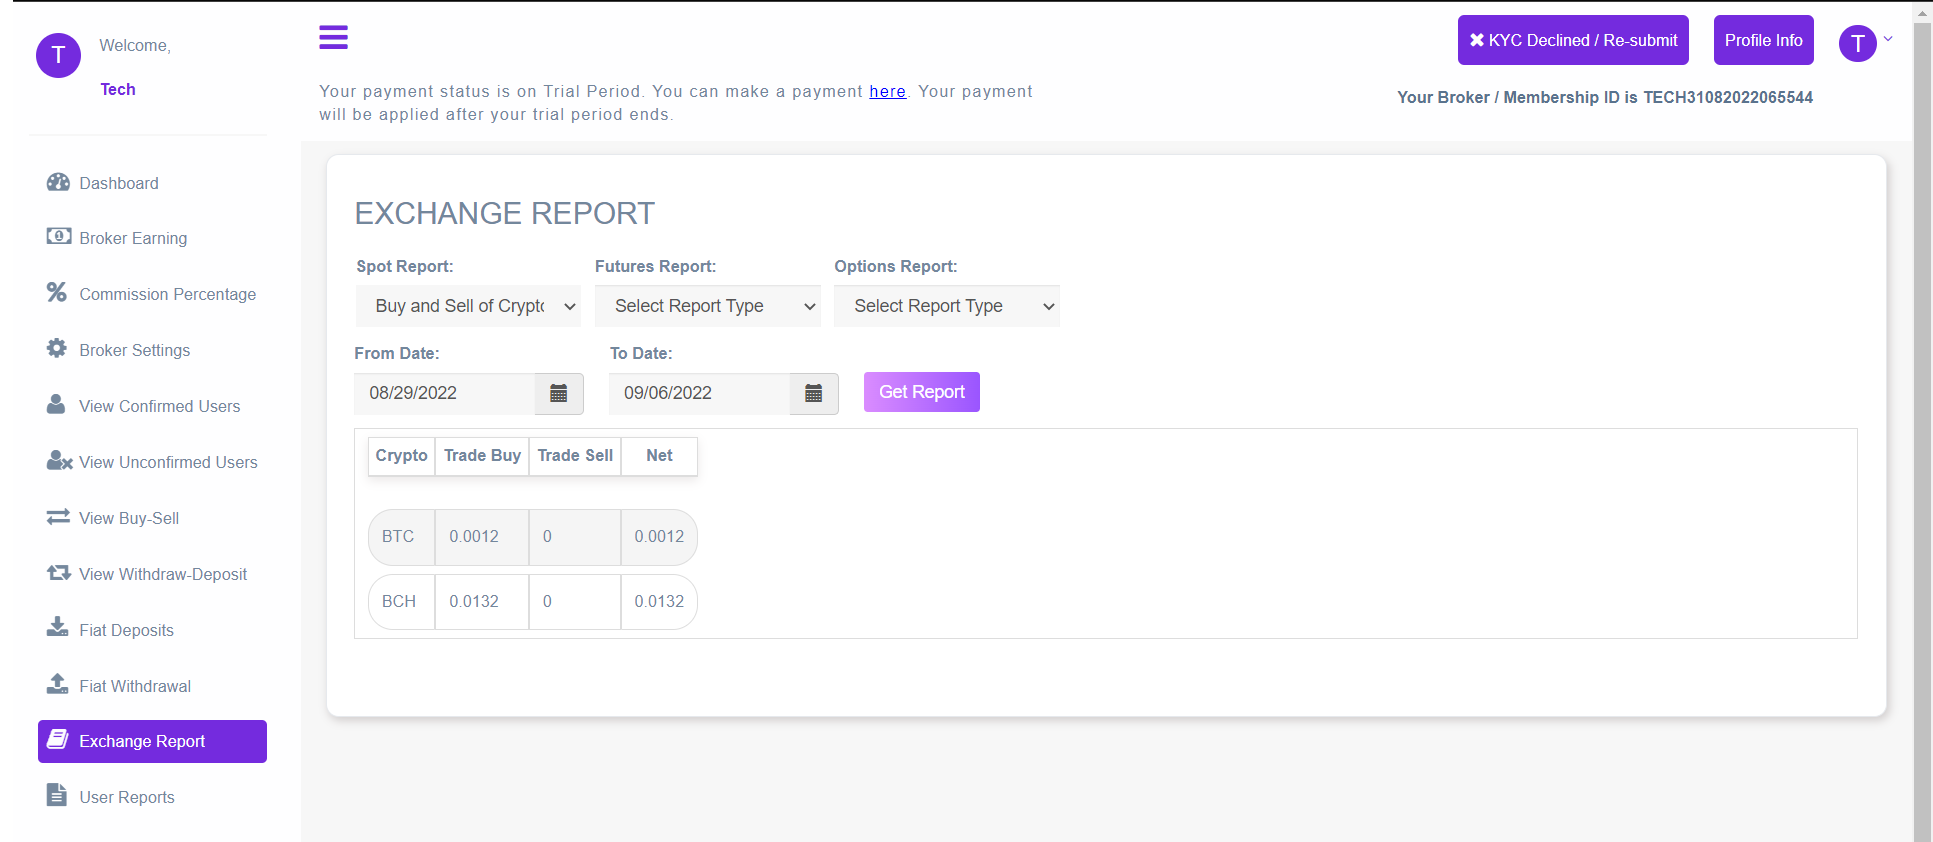
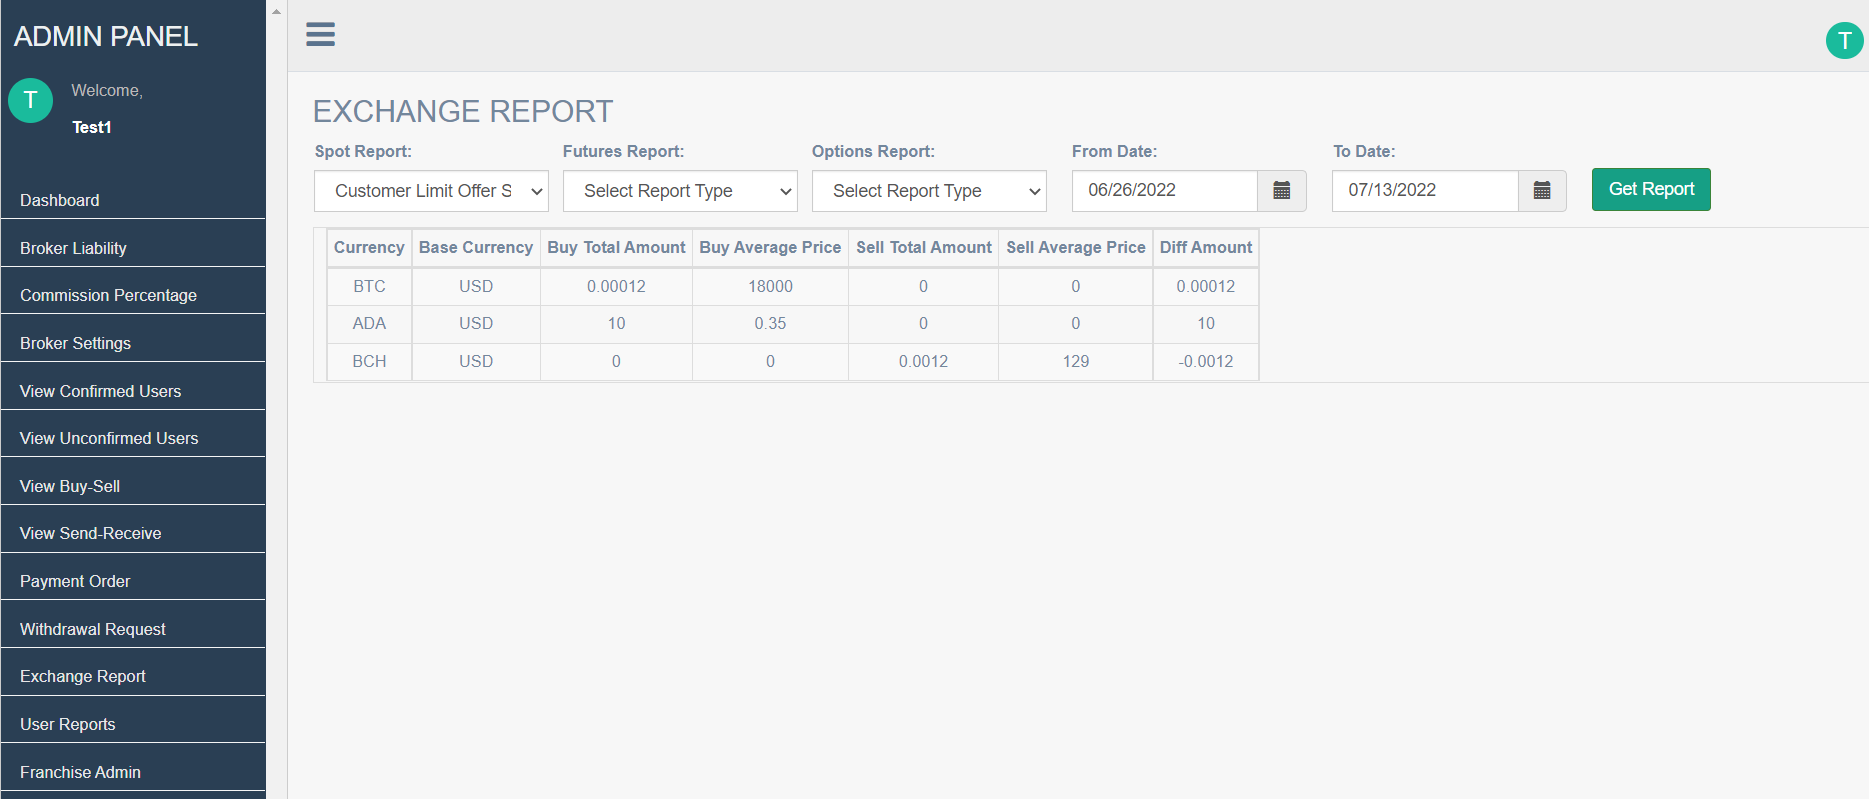
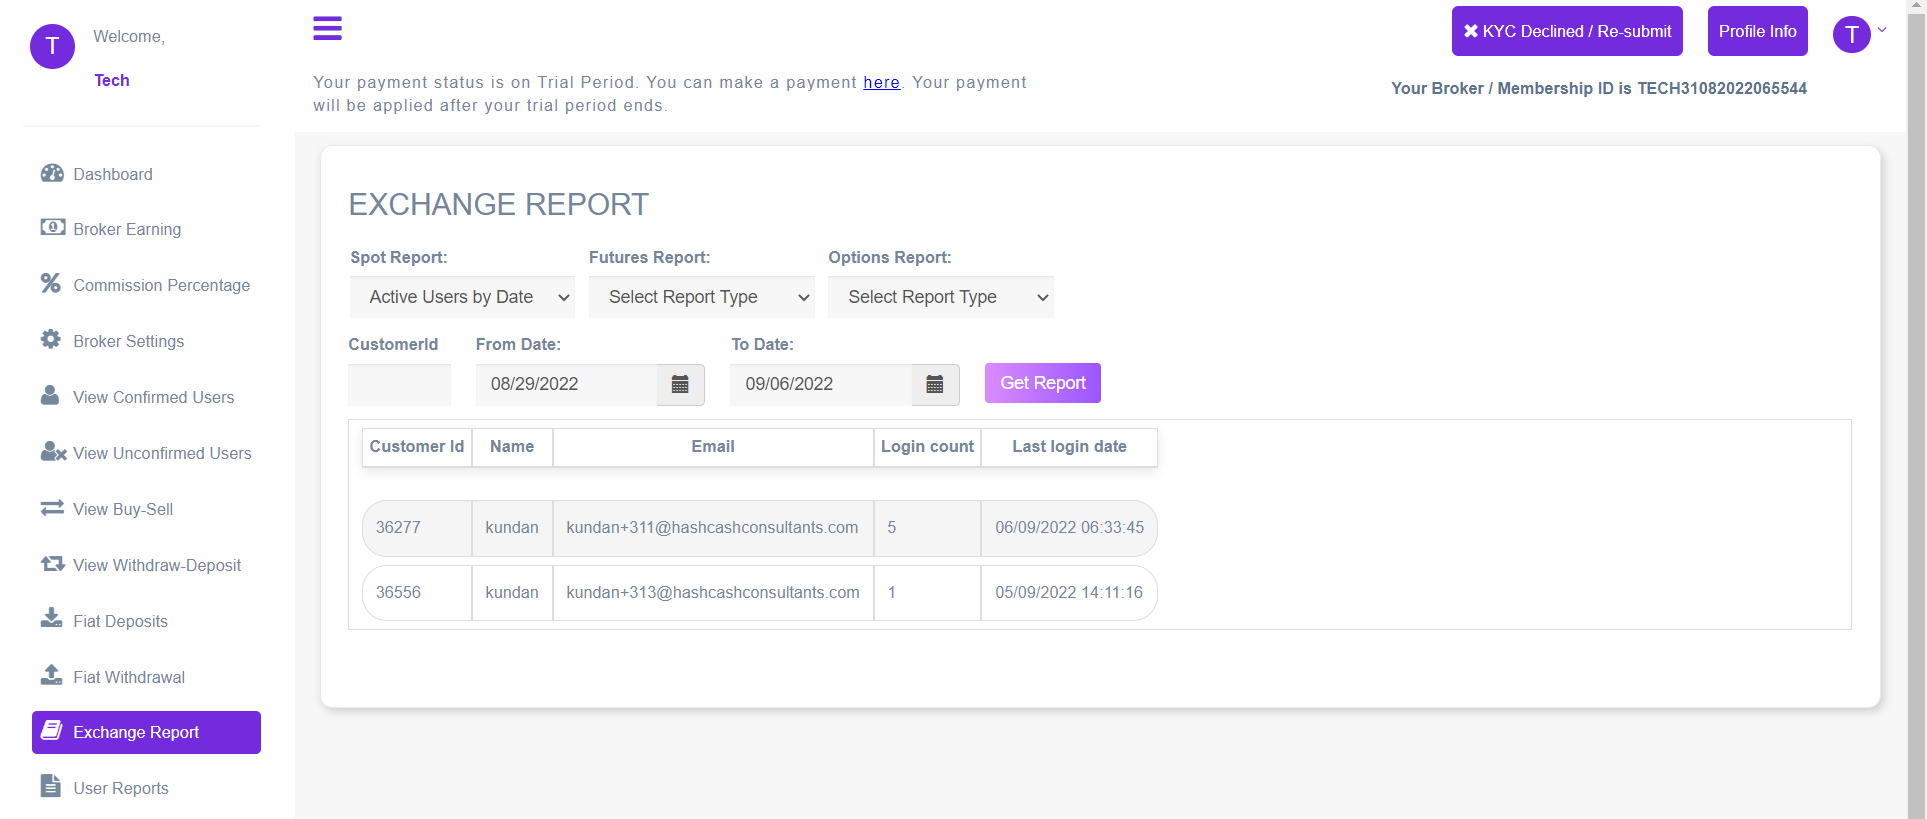
13. Exchange Report
You can get reports of each of the following operations from here.
1. Earning in Transaction Fees: It displays the earnings of the exchange on each transaction done by users.

2. Buy and Sell of crypto assets summary: It displays the summary of Buy and Sell of currencies and the difference of the Buy and Sell.
3. User Balance by Crypto Assets: It will display the balance of selected cryptocurrency.

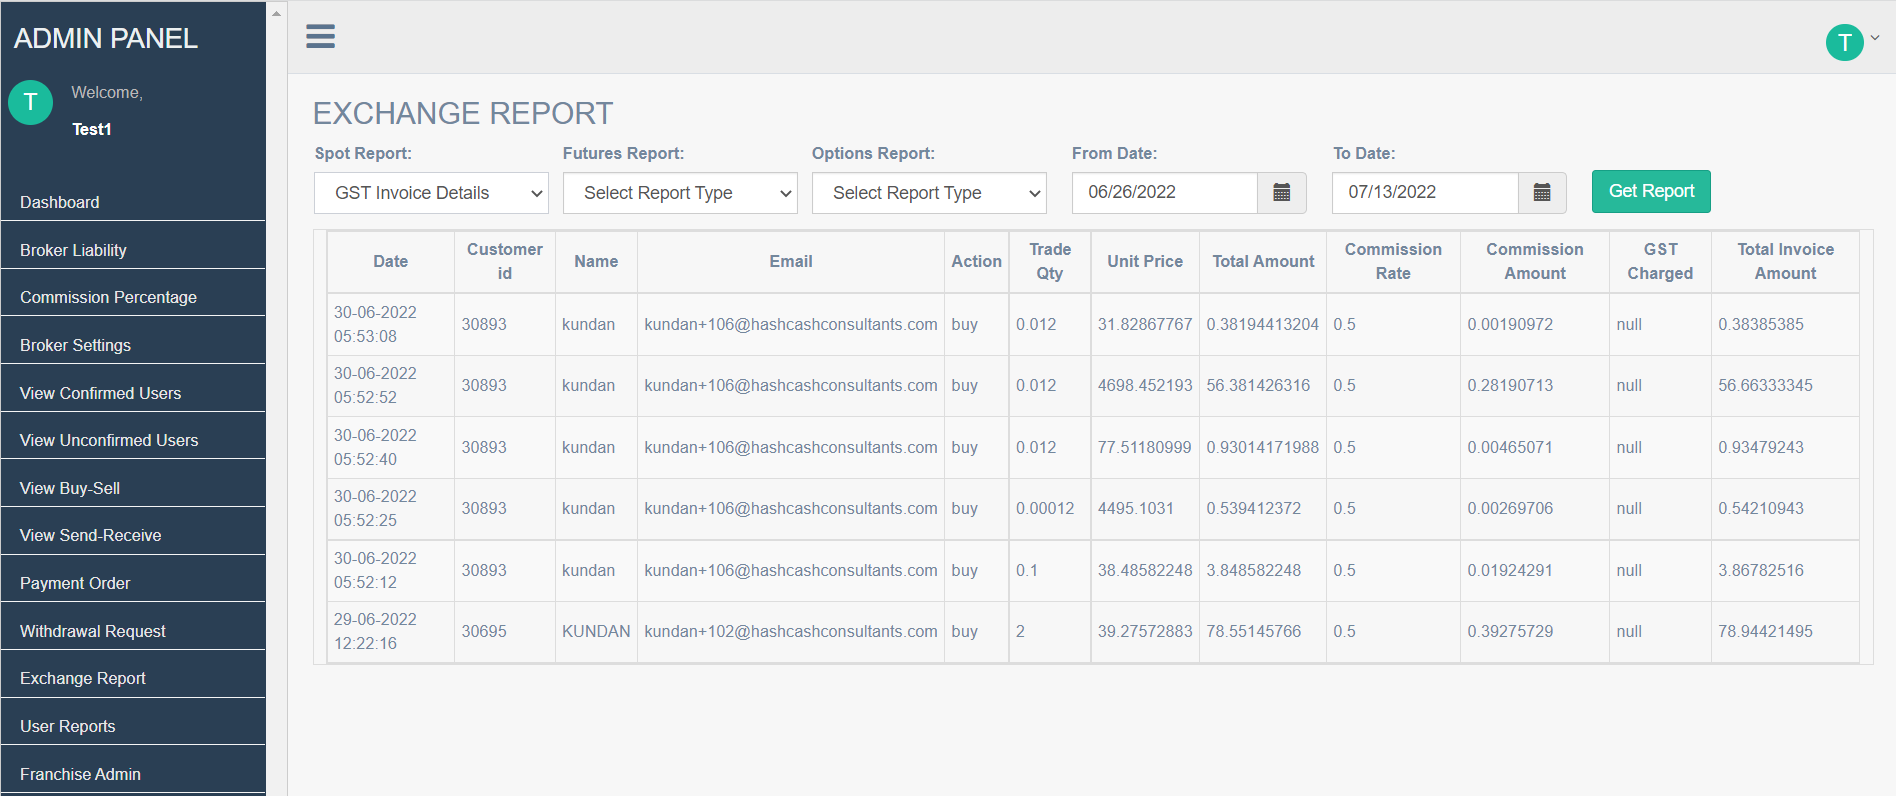
4. GST invoice Details: Its showing all the information related to GST invoices.
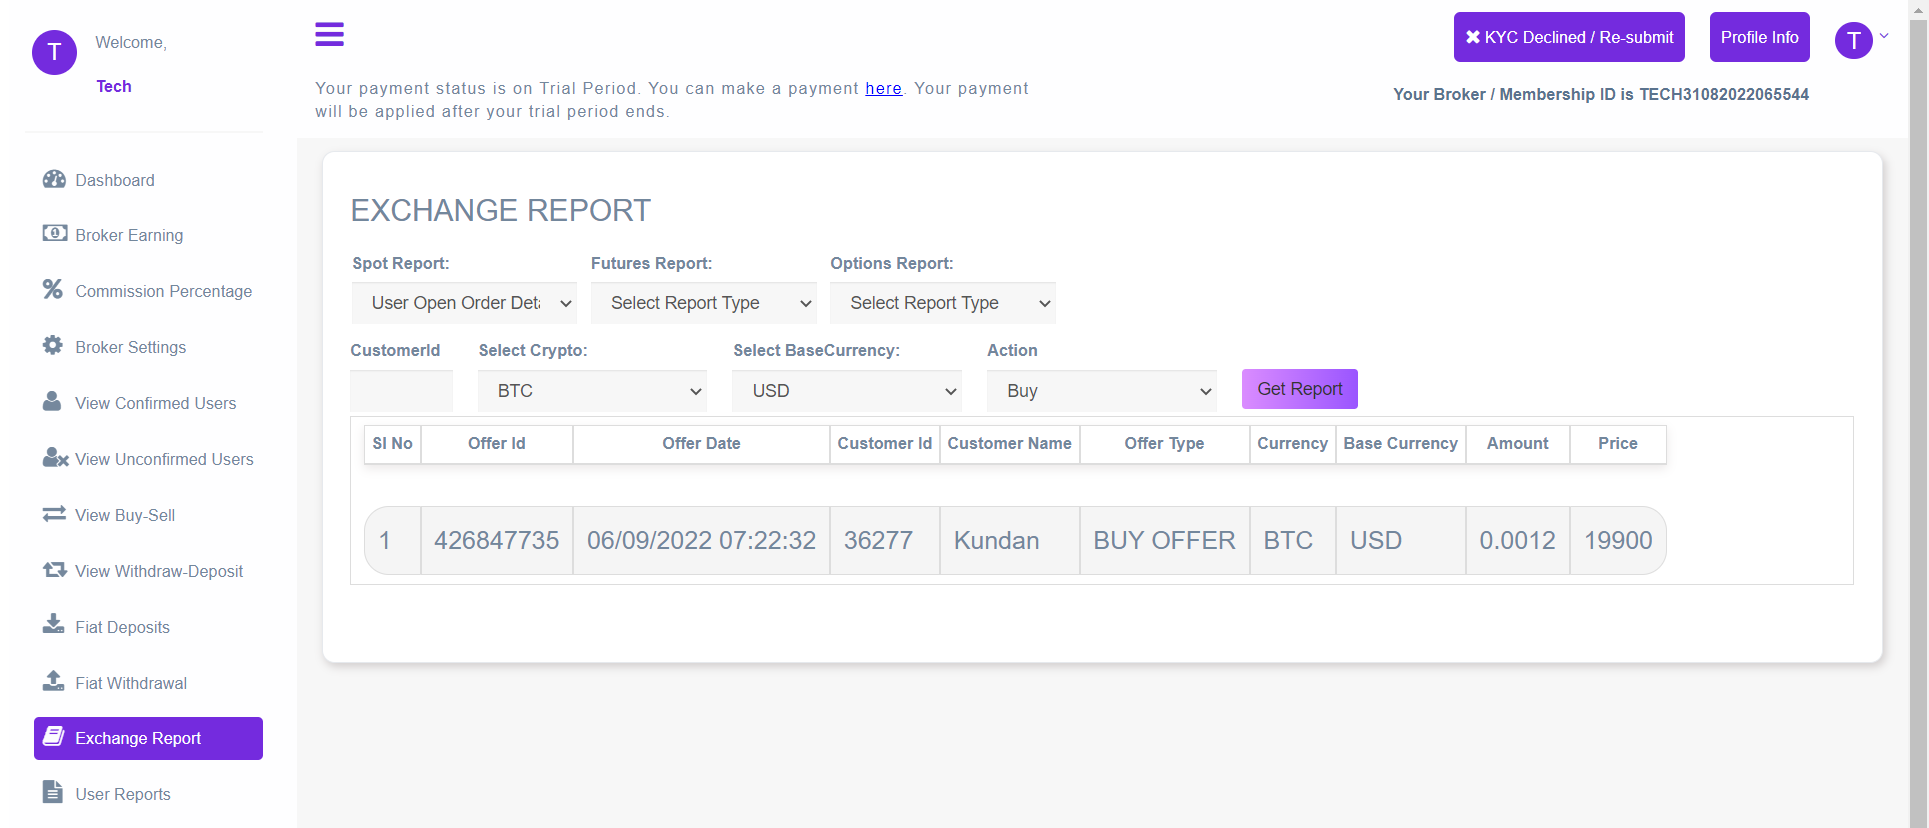
5. User open order Details: It displays the Limit Offers of the customers created from the exchange's trade front end.
6. Open order Summary: This report displays the difference between the Total Buy and Sell of the limit offers created by the users.
7. User fiat deposit info: This report shows the Payment Orders approved by the admin with Confirmed status.
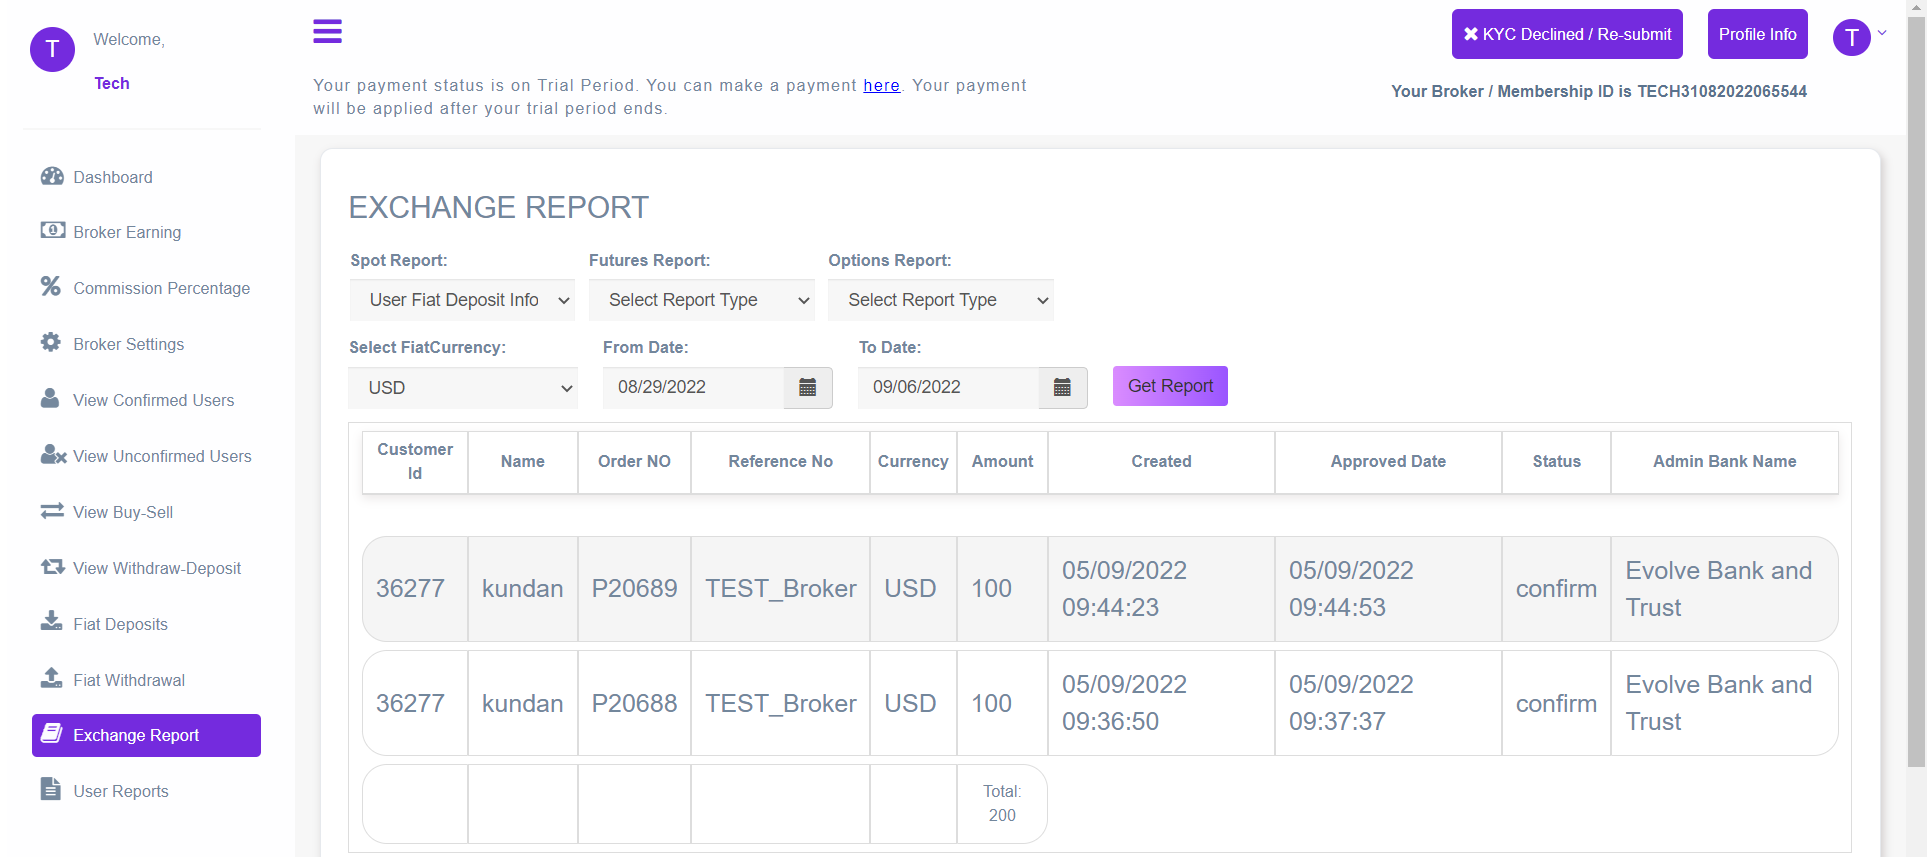
8. User fiat Withdrawal info: This report shows the Withdrawal approved by the admin with Confirm status.
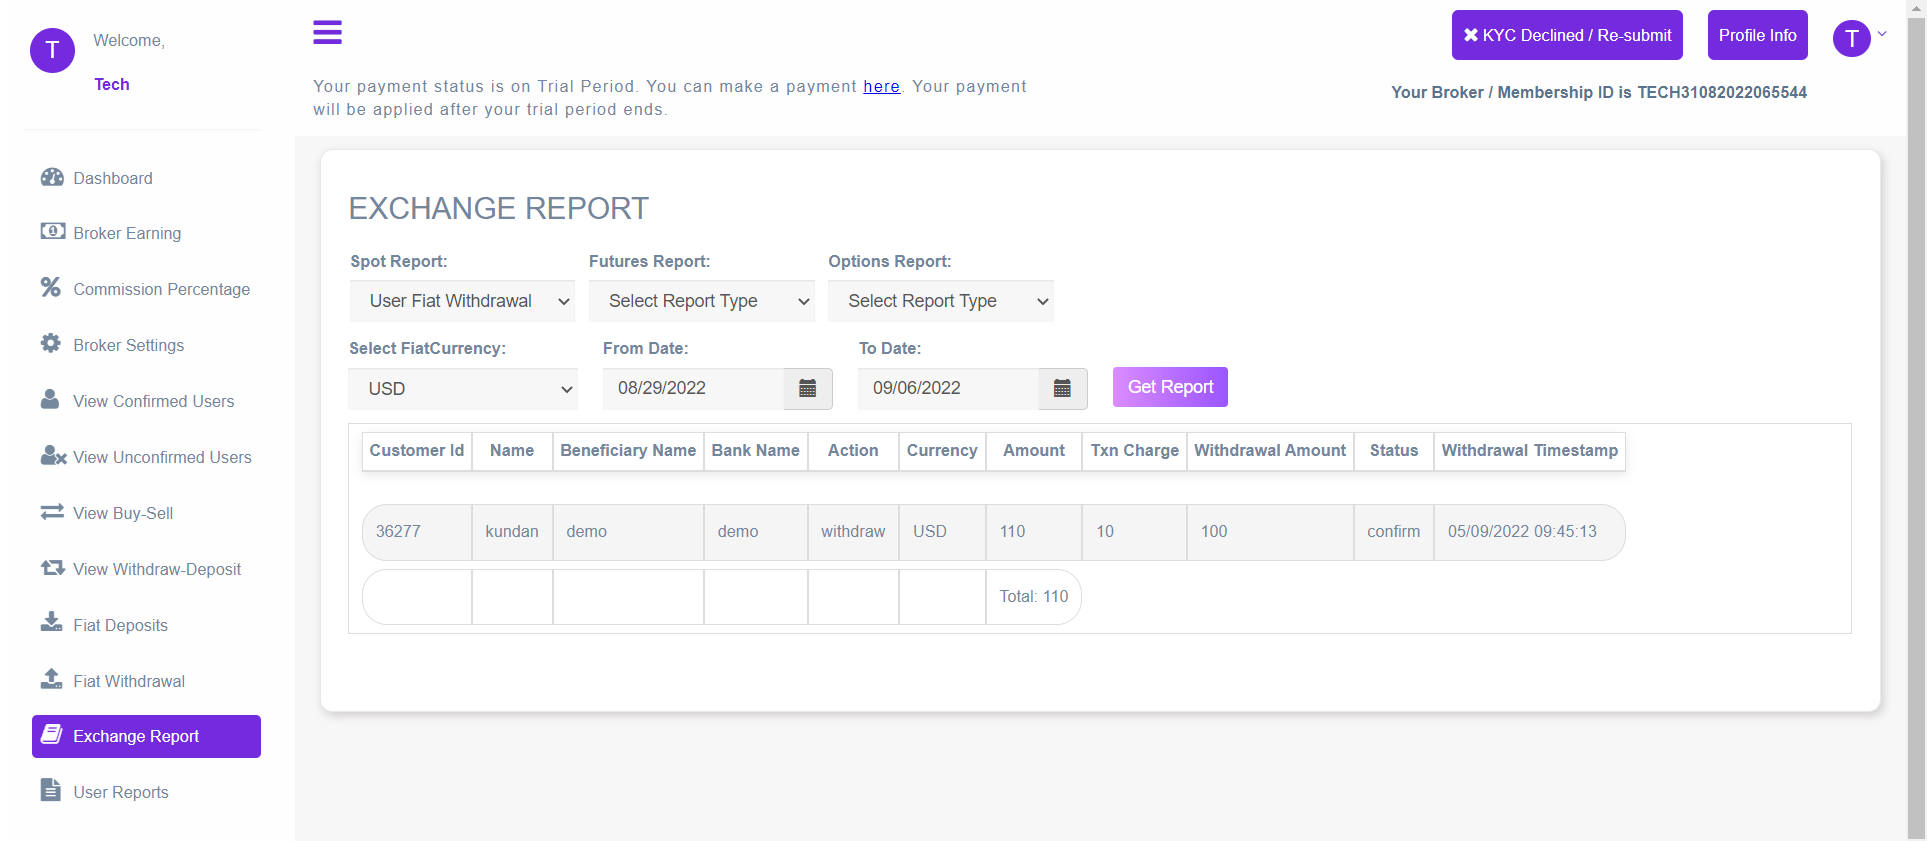
9. Users Registration Details By Date:
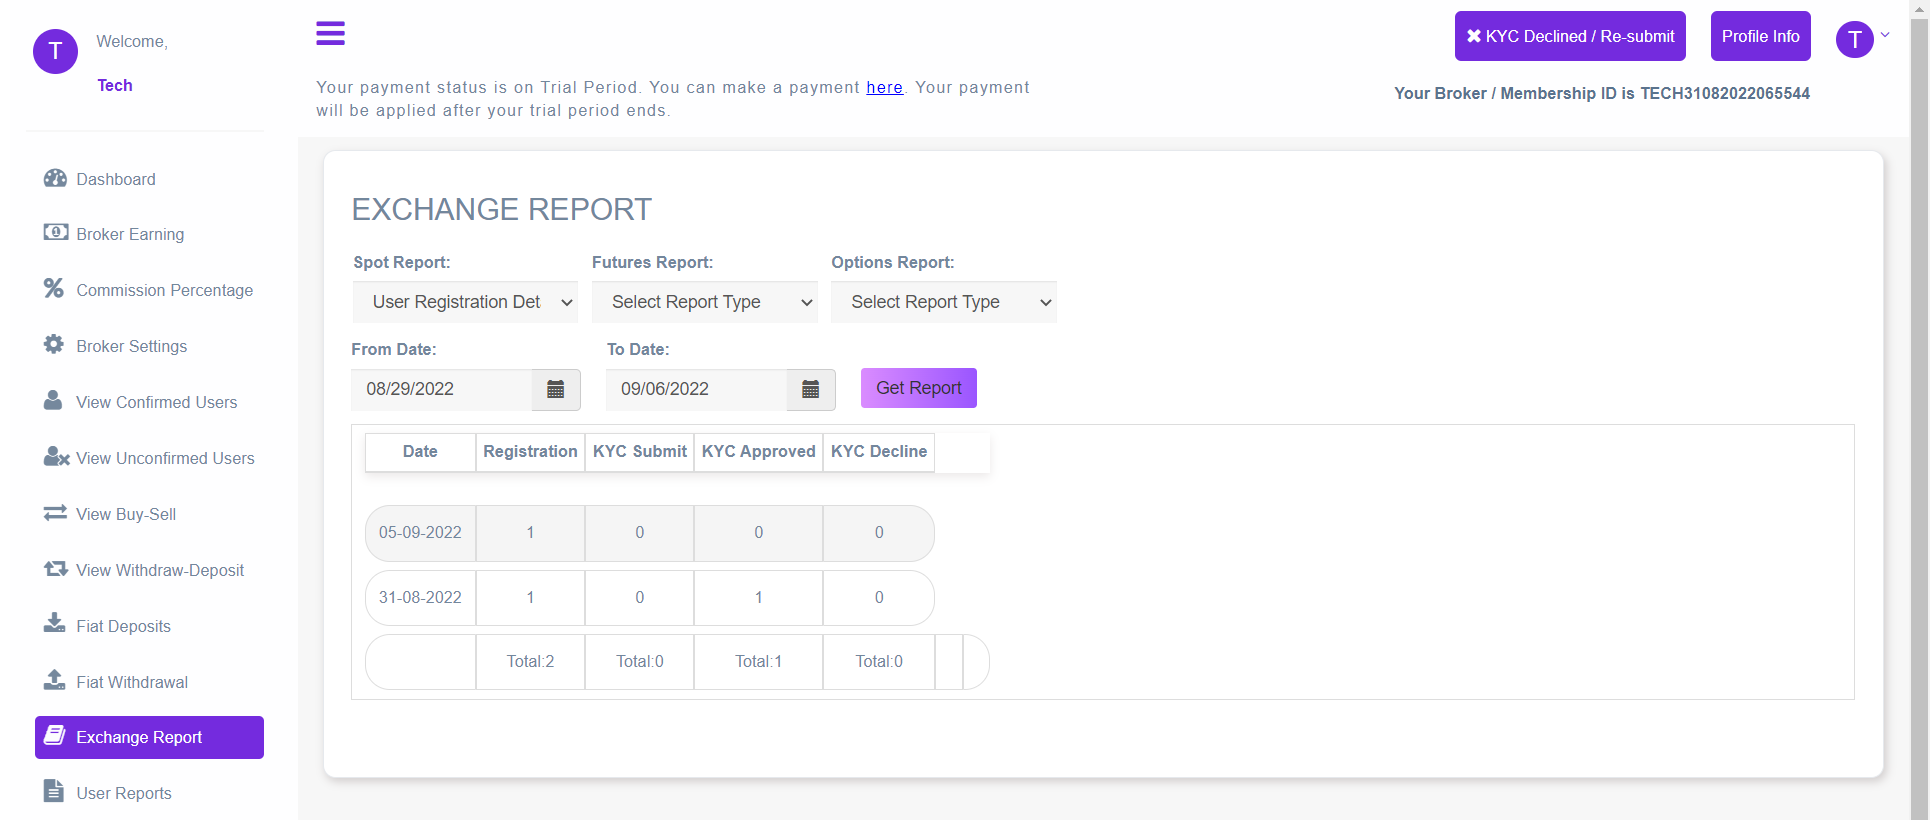
10. Active User By Date:
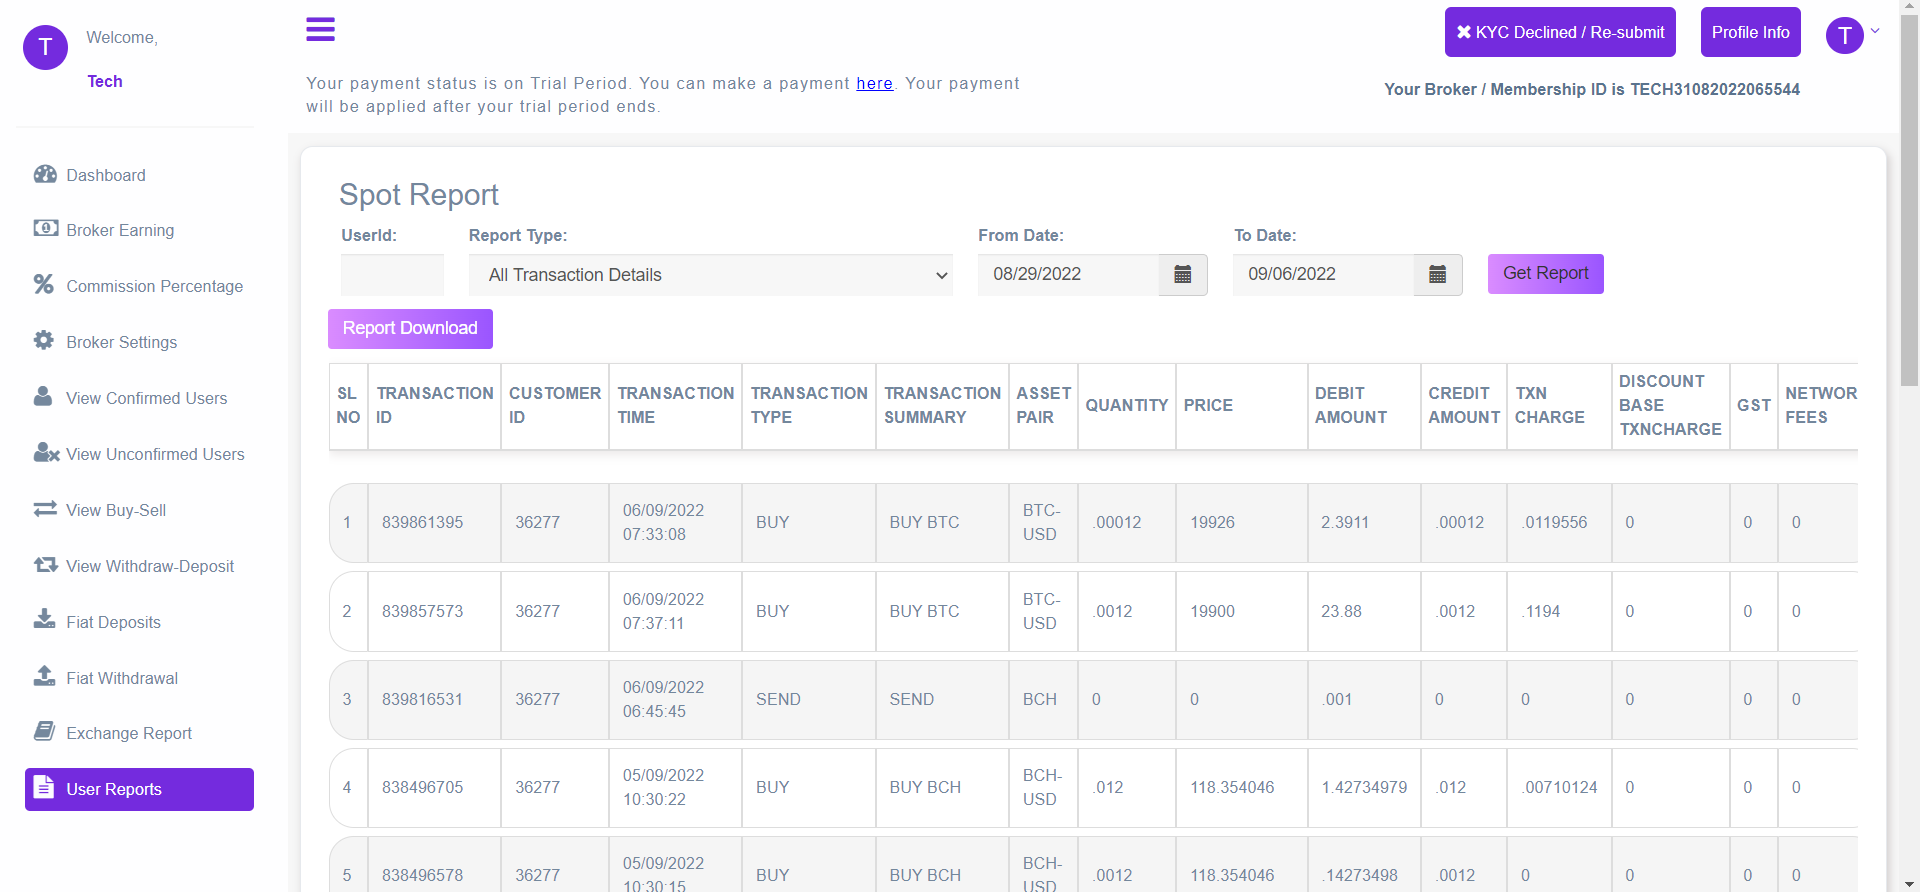
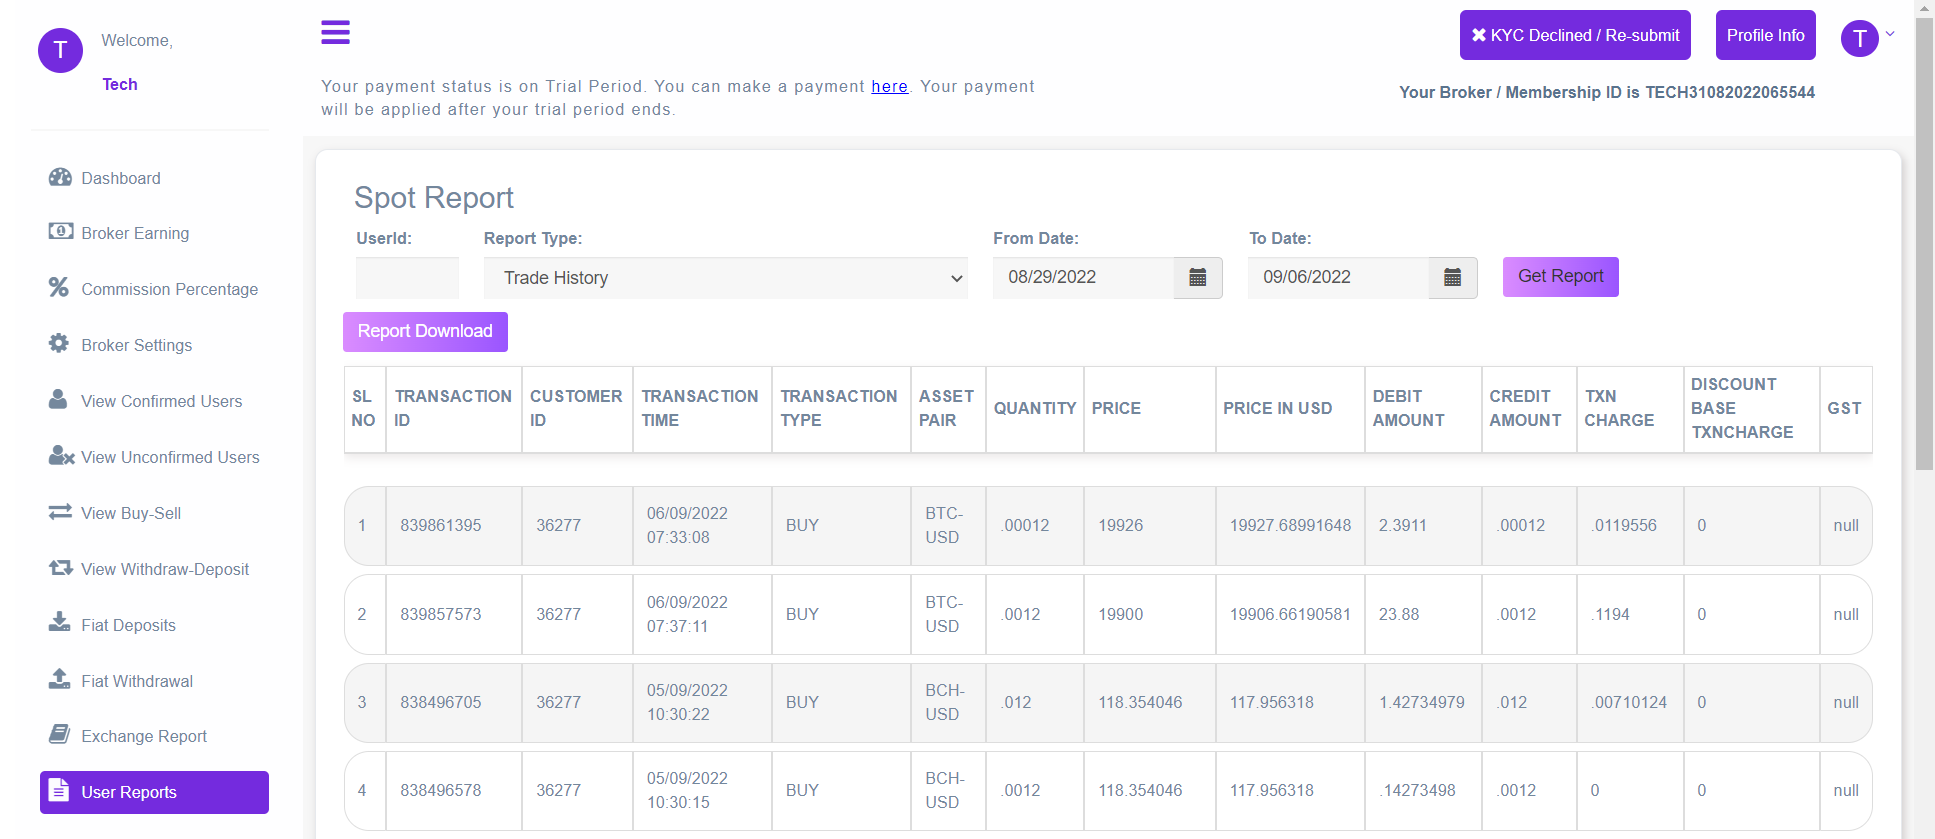
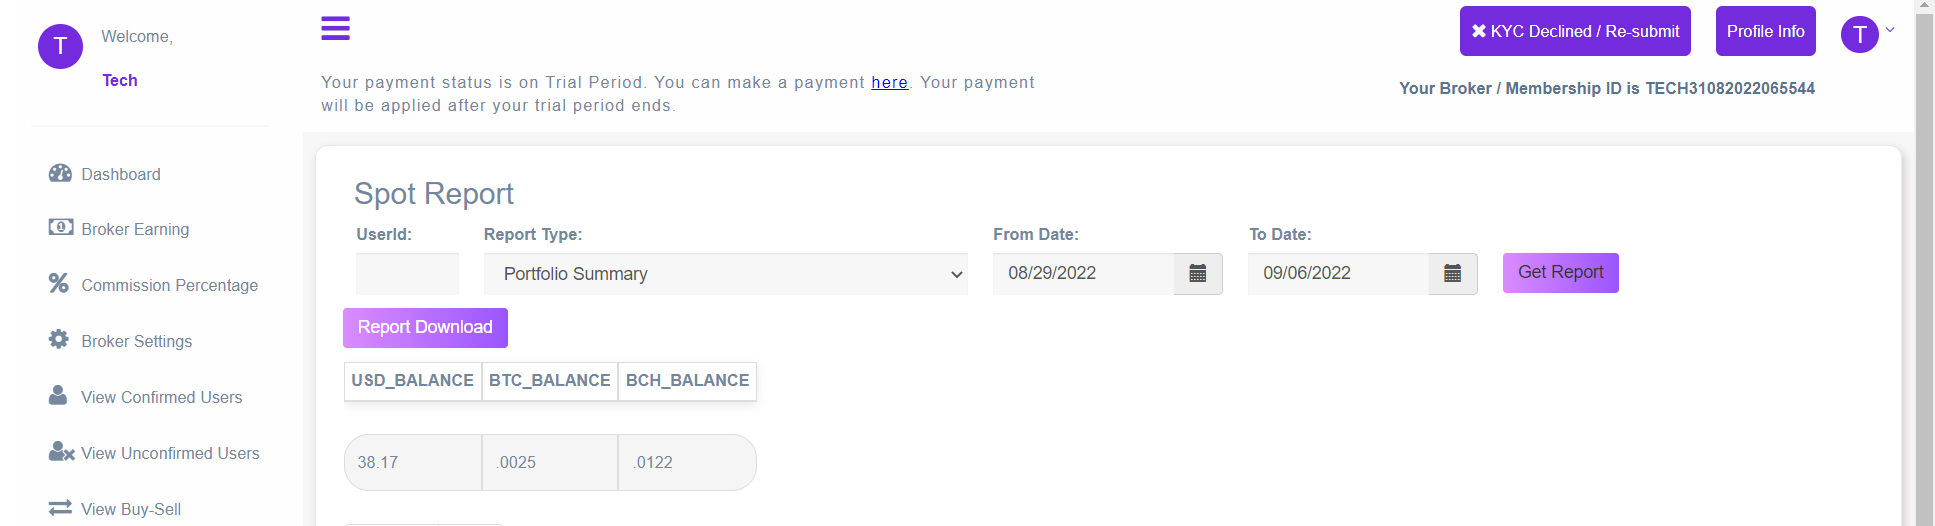
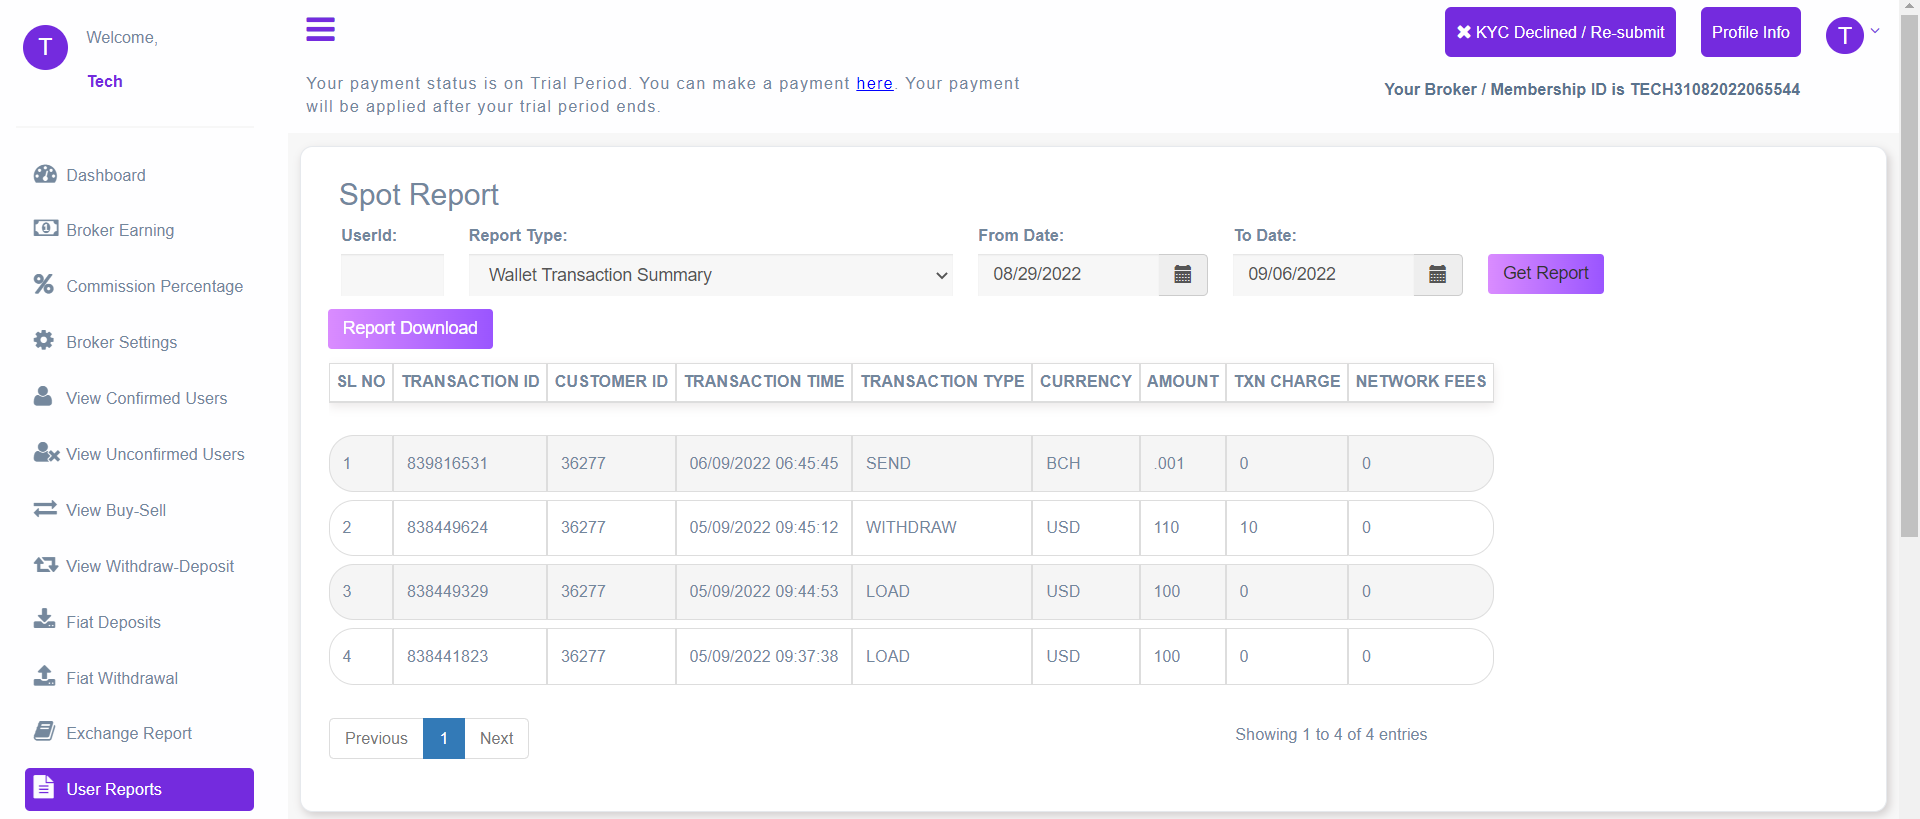
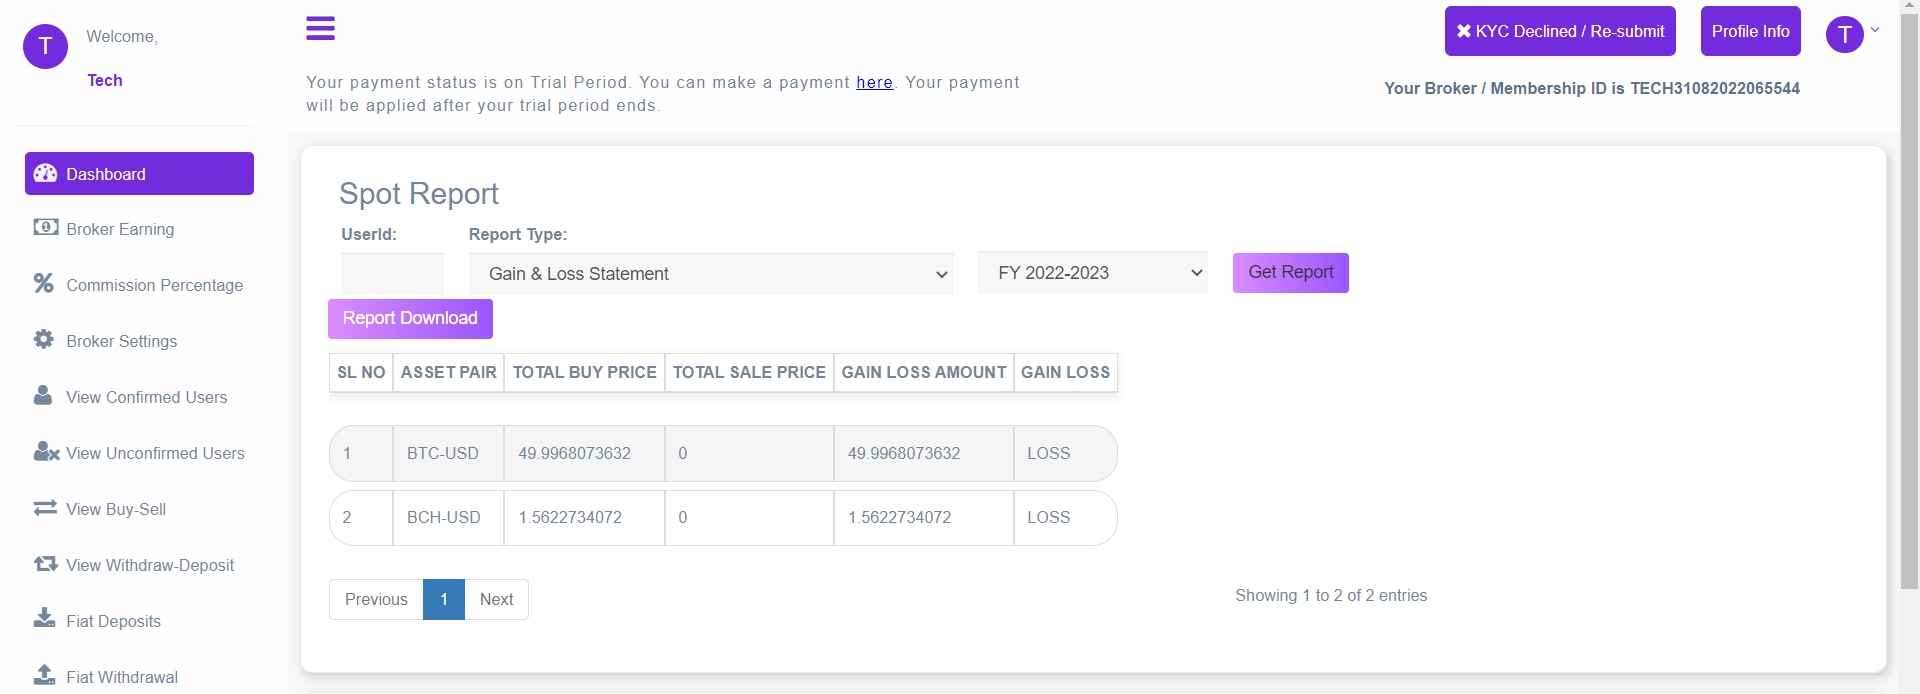
14. User Reports
Spot:
In this section, we can see the overall status of all user activities. From this panel we can download reports for the following user activities:
i. All Transaction Details: This transaction displays the Load, Send, Receive, Withdraw, Buy, and Sell done by the users.
ii. Trade History: This report displays the Buy and Sell transactions of all users.
iii. Portfolio Summary: This report displays the wallet balance of all the customers together if no user id is selected.
iv. Wallet Transaction Summary: It displays the Load, Send, Receive, and Withdraw done in the Exchange Spot section.
v. Gain and Loss Statement: It displays gain or loss in a particular currency pair.
B. Futures Reports:
In the report section, we can see the overall status of all user activities. From this panel we can download reports for the following user activities:
- All Transaction Details: This transaction displays the Load, Send, Receive, Withdraw, Buy, and Sell done by the users in futures.
- Gain and Loss Statement: It displays gain or loss in a particular currency pair in futures.
- Client Open-Position Report: This report displays the Limit Offers created from the exchange in future by users.
- Margin settlement report: When a user closes an open contract from My Trades, then the closed contract comes under this report. This report displays the margin settlement of all the customers together if no user id is selected in futures.
- Positional Trade Report: When a user buys or sells from the market or fulfills an offer, an open contract comes under My Trades. That My Trades data is displayed in this report. This report displays all the users who have done Positional trade in the Exchange futures section.
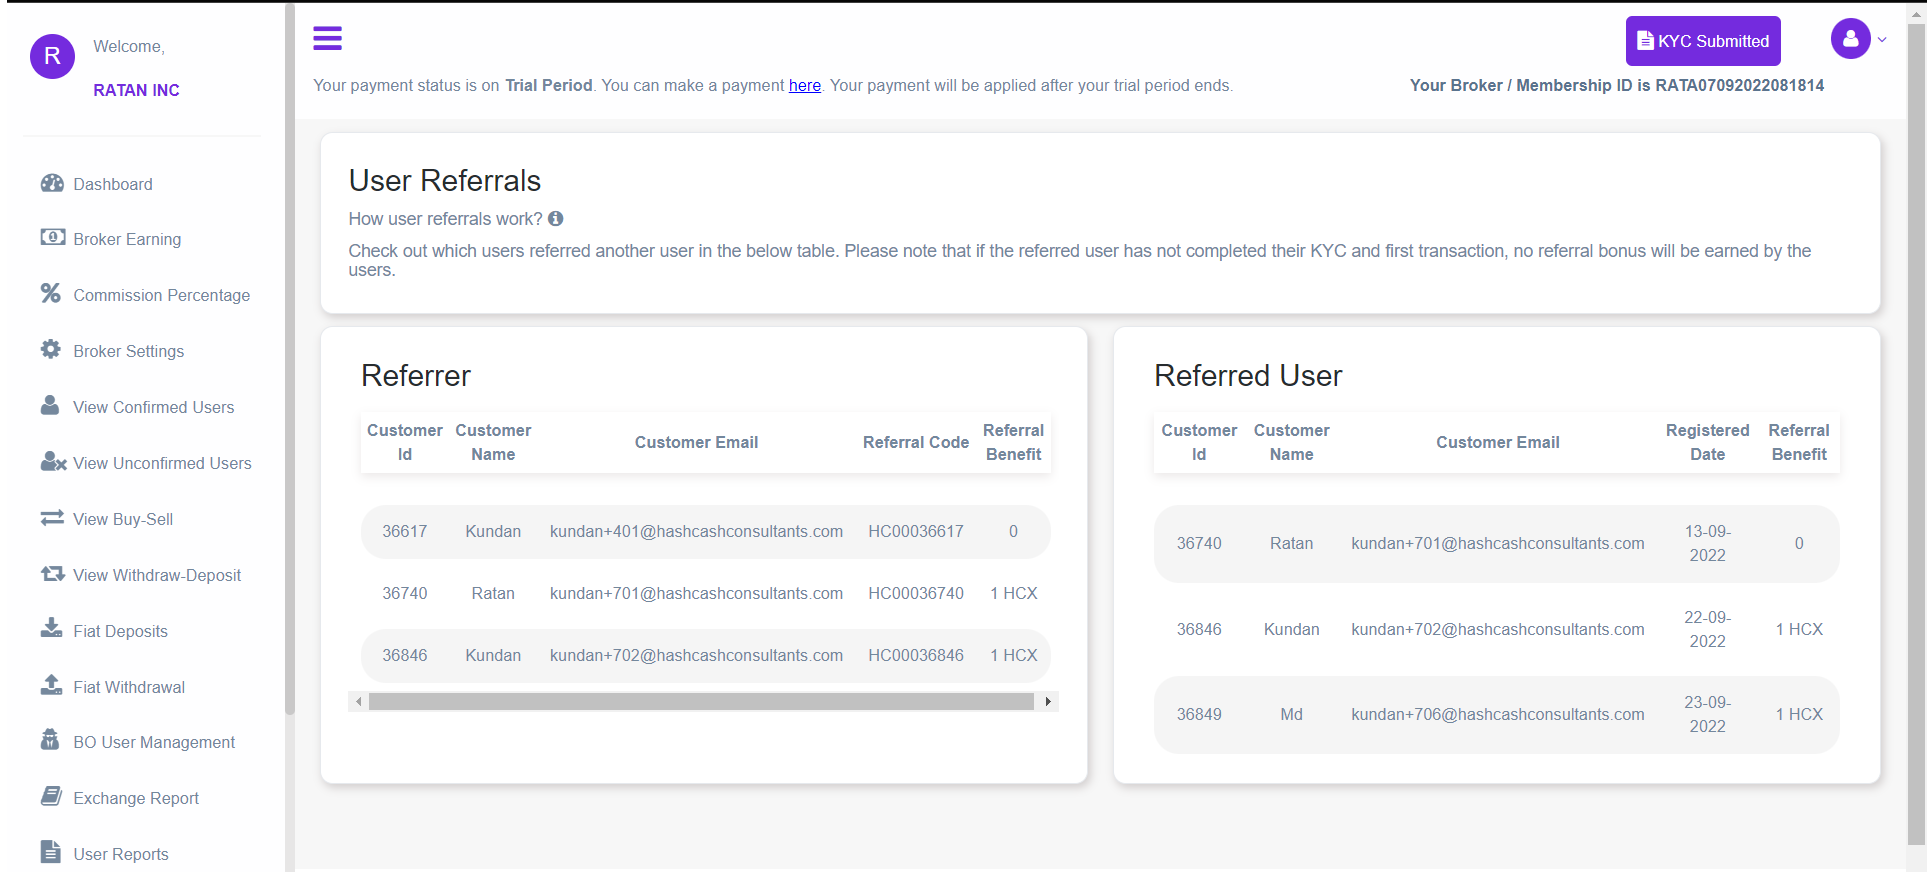
15. User Referrals
You can see the list of referrers and referred users from this panel.
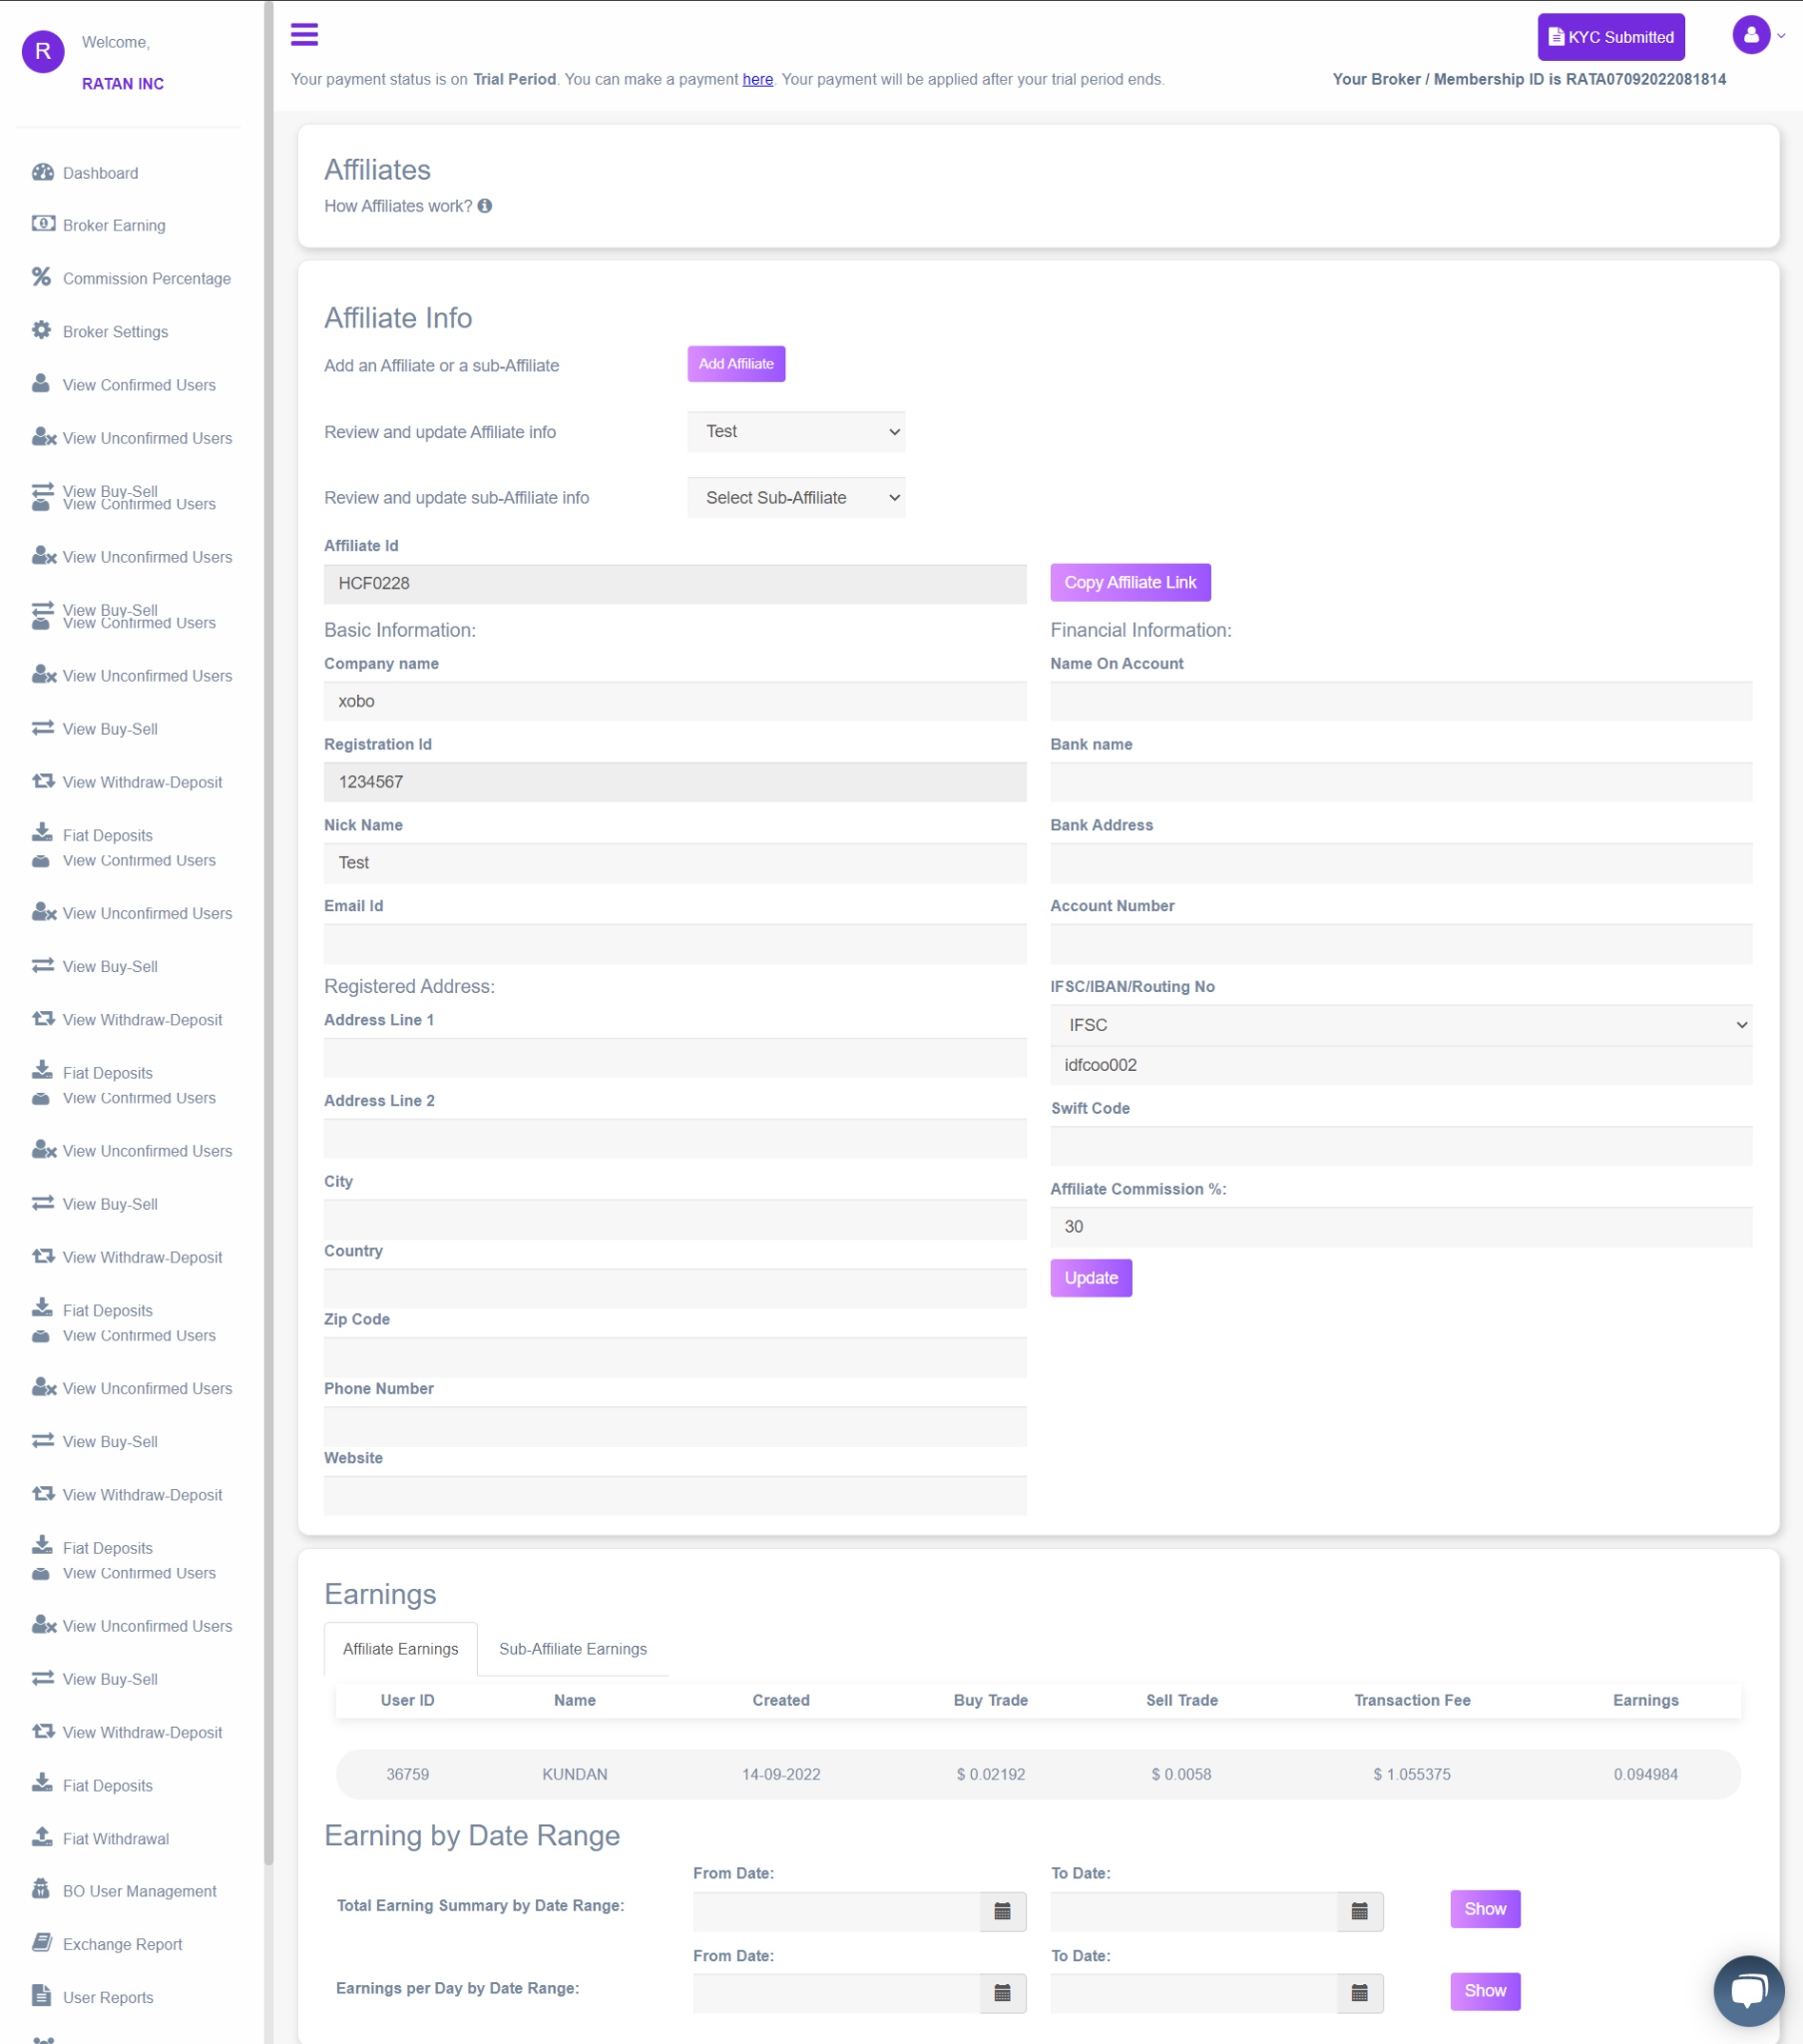
16. Affiliates
You can add a New Franchise & Sub-Franchise and update existing franchise information in this panel. You can also check the earnings of franchises in the earning by user section.