Dashboard
The Dashboard is the main control center of BitoDesk. From here, you get a quick snapshot of your support activities and team performance. It lets you monitor ticket status, agent availability, and recent activity—all in one place.
What Can You Do in the Dashboard?
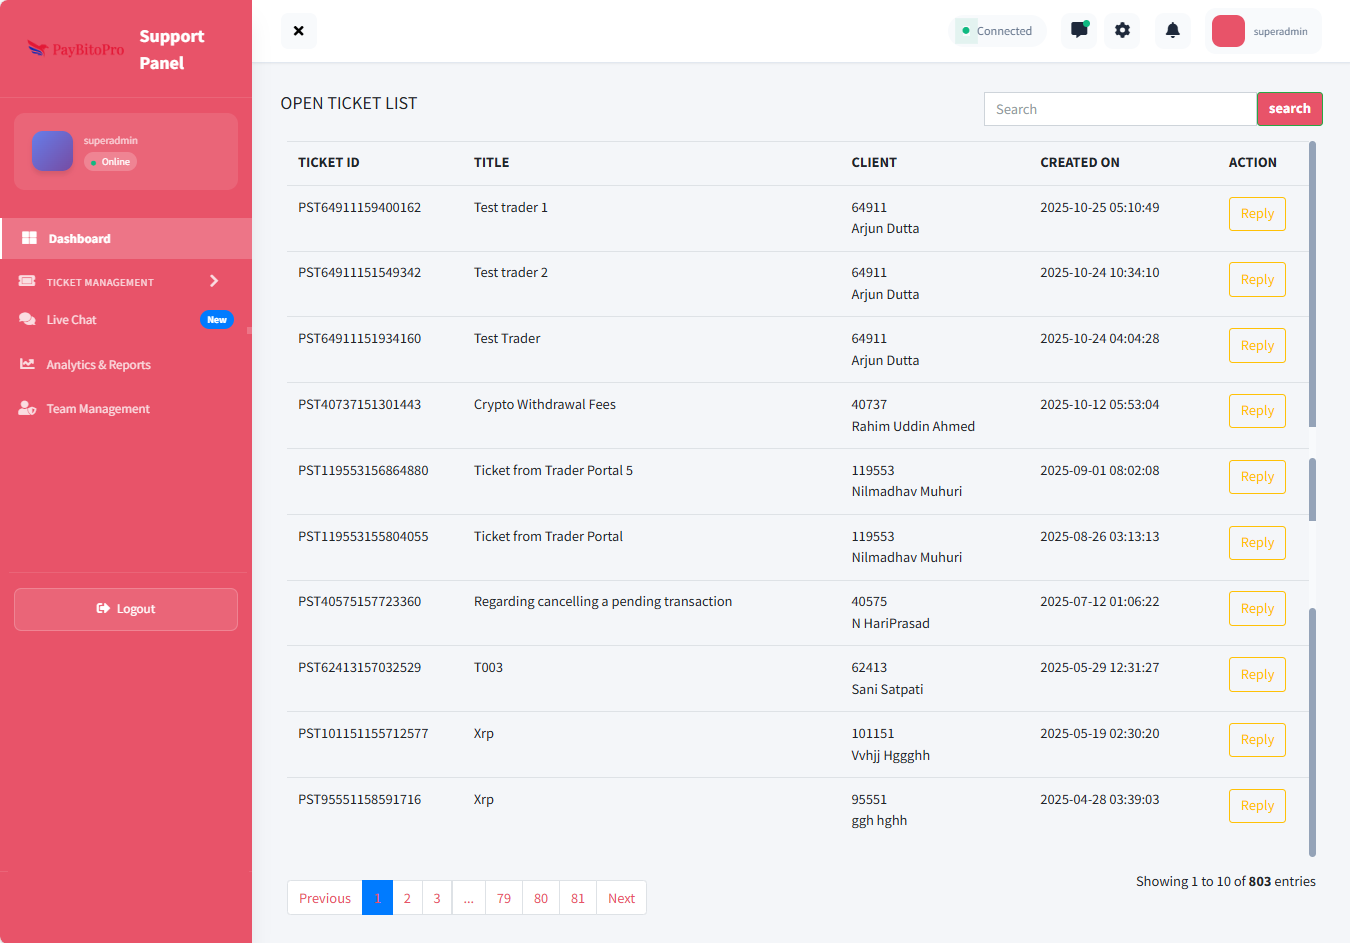
View Open Tickets
Instantly see the list of all active support tickets. Track details like Ticket ID, Title, Client Name, Created On (date/time), and Action options. Use the search bar to quickly locate specific tickets using keywords or Ticket ID.
Monitor Agent Status
View your status (Online/Offline) and role (Super Admin/Admin/Agent). See the connection status at the top right so you know if your support panel is connected in real-time.
Frequently Asked Questions
The Dashboard is the main control center of BitoDesk. It provides a quick snapshot of support activities, including open tickets and agent status.
You can view the Ticket ID, Title, Client Name, Created On (date/time), and available Action options for each active support ticket.
Use the search bar at the top of the ticket list and enter a keyword or Ticket ID to instantly locate the ticket.
A connection indicator is displayed at the top right of the screen, showing real-time connection status.
Ticket Management
The Ticket Management section helps you track, manage, and take action on customer support tickets. All client-created support requests are categorized here by status, making it easy to follow up and respond efficiently.
Ticket Management Subsections
1. Open Tickets

Displays all active tickets that require attention. You can view key details like Ticket ID, Title, Client Name, Created On (date/time), and available actions (view, reply, update status). This section ensures nothing slips through the cracks and pending issues are handled promptly.
2. Closed Tickets
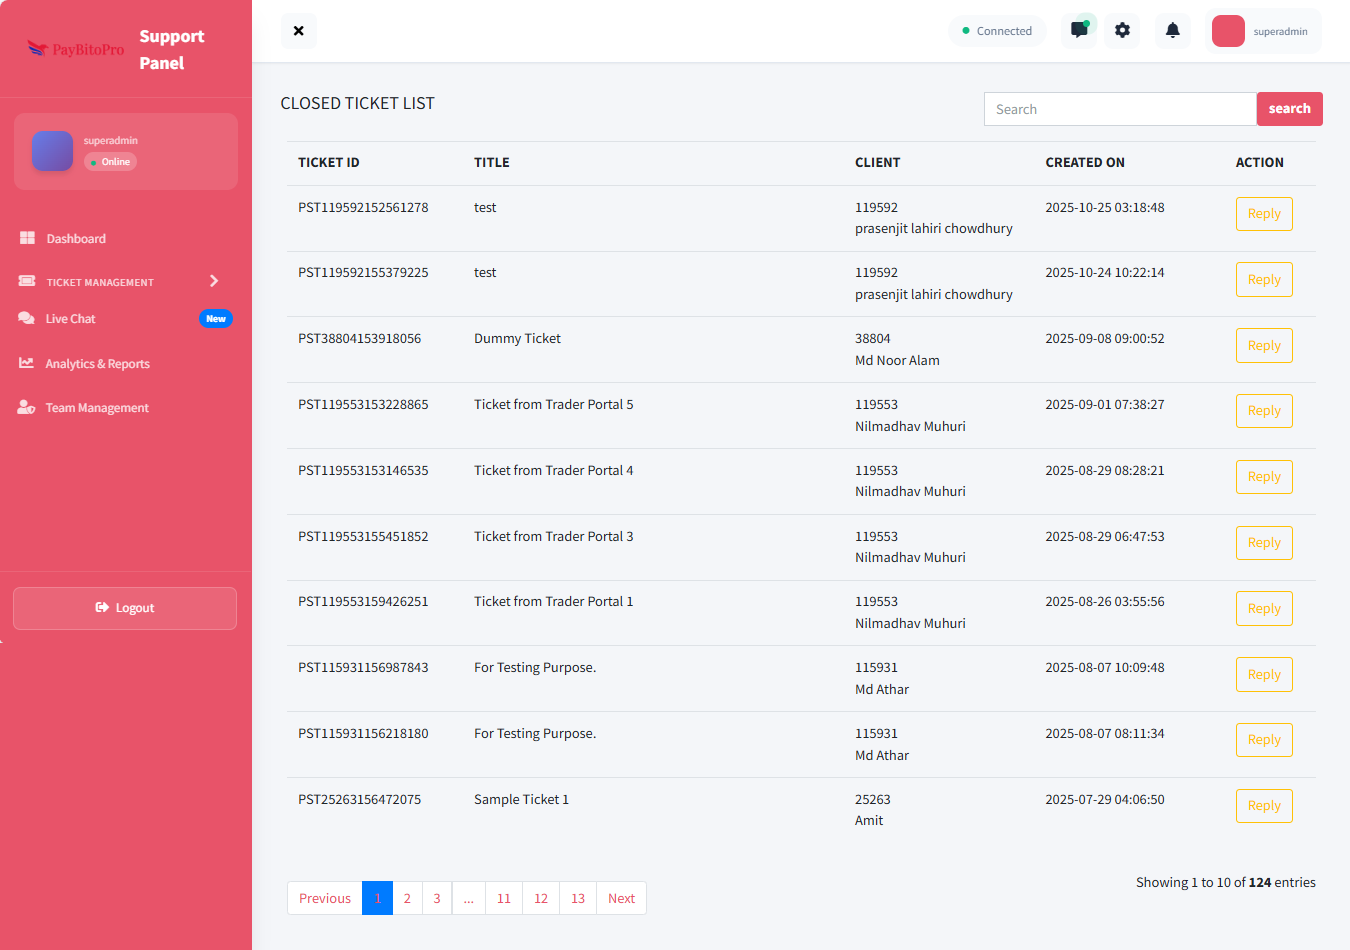
Shows tickets that have been resolved and formally closed. This section helps with reviewing past ticket history, auditing previous responses, and tracking ticket resolution performance. Helpful for quality checks and reference in case clients reopen a ticket.
3. Request Close

Displays tickets where agents have requested closure, but final approval is still pending. This ensures that no ticket is closed without proper authorization.
Request Close Features
- View the list of tickets waiting for closure approval
- See important details such as ID, Ticket ID, Client Name, Email, Request status, Notification status
- Use the search bar to quickly find a ticket using the Ticket ID or client details
- Click the "Request all users to close ticket" button to send bulk closure requests
Frequently Asked Questions
Ticket Management allows you to track, manage, and respond to customer support tickets efficiently. It categorizes tickets based on their status so that you can easily follow up and take action.
In Open Tickets, you can view all active tickets that require attention. You will see key details like Ticket ID, Title, Client Name, Created On, and available actions such as viewing, replying, and updating ticket status.
This option sends bulk closure requests to clients, prompting them to approve closing multiple tickets at once—saving time and reducing manual follow-ups.
Live Chat
The Live Chat section allows you to communicate with clients instantly and resolve issues in real time. This feature enhances the support experience by offering quick responses, reducing wait times, and improving customer satisfaction.
What You Can Do in the Live Chat Section
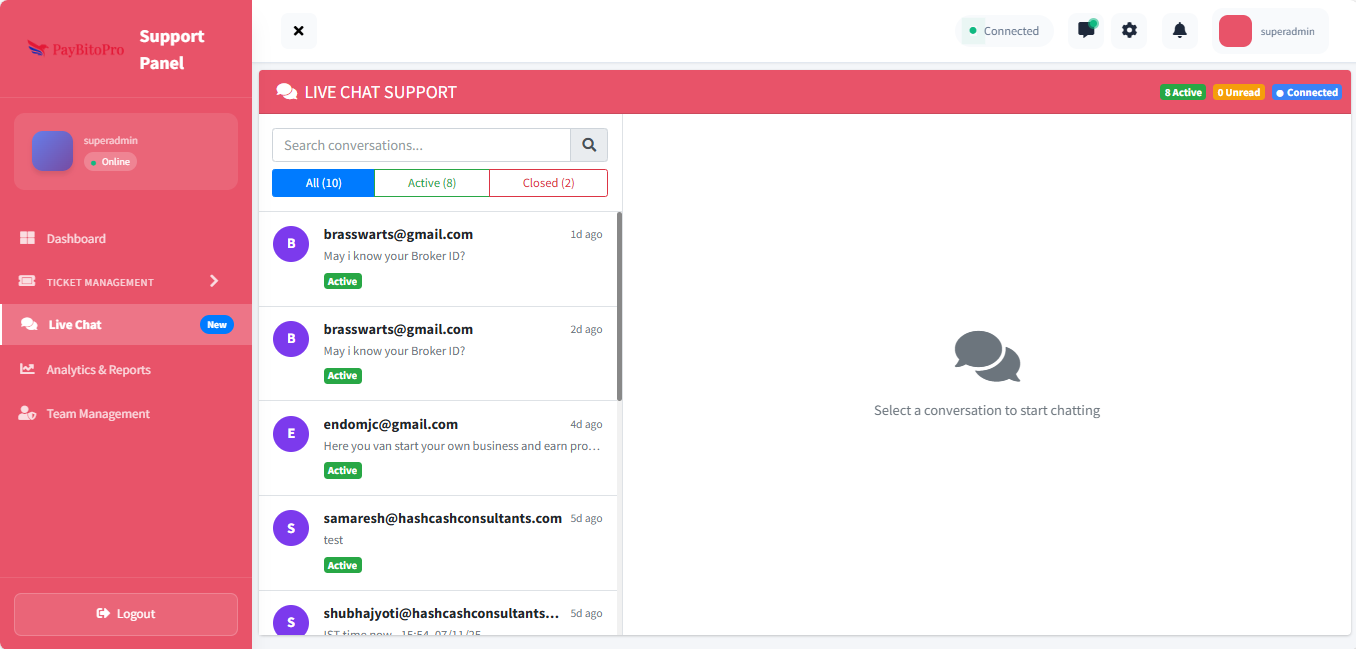
Search Conversations
Use the search bar to find past or active chat conversations using keywords such as user name or ticket ID.
Filter Conversations
Filter by status: All (every chat), Active (ongoing sessions), or Closed (resolved sessions).
Real-time Interaction
Read previous messages, reply in real time, and assign or transfer chats if needed.
Status Indicators
View Active Chats count, Unread Messages, and Connection Status at the top.
Frequently Asked Questions
Simply click on any chat from the list. The full conversation will appear on the right side, where you can type and send your reply without leaving the page.
Yes. If the customer sends another message on a previously closed chat, it will automatically move back to the Active list.
Chat Widget Settings
The Chat Widget Settings section lets you configure and customize the chat widget on your website. From visual styling to automated behavior and AI chatbot responses, this panel gives you full control over how visitors engage with your support team.

Basic Settings
| Setting | Description |
|---|---|
| Enable Chat Widget | Toggle ON to activate the chat widget. Visitors will see the support chat bubble. |
| Primary Color | Choose the main color to match your branding. Enter hex code (e.g., #f2545b) or use color picker. |
| Welcome Message | Enter the default message that appears when visitors open the chat widget. |
| Auto Greeting Delay | Define how long (in seconds) to wait before automatically sending the greeting message. |
| Email Collection | Choose whether to require visitor email before starting a chat. |
AI Chatbot Settings
Website URL
Displays the website URL that the AI chatbot will scan to learn content from. This allows the chatbot to respond intelligently based on your website's information.
Enable AI Chatbot
Toggle ON to activate the AI chatbot. When enabled, the AI chatbot responds to visitor queries automatically and reduces dependency on human agents for basic queries.
Time Delay to Switch to Agent
Enter how long the system should wait before transferring the chat from the AI chatbot to a human agent — typically between 10 to 300 seconds.
Installation Code
To display the chat widget on your website:
- 1. Copy the installation script provided in the Installation Code section.
- 2. Paste it into your website's HTML, just before the closing
</body>tag.
With these settings configured, your chat widget will appear on the website, greet visitors automatically, collect emails if required, and handle conversations through the AI chatbot or human agents as needed.
Frequently Asked Questions
The AI chatbot needs content to learn from. Clicking Start Crawl indexes your website so the chatbot can use your site information to provide accurate answers. The more data it crawls, the better the chatbot performs.
If the AI chatbot is disabled, all conversations will go directly to human agents without AI assistance.
Analytics & Reports
This section allows the Support Admin / Super Admin to view and download different types of ticket-based reports. Analytics & Reports help the admin quickly analyze the overall support performance, agent productivity, and user behaviour.

How to Use
Navigate to Reports
Go to Analytics & Reports from the left menu.
Select Report Type
Select a report type from the drop-down menu.
View & Export
The table will update automatically. Export/download the report based on your permissions.
Available Report Filters
| Report Type | Description |
|---|---|
| Filter By User | View tickets raised by a specific customer/client. Useful for customer-wise analysis and complaints summary. |
| Filter By Status | View tickets based on status (Open / In-Progress / Resolved / Closed). Useful for monitoring backlog or pending tickets. |
| Filter By Rating | View tickets based on customer feedback rating. Used to measure agent quality and CSAT performance. |
| Filter By Duration | View tickets for a specific date range (daily/weekly/monthly/custom). Used for MIS reporting and trend analysis. |
Frequently Asked Questions
Only users with Support Admin or Super Admin roles have access to this section.
It means there are no ticket records matching your selected filter or date range. Try changing the filter criteria.
Team Management
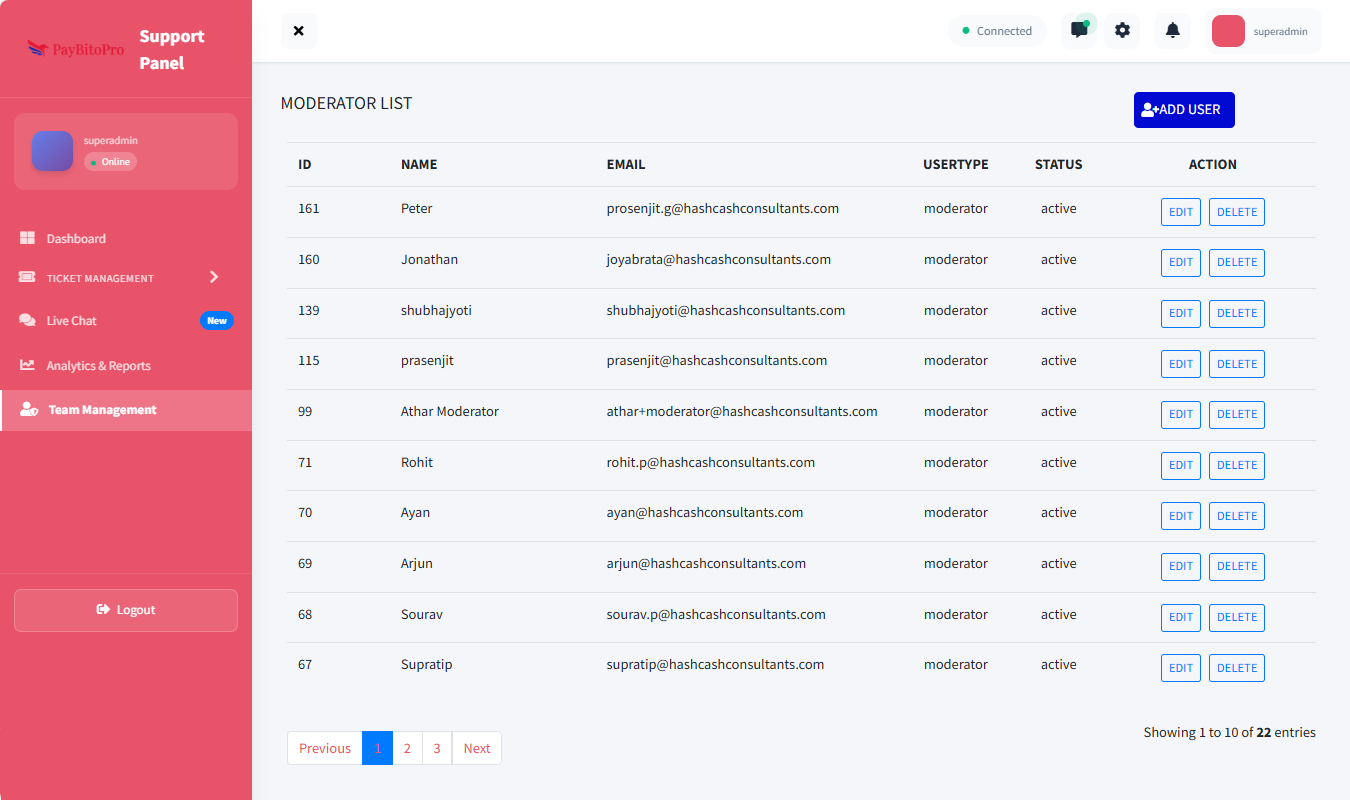
This section allows the Super Admin to manage Support team members who will handle tickets on the platform. Team Management helps add, edit, or remove support personnel (Moderator / Agent / Support Team user) and assign proper roles & access.
How to Add a New Team Member
Navigate to Team Management
Go to Team Management from the left menu.
Click Add User
Click on the ADD USER button (top right corner).
Fill in Details
Enter Full Name, Email Address, Password, and select the Role from the dropdown.
Complete Onboarding
Click ADD NEW USER to complete the onboarding process.
Available Roles
Admin
Can manage ticket queues, assign tickets, and view analytics (based on permission structure).
Moderator
Can view & act on assigned tickets only.
Frequently Asked Questions
No. Only the Super Admin has permission to add new team members.
Yes. The Super Admin can edit any user and update their assigned role at any time.
The user will lose access to the Support Panel instantly. Their previous ticket activities will remain in the system for record purposes.
No system limit is enforced. The Super Admin can create any number of support agents based on operational requirements.