My Profile
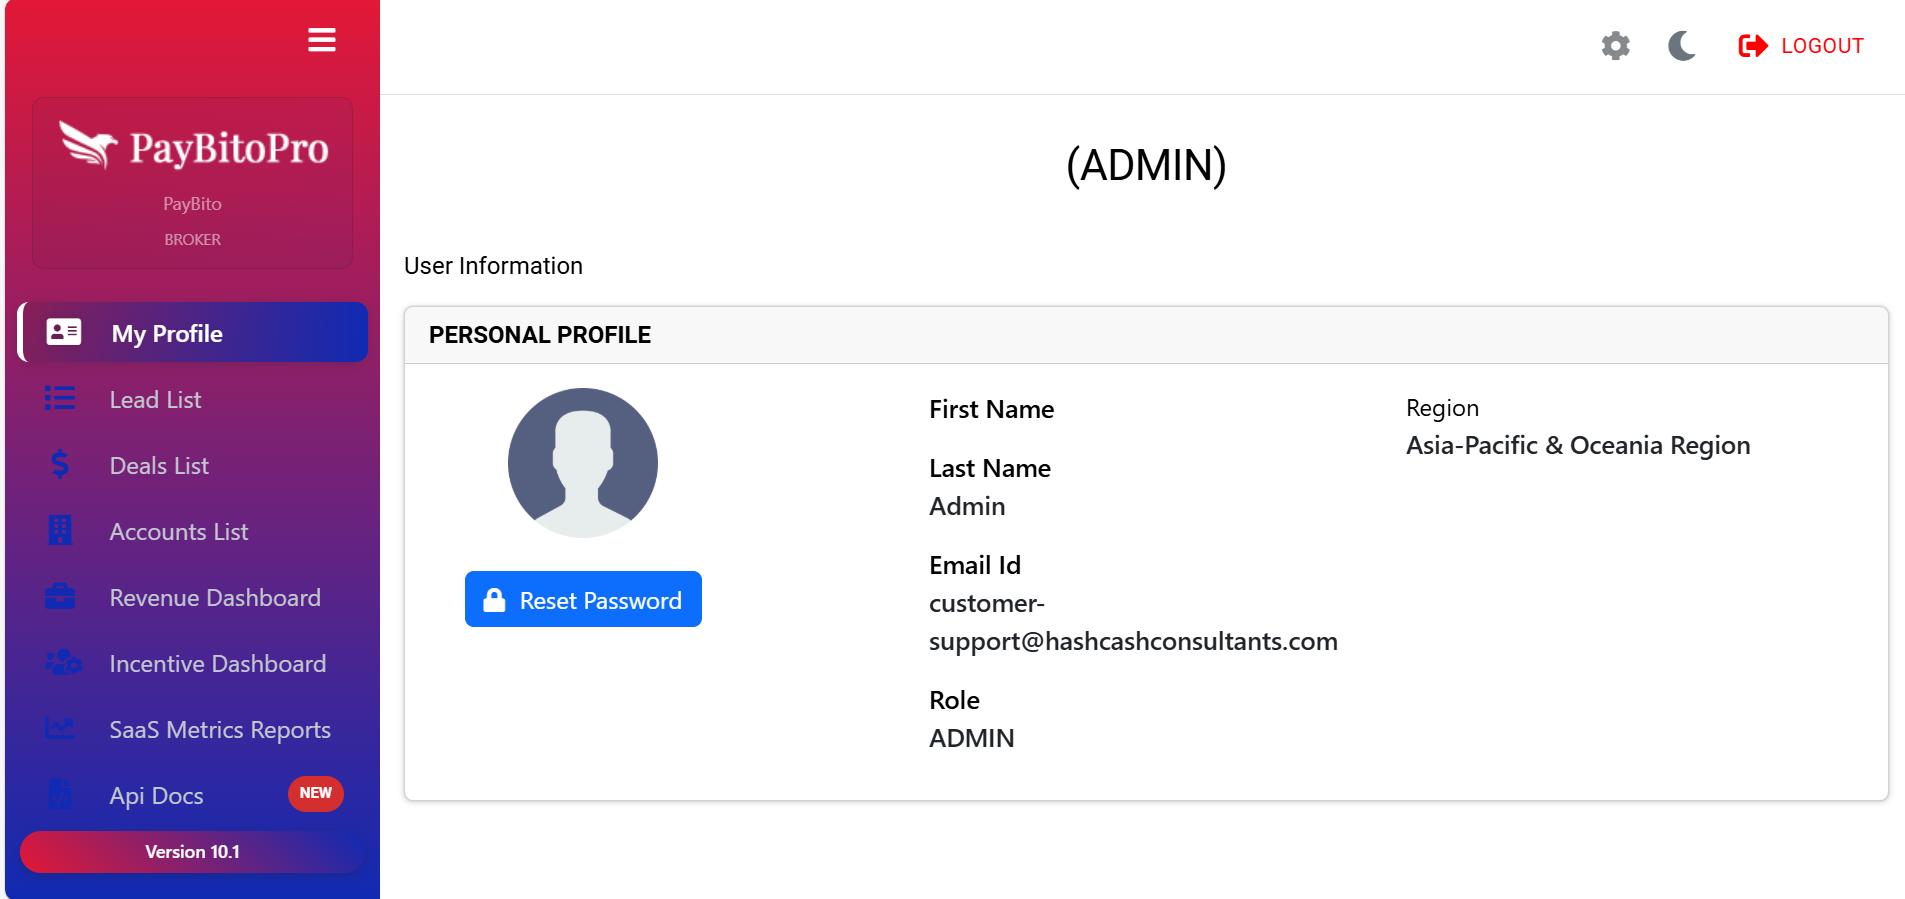
The My Profile section lets you view and manage your personal and account information in the SalesBito platform. This is where you can verify your profile details, update key information, and manage essential settings like password reset.
What You Can Do in This Section
View Personal Information
This area displays your core profile details, including First Name & Last Name, Email ID (registered login email), Role (Admin / Sales Rep / Manager, etc.), and Region (assigned region for reporting and access).
Manage Your Password
If you need to update or change your login password, simply click the Reset Password button. An email with reset instructions will be sent to your registered email address.
Profile Overview
Your profile card visually represents your role in the system and makes it easy to confirm that you are logged in with the correct user access level.
Frequently Asked Questions
Currently, the My Profile section allows you to view your details. If you need to update your personal information, such as your name, email address, or region, please contact your system administrator.
Click the Reset Password button in the My Profile section. A password reset link will be sent to your registered email. Follow the instructions in that email to create a new password.
Roles and regions are assigned by the platform administrator to manage access permissions and reporting structure. Only an admin with appropriate privileges can modify these settings.
Settings
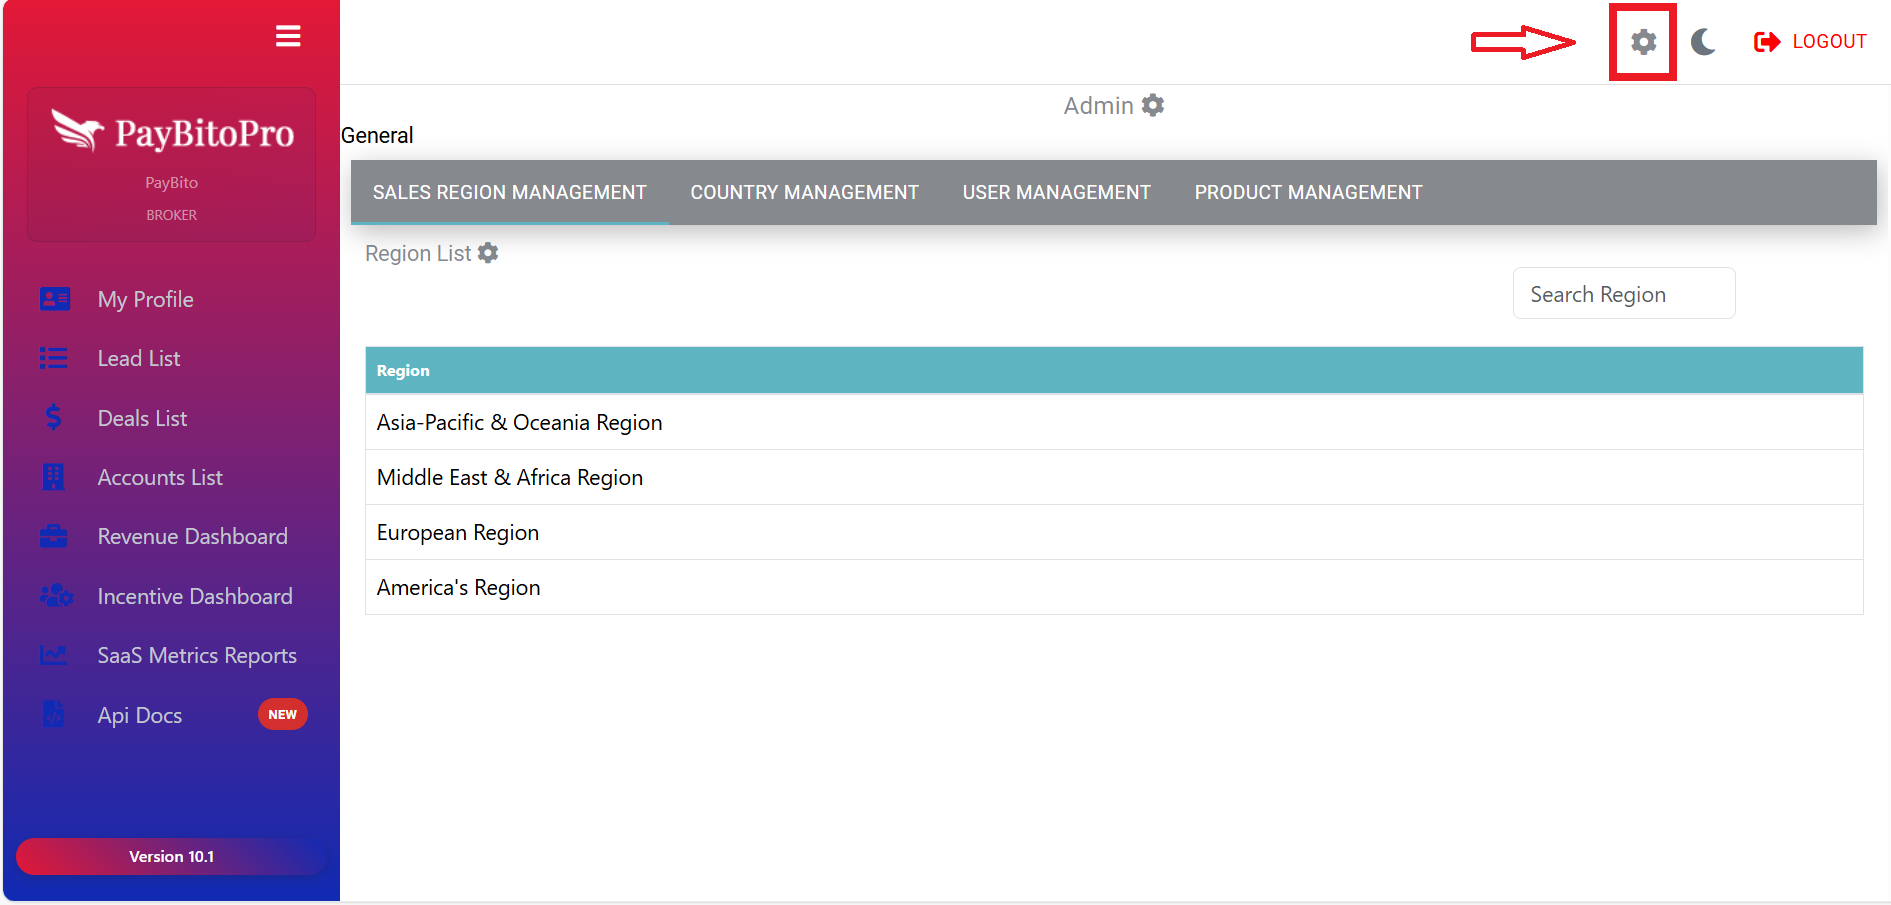
The Settings panel allows administrators to configure and manage key elements of the SalesBito system. It can be accessed from the gear icon on the top right corner of the dashboard.
Settings Modules
1. Sales Region Management
View all defined regions such as Asia-Pacific & Oceania, Middle East & Africa, Europe, and the Americas Region. Use the Search Region option to quickly locate a specific region. This helps structure your sales data geographically and assign users to relevant regions.
2. Country Management
Define and manage countries within each sales region. Add or update country lists associated with a particular region. Ensure that deals, leads, and users are accurately categorized by country for better regional reporting and management.
3. User Management
Admins can create and manage user accounts, assign roles, and associate users with sales regions.
Create User Form Fields
To create a new user, fill in all mandatory (*) fields:
| Field | Description | Required |
|---|---|---|
| First Name | User's first name | Yes |
| Last Name | User's last name | Yes |
| Display Name | Name shown in the system | Yes |
| Sales Region | Select from available regions | Yes |
| User's email address | Yes | |
| Password | Login password | Yes |
| User Type | Select role from available types | Yes |
Available User Types
ADMIN
Full system access and control
LEAD_USER
Can create and manage leads
LEAD_QUALIFIER
Reviews and qualifies leads
LEAD_CLOSER
Finalizes deals and closes opportunities
4. Product Management
Admins can add and manage the company's product offerings. Enter Product Name, Category, and Status (Active/Inactive) to maintain a clear and organized product catalog for lead management and sales tracking.
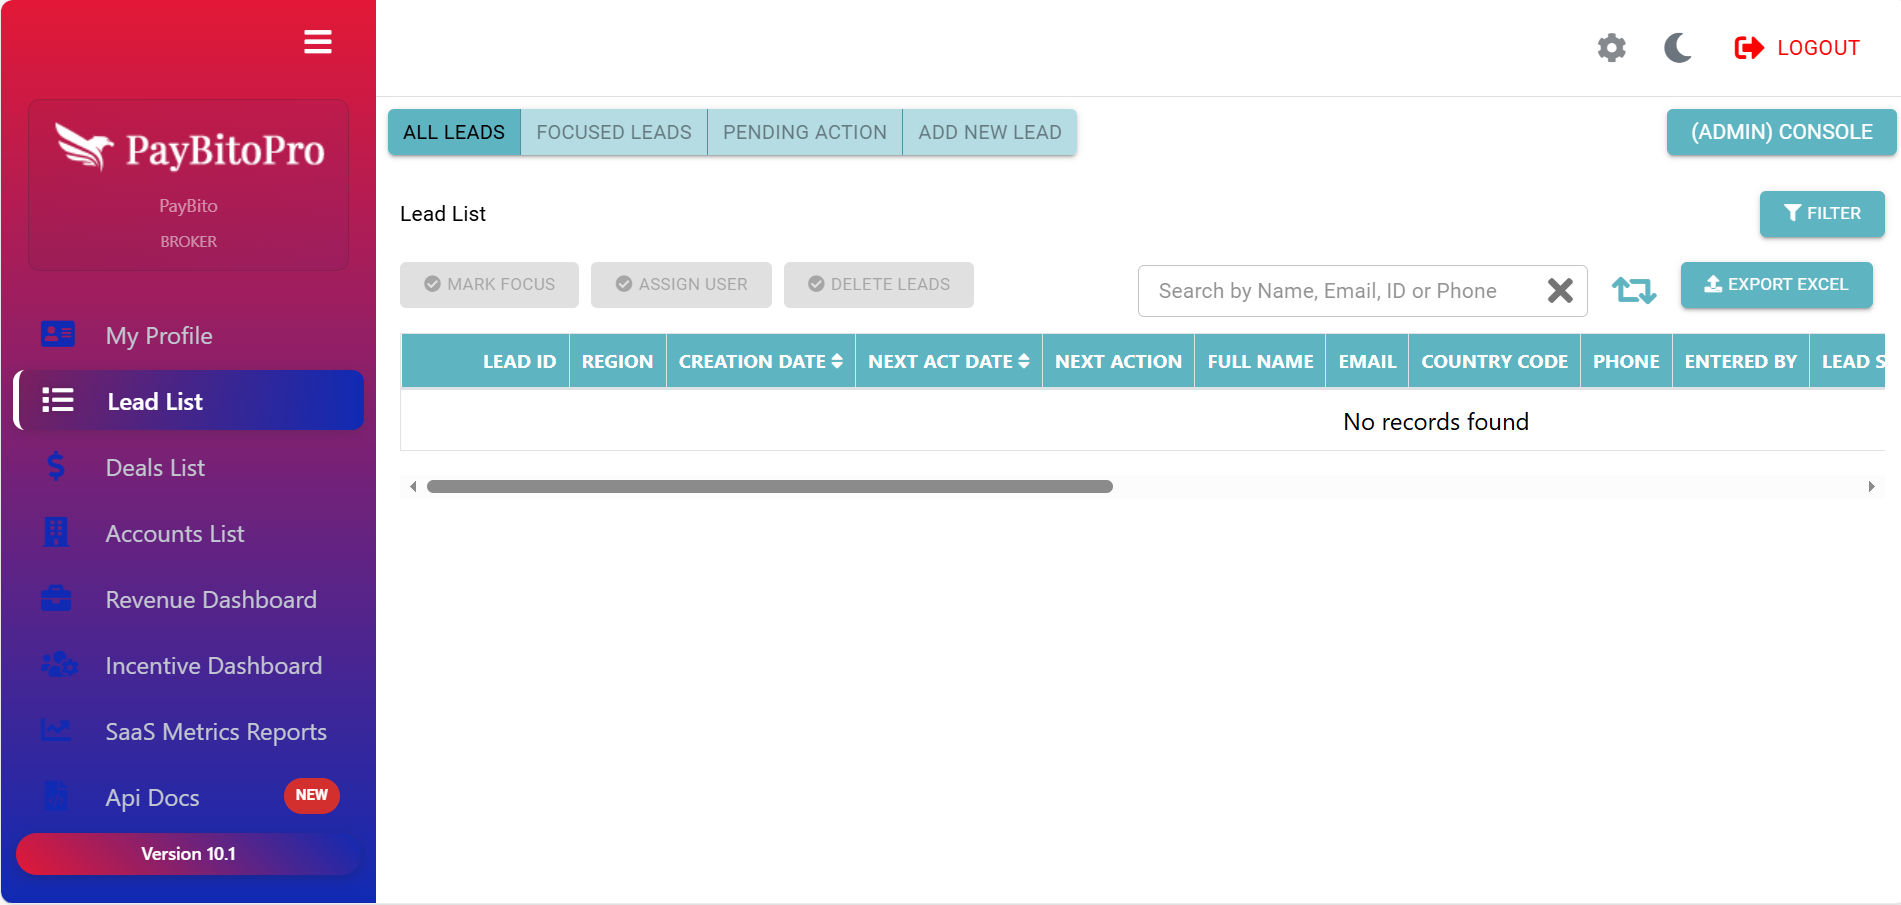
Lead List
The Lead List section displays all leads created or assigned within the SalesBito system. This view makes it easy to monitor lead status, ownership, progress, and next actions.
What You Can Do in This Section
View Leads
See complete details of each lead, including Lead ID, Region, Creation Date, Contact information, Assigned user, Lead status, qualifier status, closer status, Deal and account linkage.
Filter Leads Efficiently
Use the advanced filter panel to quickly locate leads based on: Entered By, Lead Source, Country, Region, Lead Status / Qualifier Status / Closer Status, Assigned User, Product List, and Date Range.
Manage Lead Actions
Available actions include: Mark Focus – prioritize leads for quicker follow-up, Assign User – allocate leads to team members, Delete Leads – remove leads no longer needed.
Add New Leads
Click Add New Lead to create a new entry directly from this section.
Export Leads
Export leads to Excel by selecting a date range for reporting and analysis.
Frequently Asked Questions
Use the filter options at the top of the Lead List section. You can search leads by multiple criteria such as lead source, region, country, status, assigned user, product list, or date range.
Yes. Select the lead(s) from the list and click the Assign User button. Choose a user from the dropdown to transfer the lead to that person.
Marking a lead as Focus helps you highlight priority leads that require attention or follow-up, making it easier to track and manage high-value opportunities.
Deals List
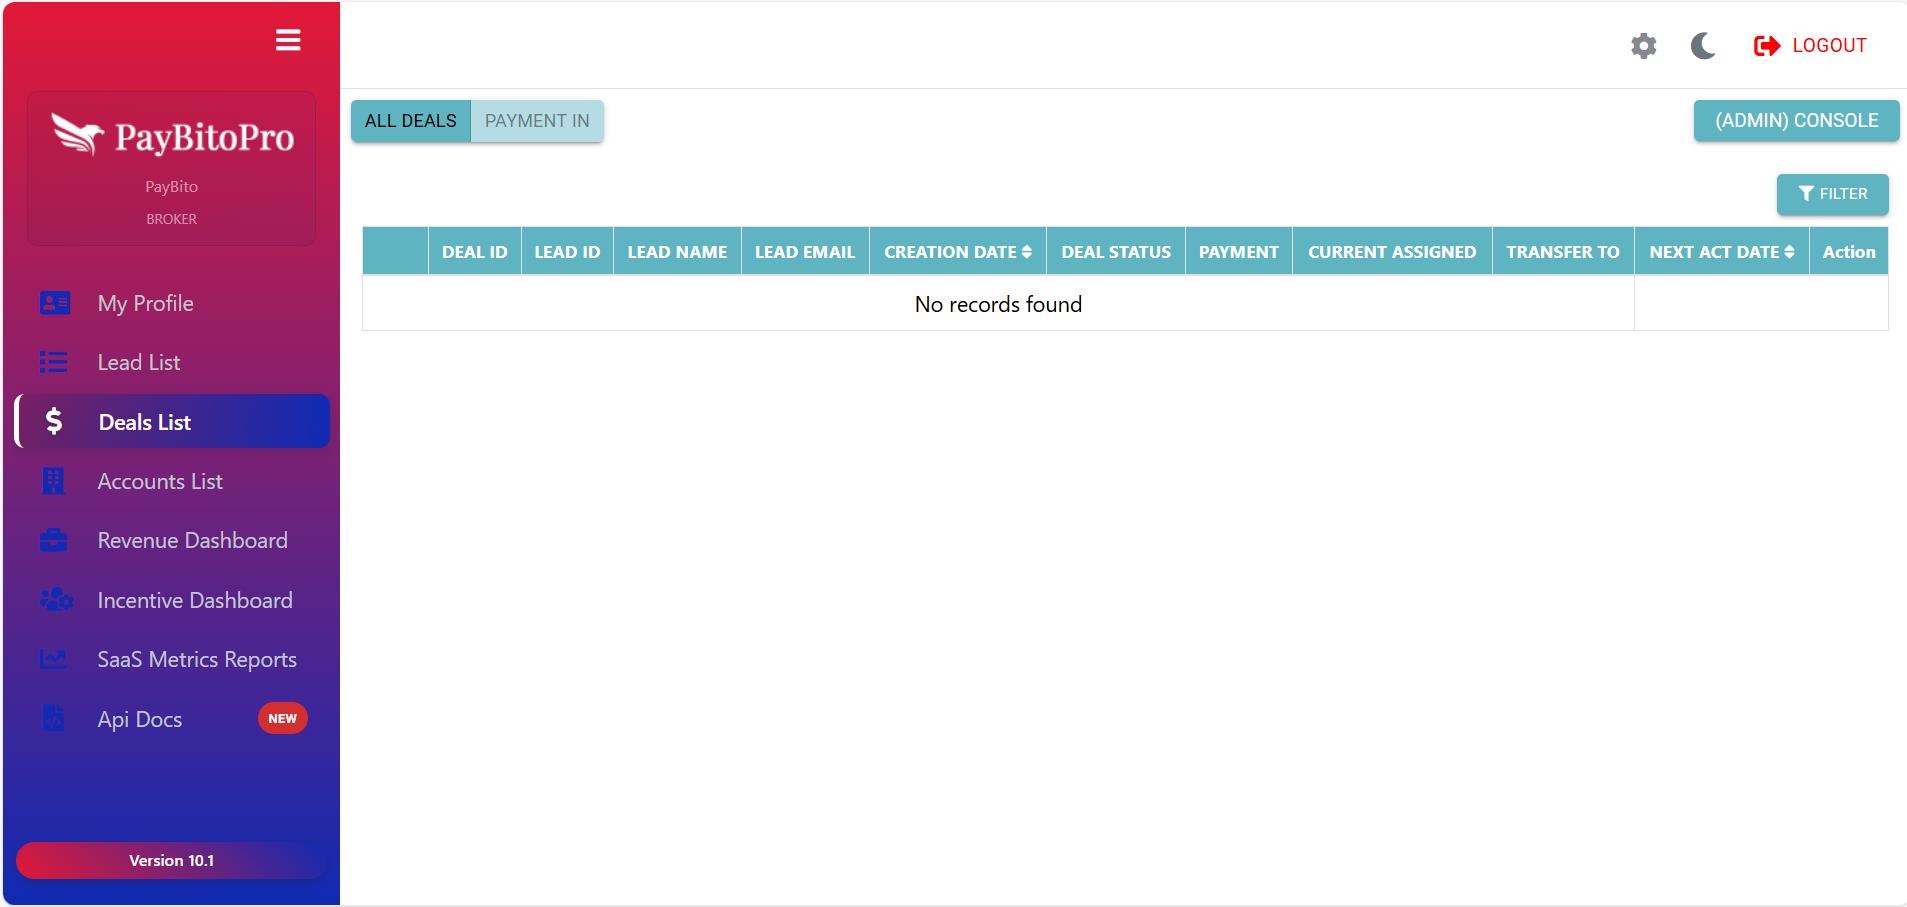
The Deals List section provides a complete overview of all deals created from your leads. It helps you monitor progress, manage assignments, and update deal-related activities.
What You Can Do in This Section
All Deals
The table displays key deal details, including Deal ID, Lead information, Creation Date, Deal Status, Assigned User / Transfer To, Next Action Date, and Payment status.
PAYMENT IN — Add Payments to Deals
This option allows you to add payment records against an existing deal.
Payment In Process
Choose Lead
Enter lead ID, lead name, or email in the input field. The system will fetch all deals associated with that lead.
Select Deal
Choose the appropriate Deal ID from the dropdown list.
View Payment Count
The form highlights how many payments are already added to the selected deal.
Enter Payment Details
Fill in Paid Amount, Payment Type, and Comments. Review details before submission.
Frequently Asked Questions
Use the Filter button to narrow down your deals based on parameters such as deal status, assigned user, date range, or next action date.
Go to the PAYMENT IN tab, search and select the lead, choose the Deal ID, enter payment details (amount, payment type, and comments), and submit.
Accounts List
The Accounts List section gives you a centralized view of all business accounts created from your leads or deals. Whenever a lead becomes a paying customer or an active business account, their company details appear here.

What You Can See in the Accounts List
- Company Name
- Email & Phone
- Website
- Registration Number
- Office Address & Country
- Revenue & Profit
- Industry
- Investment Source
- Created By / Created At
- Action (manage or update)
Frequently Asked Questions
Lead: A prospect or potential customer.
Deal: A qualified lead with ongoing negotiation.
Account: A converted customer or business entity.
Yes. A business account can have multiple deals over time, allowing you to track repeat or ongoing business with the same company.
Revenue Dashboard
The Revenue Dashboard provides a complete overview of payments and revenue generated from clients. It helps brokers and administrators track financial performance over selected periods and by sales personnel.
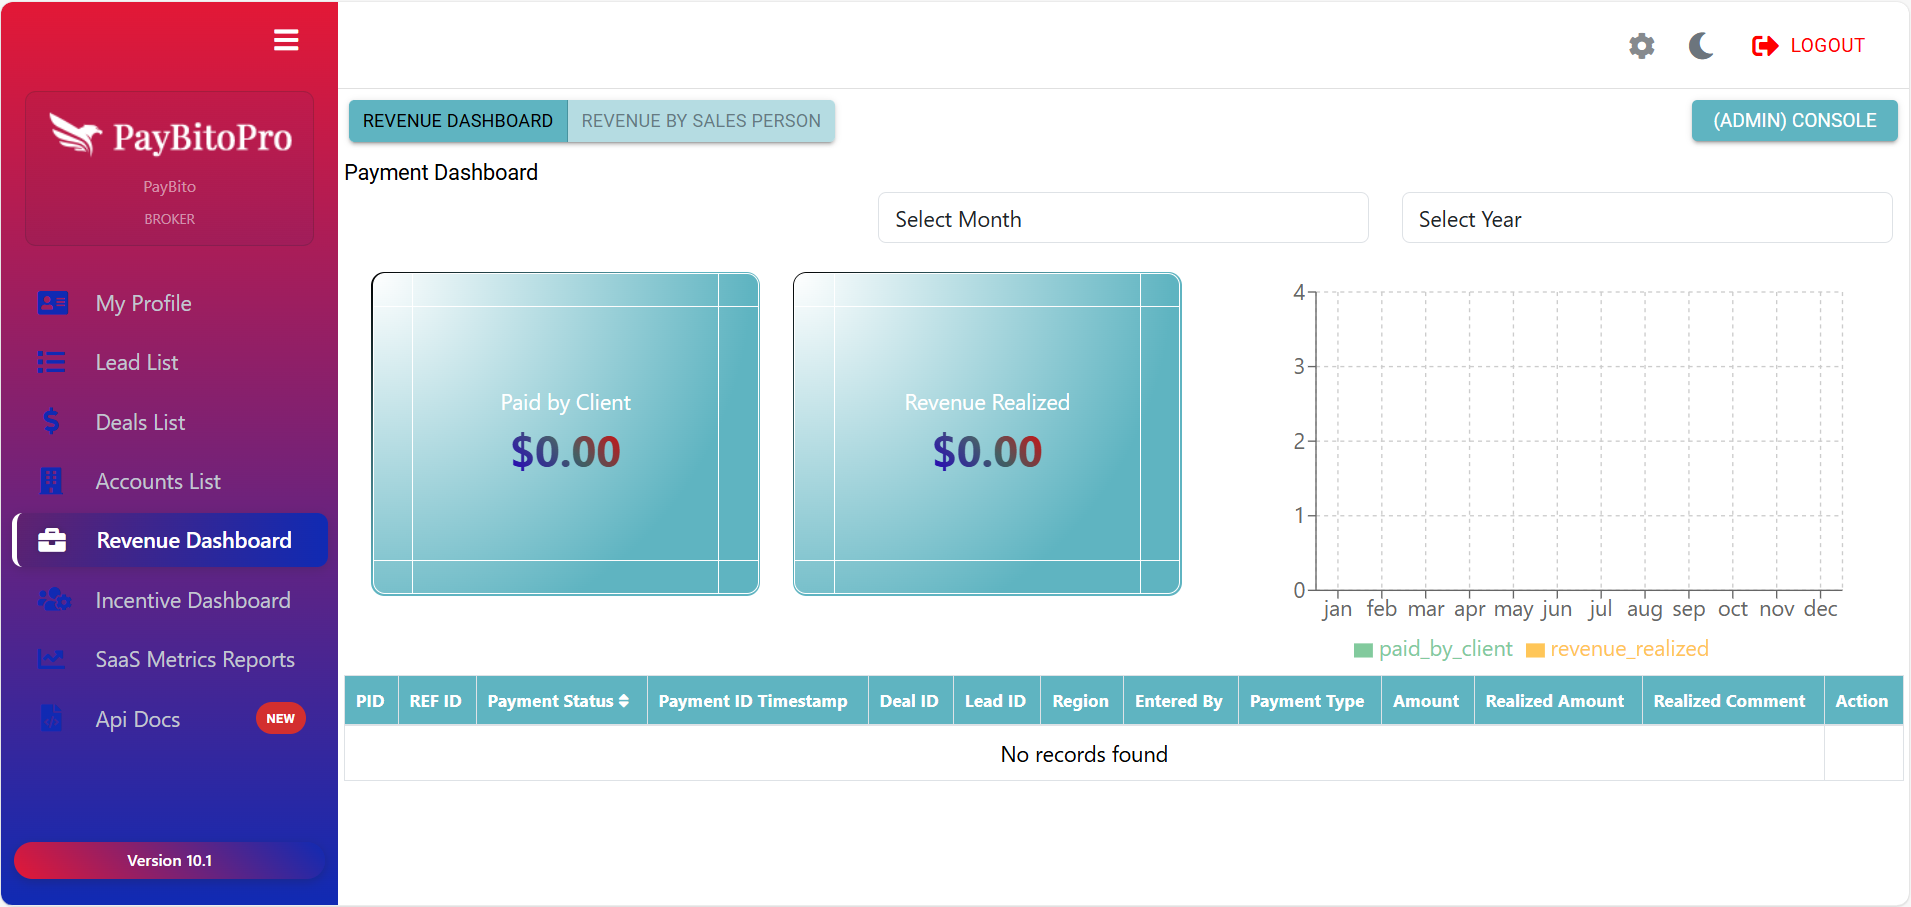
Key Features
Paid by Client
Total Payments
Revenue Realized
Confirmed Income
Graphical View
A visual chart displays monthly payment trends — comparing Paid by Client and Revenue Realized values throughout the year.
Data Table
Lists detailed payment records with fields such as Payment ID, Reference ID, Payment Status, Timestamp, Deal ID, Lead ID, Region, Entered By, Payment Type, Amount, Realized Amount, and Comments.
Frequently Asked Questions
Paid by Client: Shows the total amount clients have paid.
Revenue Realized: Reflects the amount confirmed as earned income after verification.
Incentive Dashboard
The Incentive Dashboard provides a centralized view of all incentive-related details for your sales team. Admins can track performance, view earned incentives, check payout status, and manage incentive settings.

Incentive List Columns
| Column | Description |
|---|---|
| ID | Unique identification number for each incentive entry |
| Region | The sales region assigned to the salesperson |
| Full Name | Name of the sales user who achieved the incentive |
| Tier Achieved | The incentive tier or level earned for the selected month |
| Total Revenue | The total revenue generated by the salesperson |
| Total Incentive | The incentive amount earned based on performance |
| Payment Status | Indicates whether pending, processed, or paid |
Incentive Settings
1. Region Selection
Admins must first select the Available Region to set region-specific incentive rules.
2. Typical Month Settings
Define incentives for regular months: Total Minimum Global Sales Target, Sales Target Increment Size, Commission on Tmin, and Commission Increment Size.
3. Exceptional Month Settings
Used for months with boosted or special incentives with different targets and commissions.
4. Tier Targets and Commissions
Define multiple incentive tiers with Tier Sales Target, Tier Commission, Exceptional Tier Target & Commission.
SaaS Metrics Report
The SaaS Metrics Report section provides key performance metrics to help Admins evaluate sales effectiveness, lead quality, acquisition costs, and overall sales growth.
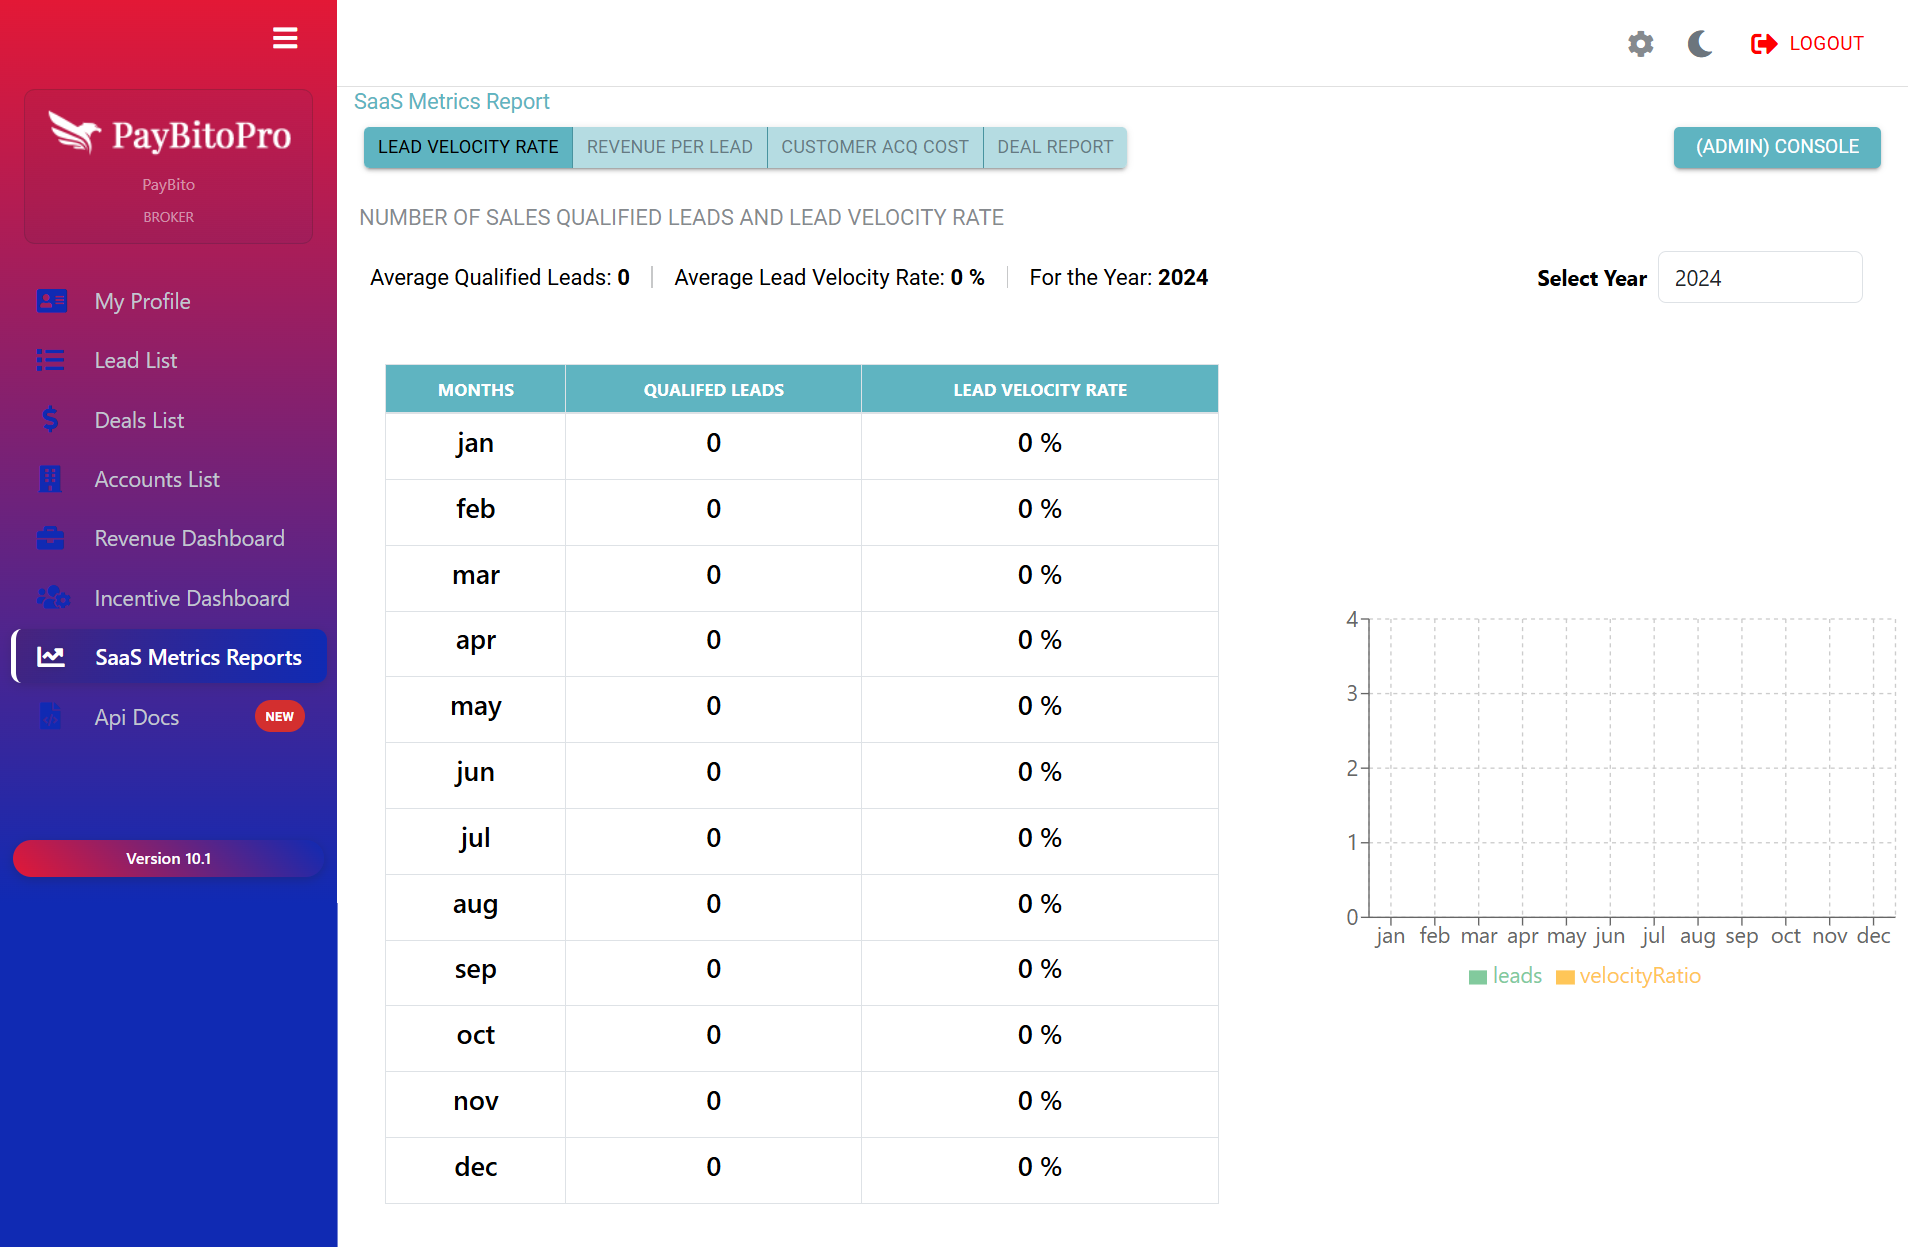
Report Types
1. Lead Velocity Rate (LVR)
Shows the number of Sales Qualified Leads (SQLs) generated per month and calculates the Lead Velocity Rate, which indicates the rate at which your qualified leads are growing month over month.
2. Revenue Per Lead
Measures the average revenue per lead, helping you evaluate the effectiveness and profitability of your lead-generation efforts.
3. Customer Acquisition Cost (CAC)
Calculates the average cost required to acquire a customer by combining all marketing and sales-related expenses including Simple CAC and Complex CAC.
4. Deal Report
Provides a month-wise summary of all Closed Won and Closed Lost deals for the selected year, giving you a clear view of overall deal performance.
API Docs
This guide explains how to use the available APIs to automate lead generation in your CRM. It covers authentication, required headers, API endpoints, request/response formats, and best practices.
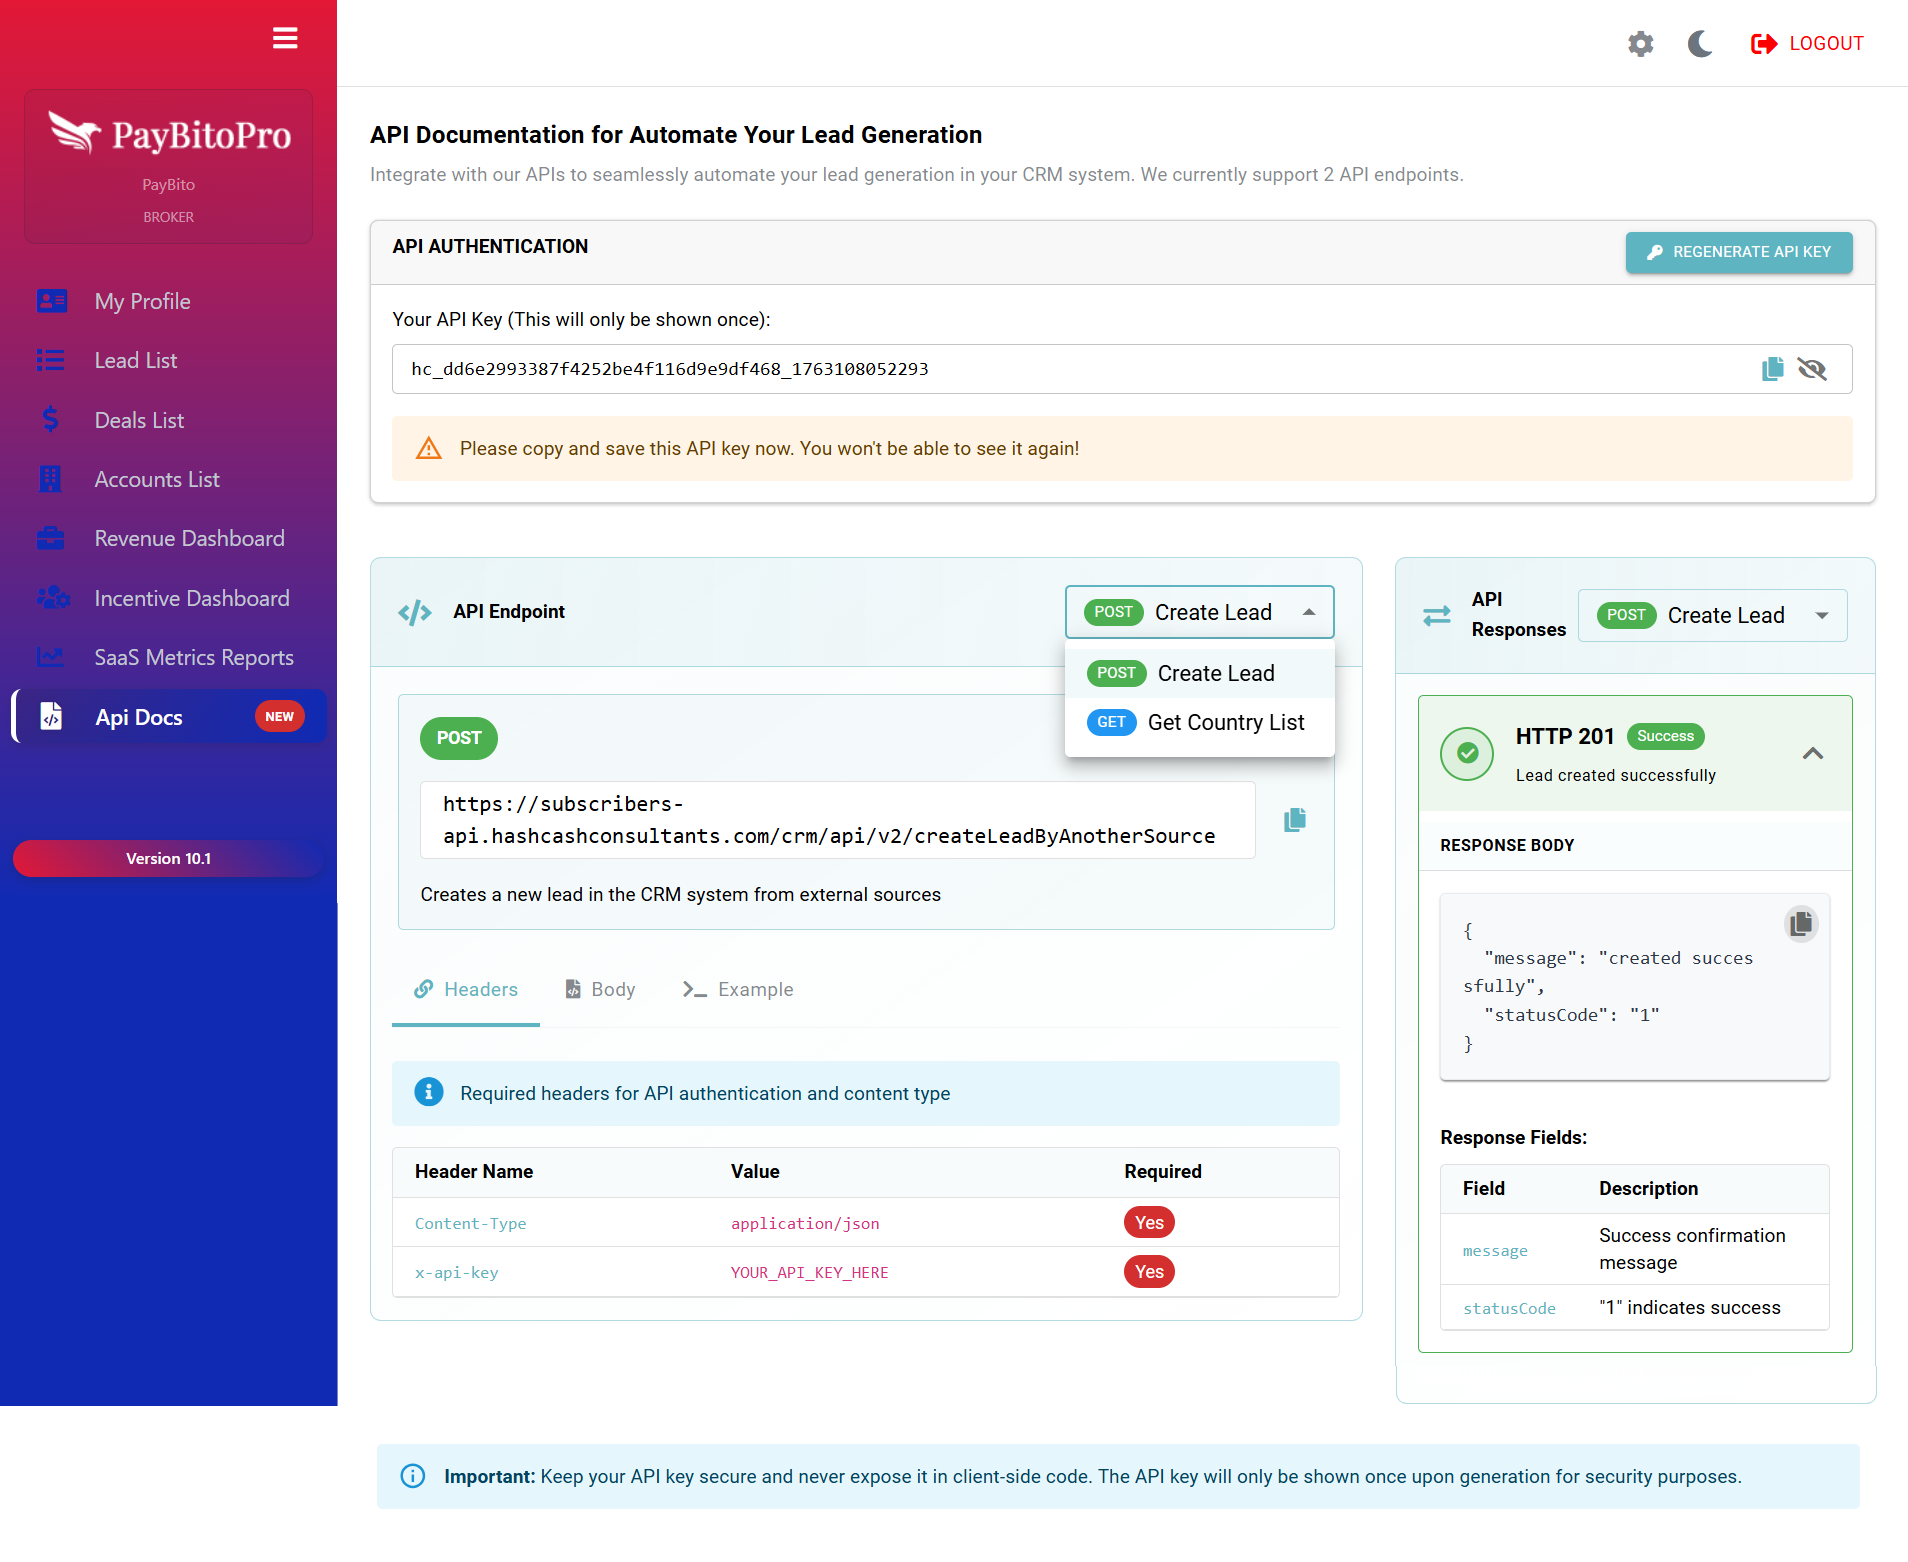
1. API Authentication
How to Use the API Key
x-api-key: YOUR_API_KEY_HERE
2. Required Headers
| Header Name | Value | Required |
|---|---|---|
| Content-Type | application/json |
Yes |
| x-api-key | YOUR_API_KEY_HERE |
Yes |
3. API Endpoints Overview
Endpoint 1: Create Lead (POST)
Creates a new lead in the CRM system from external applications or third-party sources.
Request Body Example
{

                  "firstName": "John",

                  "lastName": "Doe",

                  "email": "john@example.com",

                  "country": "United States",

                  "source": "Partner Website"

                }
Success Response (201)
{

                  "message": "created successfully",

                  "statusCode": "1"

                }
Endpoint 2: Get Country List (GET)
Retrieves a list of countries, optionally filtered by name.
Query Parameter
| Parameter | Type | Required | Description |
|---|---|---|---|
| name | string | No | Filter results by partial or full country name |
4. Security Best Practices
- Never expose the API key in your website's front-end or client-side scripts
- Store and use the key only on a secure backend server
- Regenerate the key if you suspect unauthorized access
- All requests must be made over HTTPS
Frequently Asked Questions
Your API key is displayed only once during generation on the API Docs page. Copy it immediately and store it safely. If lost, you must use the Regenerate API Key to create a new one.
No. Never expose your API key on the client side. Always call the API from a secure backend server to prevent unauthorized access.
The system may apply standard rate limits to prevent abuse. If you encounter "Too Many Requests" errors, reduce the frequency of calls or implement retry logic.