How to Integrate a Payment Gateway Into a Website or Application?
- August 17, 2026
- Soham Guchait
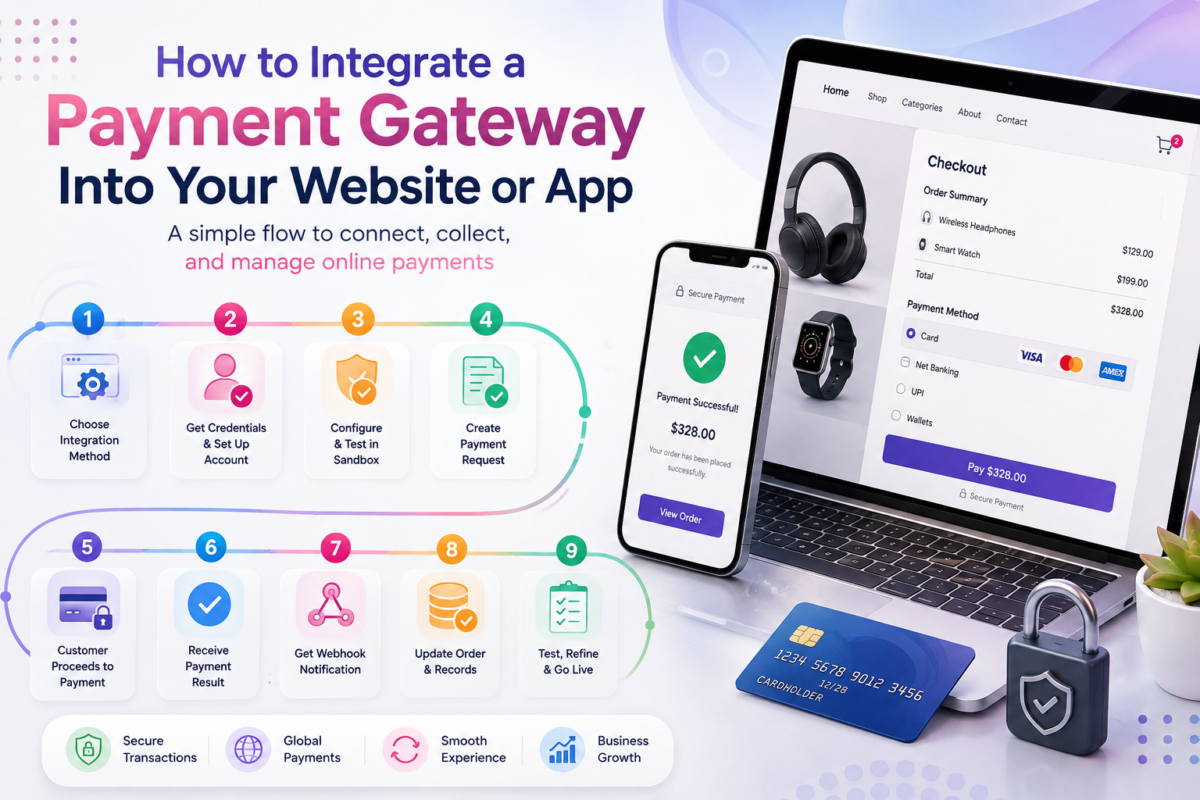
Adding online payments to a website is more than placing a “Pay Now” button on a checkout page. Behind that button, the customer’s payment request has to move through several systems, including the payment processor, return a result, and be recorded correctly by the business.
A payment gateway integration connects your website or application to that payment infrastructure. The exact implementation depends on the gateway and the integration model, but the overall process follows a recognizable pattern.
Understanding that process is useful even if you are not a developer because payment integration affects checkout, order management, refunds, security, and what happens when a transaction does not complete normally.
What Does Payment Gateway Integration Mean?
Payment gateway integration is the process of connecting a website, application, or ecommerce system to a payment gateway so customers can submit payments electronically.
The gateway may provide a hosted checkout page, embedded payment fields, APIs, SDKs, plugins, or another integration method. The technology used determines how much of the payment experience is controlled by the merchant’s application.
For example, imagine an online electronics store selling a $500 laptop. A customer adds the laptop to the cart and enters the checkout. When the customer submits payment, the store’s software needs to create or initiate a payment request, send the relevant information through the gateway’s payment flow, receive the transaction result, and update the order accordingly.
The important point is that the payment result should not be treated as simply a message displayed to the customer. The merchant’s backend also needs a reliable way to determine whether the payment actually reached the expected state. That is where a properly designed integration becomes important.
Step 1: Choose the Right Integration Method
Before writing code, the business needs to determine how customers will interact with the gateway.
Common approaches include hosted checkout pages, redirects, embedded payment components, hosted fields, plugins, and direct API integrations. Each provides a different balance between development effort, customer experience, and control. The choice can also affect the payment gateway cost, particularly when different integration methods come with different setup, transaction, or ongoing fees.
A small online business using an established ecommerce platform might use a plugin or hosted checkout. A software company with its own application might use APIs and embedded payment components to create a more customized experience.
The integration method should be selected before development begins because it affects the architecture of the entire payment flow.
Step 2: Create an Account and Obtain Credentials
Once a gateway has been selected, the business normally receives credentials or configuration information required to communicate with the gateway.
These credentials identify the merchant application and authenticate requests. The exact terminology differs between providers, but businesses commonly encounter separate credentials or environments for testing and production.
Credentials should never be treated like ordinary configuration values. They should be stored securely, kept out of public-facing code, and managed separately from customer-facing payment information.
A common mistake is placing secret credentials directly inside browser-side JavaScript or a publicly accessible application repository. Sensitive credentials generally belong on the server side or within an appropriately secured secrets-management system.
Step 3: Set Up the Test Environment
Most payment integrations should be developed and tested in a sandbox or test environment before real transactions are processed. The test environment allows developers to simulate different outcomes without charging actual customers. A useful test plan should include more than a successful payment.
For example, the integration should be tested for:
- Successful authorization and payment completion
- Declined transactions
- Failed or incomplete requests
- Refunds
- Duplicate submissions
- Delayed or asynchronous payment updates
The purpose of testing is not simply to confirm that the payment button works. It is to verify that the entire application responds correctly to different payment states.
Step 4: Create the Payment Request
When the customer reaches checkout, the application needs to create a payment request.
The exact fields vary, but a typical request may contain information such as the transaction amount, currency, order reference, customer information where required, and information identifying where the payment result should be returned.
For example:
A customer purchases a $500 laptop. The merchant’s system might create a payment request representing:
Amount: $500
Currency: USD
Order: #84721
The gateway then uses that information to begin the payment flow. The application should also maintain its own order identifier. This allows the merchant to connect the gateway’s transaction information with the correct order in its database.
Step 5: Send the Customer Through the Payment Flow
The next stage depends on the integration model.
- With a hosted checkout, the customer may be redirected to a payment page operated by the gateway.
- With an embedded checkout, payment components may appear directly inside the merchant’s website.
- With an API-driven integration, the merchant’s application may communicate with the gateway programmatically while using the gateway’s supported payment components for sensitive payment information.
The customer experience may look simple, but the underlying systems are exchanging structured payment information.
Step 6: Handle the Payment Response
After the payment attempt, the gateway provides information about the transaction. The result might indicate that the payment was authorized, declined, failed, requires additional action, or is still awaiting a later status update, depending on the payment method and architecture.
The merchant’s application should translate that result into an appropriate order state.
For example:
Payment successful → Order confirmed
But it should not assume:
Customer returned to success page → Money definitely settled
Those are not necessarily the same thing. Payment systems can involve asynchronous events, delayed status changes, and separate stages such as authorization, capture, clearing, and settlement.
Step 7: Handle Webhooks and Payment Events
One of the most important parts of a reliable integration is handling server-to-server notifications, often called webhooks or payment events. A webhook allows the gateway to notify the merchant’s application when something happens to a transaction.
For example, an application might initially create a payment and later receive a notification confirming a particular transaction state.
The application can then update its database accordingly. This matters because customers can close browsers, lose network connectivity, refresh pages, or leave a checkout before the application has completed every step of the user-facing flow. The backend should therefore have a reliable mechanism for receiving and processing payment events.
Webhook handling should also account for duplicate notifications and verify that incoming events are authentic before acting on them.
Step 8: Update the Order and Business Systems
Once the payment state has been reliably established, the merchant’s system needs to update the corresponding order. For an ecommerce business, that might mean changing an order from:
Pending Payment → Paid → Fulfillment
For a SaaS company, it could mean:
Payment Confirmed → Subscription Activated
The payment status should remain connected to the order or customer record through a unique transaction or order reference. This connection becomes particularly important when the business later needs to issue a refund, investigate a failed payment, reconcile transactions, or respond to a customer asking about a charge.
Step 9: Test the Complete Integration Before Going Live
Before moving to production, test the complete lifecycle rather than only the successful payment path. Check what happens if the customer:
- Submits the payment twice
- Closes the browser during checkout
- Receives a decline
- Loses internet connectivity
- Refreshes the confirmation page
- Requests a refund later
Also test whether your application handles webhook events correctly and whether order statuses remain accurate when events arrive later than expected.
A payment integration is ready for production only when the surrounding business logic works reliably – not merely when the gateway accepts a test payment.
Moving From Sandbox to Production
Once testing is complete, the integration can be configured for the production environment.
This usually involves replacing test credentials with production credentials, checking production configuration, confirming the correct URLs and event endpoints, and conducting controlled real-world testing where appropriate. The transition should be treated as a deployment of financial infrastructure rather than an ordinary website feature.
A mistake in production can result in incorrect order states, failed payments, duplicate charges, missing transaction records, or operational problems.
What Happens After Integration?
Payment integration is not finished when the first successful transaction appears.
The business should monitor payment events, failed transactions, refunds, disputes, system errors, and other operational signals. It should also have a process for investigating situations where the merchant’s database and the gateway’s transaction status do not appear to match.
For example, suppose a customer sees a payment confirmation but the merchant’s order remains marked “pending”. That discrepancy needs to be investigated rather than manually changed without checking the underlying transaction information.
Understanding why payment gateway transactions fail is therefore an important next step when maintaining an integration.
A Payment Gateway Integration Is a System, Not a Button
A reliable payment gateway integration connects much more than a checkout screen.
The overall lifecycle looks like:
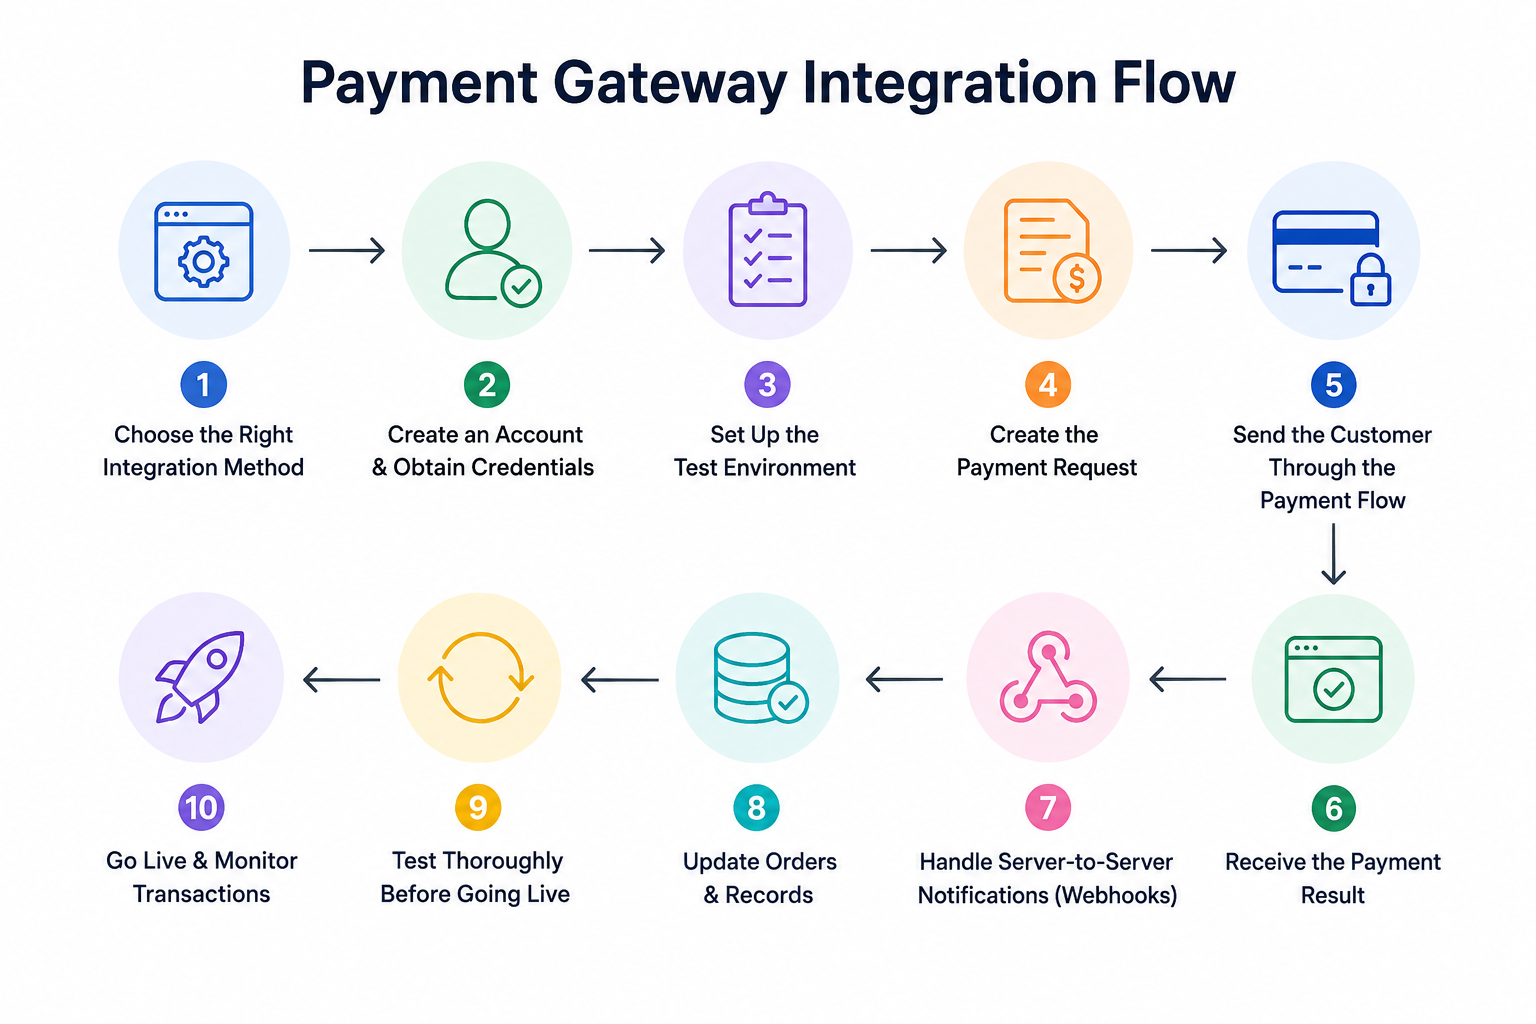
Choose integration method → Obtain credentials → Configure sandbox → Create payment request → Customer completes payment → Receive response → Process webhooks → Update order → Test → Deploy → Monitor
The visible checkout may take only a few seconds, but the underlying integration determines how accurately the business handles successful payments, failures, refunds, and unexpected events.
For that reason, the best payment integration is not simply the one that makes a payment go through. It is the one that keeps the customer’s payment experience, the gateway’s transaction state, and the business’s internal records synchronized throughout the payment lifecycle.

Categories
- ACH Payments (10)
- adult payment processing (11)
- AI (9)
- Altcoins (10)
- Banking (10)
- Bitcoin (133)
- Bitcoin ETF (11)
- Bitcoin Price (30)
- Blockchain (50)
- Brokering World Hunger Away (16)
- Business (17)
- card payment processing (10)
- CBD (11)
- CBDC (11)
- Chargeback (8)
- coaching business (11)
- COVID-19 (3)
- Crypto ATMs (1)
- Crypto Banking (17)
- Crypto Bill (1)
- Crypto business owner platform (31)
- Crypto Investment (3)
- Crypto Markets (5)
- Crypto Payment (35)
- Crypto Payment Processor (4)
- Crypto Prices (1)
- Crypto Trading (92)
- Cryptocurrency (402)
- Cryptocurrency Exchange (108)
- Data Visualization (2)
- dating platforms (11)
- debt collection payment processing (10)
- Decentralized Finance (7)
- DeFi Payment (9)
- DEX (3)
- Digital Currency (23)
- dropshipping payment processing (12)
- Ethereum (2)
- FAQ (7)
- file sharing payment processing (11)
- Finance (25)
- Financial Equality (4)
- Financial Freedom (8)
- Forex (35)
- hemp (1)
- ICO (2)
- Investment (11)
- IPTV (11)
- Merchant Account (10)
- Mining (3)
- News (66)
- NFTs (2)
- online gambling (11)
- P2P (1)
- Paybito (147)
- PayBitoPro (693)
- PayBitoPro Coin Listing (6)
- PayBitoPro Exchange (2)
- Payment Gateway (48)
- peptide (10)
- Post COVID Digital Transformation (1)
- Press Release (130)
- Privacy & Security (3)
- Real Estate (1)
- Stablecoin (5)
- Technology (15)
- Travel (11)
- Uncategorized (10)
- US Presidential Election (2)
- Utility Coin (1)
- Web3 business (4)
- Web3 Wallets (2)
- White Label Crypto Exchange (8)
Recent Posts
- Payment Gateway vs. Payment Orchestration: What’s the Difference?
- What Is Smart Payment Routing? Strategies to Optimize Payment Performance
- How to Improve Payment Approval Rates for High-Risk Businesses?
- Why Are Online Payments Failing? Common Causes and How to Fix Them
- How to Use Multiple Payment Processors to Reduce Business Disruptions?